Wonder how to start your own blog for free and which free blogging tool is the best for beginners? I'll show you how to set up your blog with Ghost CMS on Google Cloud completely for free 🔥
We'll also configure Ghost newsletter functionality and a business email address like you@yourdomain in part 2 of this tutorial. It will be published here as well as on my YouTube channel soon.
Tutorial is beginner-friendly, you don't need any specific skills or previous experience. And you'll get the same professional, but still very easy to use, Ghost blogging platform as Ali Abdaal is using for his own blog.
It will take a couple of hours for the whole setup process, but you're saving hundreds of dollars. There is a faster way to get you started in minutes with Ghost Pro, but it is not free.
Grab whatever you're drinking and let's get it done 🚀
Contents:
- Things you'll need
- Free domain name
- The cheapest paid domain
- Google Cloud free tier
- Domain configuration
- Installing cyberpanel
- SSL set up
- Ghost installation with Docker
- Final step: reverse proxy (so your blog opens without entering port number)
Video version
Things you'll need
To start a blog you would need three things, that I'll cover in this tutorial.

First: a domain name, so people can get to your blog by typing its name into the address bar instead of some weird IP address. Just imagine if apple.com was 17.253.144.10 — it hurts even to read that.

Second: a platform, that will be running your blog. Think of it as software, that will manage creating pages, storing your media, doing SEO, and other important stuff. So you can focus on one exact thing — creating content.
In this tutorial, we'll be using Ghost CMS (content management system), which comes with all the tools you would need for a successful blog. It's stylish, blazing fast, has SEO and social built-in. Ghost is explicitly focused on doing one thing really well: Publishing. And it's free to install on your own server.

This brings us to a third element: hosting, which will house all your blog files and serve them to visitors. For this tutorial, we'll use Google Cloud, which has quite a generous forever free tier.
And on top of that, you would probably want to have that cool business email with your domain name 👇

I'll cover how to do this for free as well in part 2 of this tutorial.
Moreover, we'll link that to your Gmail account, so you can use a familiar interface for your business email.
Domain
You can get a free domain name from Dot.tk and Freenom registrars.
Some notes here: these domains will work just like any other standard domains out there, but:
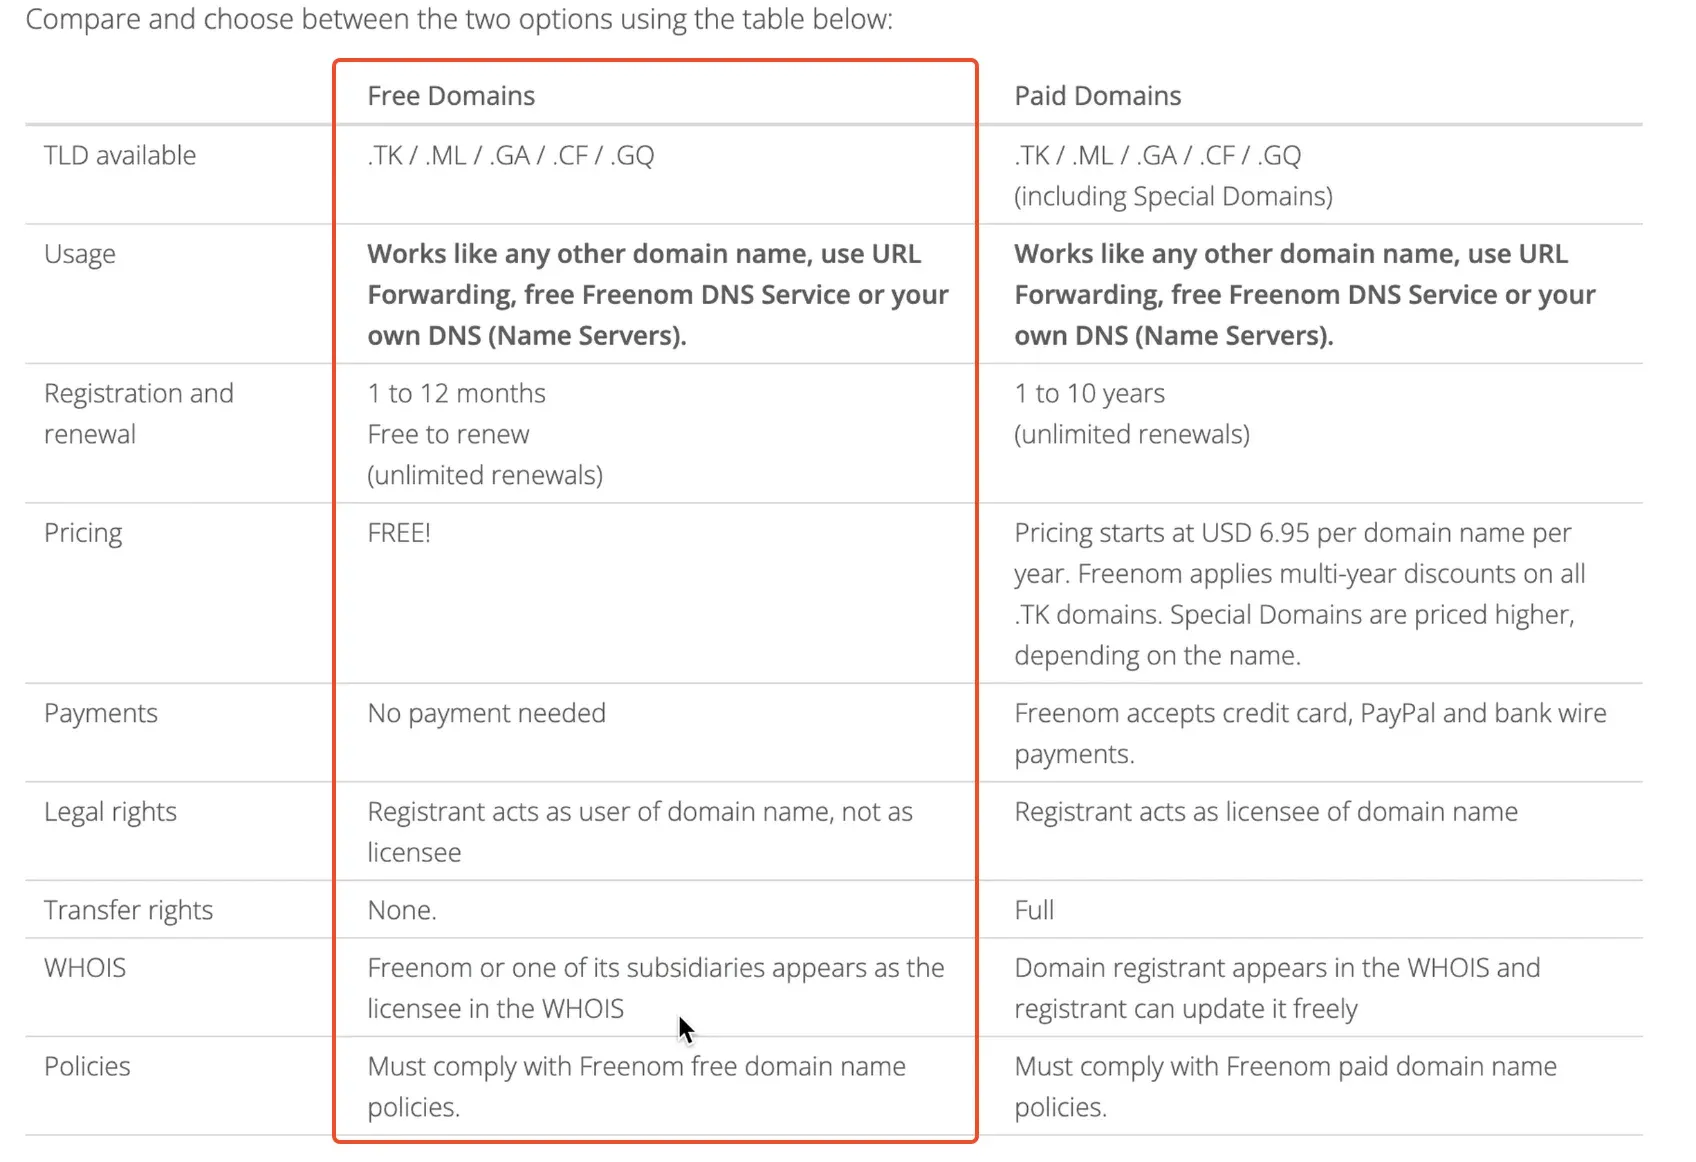
- they are not registered in your name, so you can't transfer such domain to another registrar or sell it;
- they don't look professional;
- you probably won't get any support from Freenom if there are any issues;
- Freenom is buggy.
Let me show you. Here we are at freenom.com, I enter the domain name I'm looking for, and it shows as available,
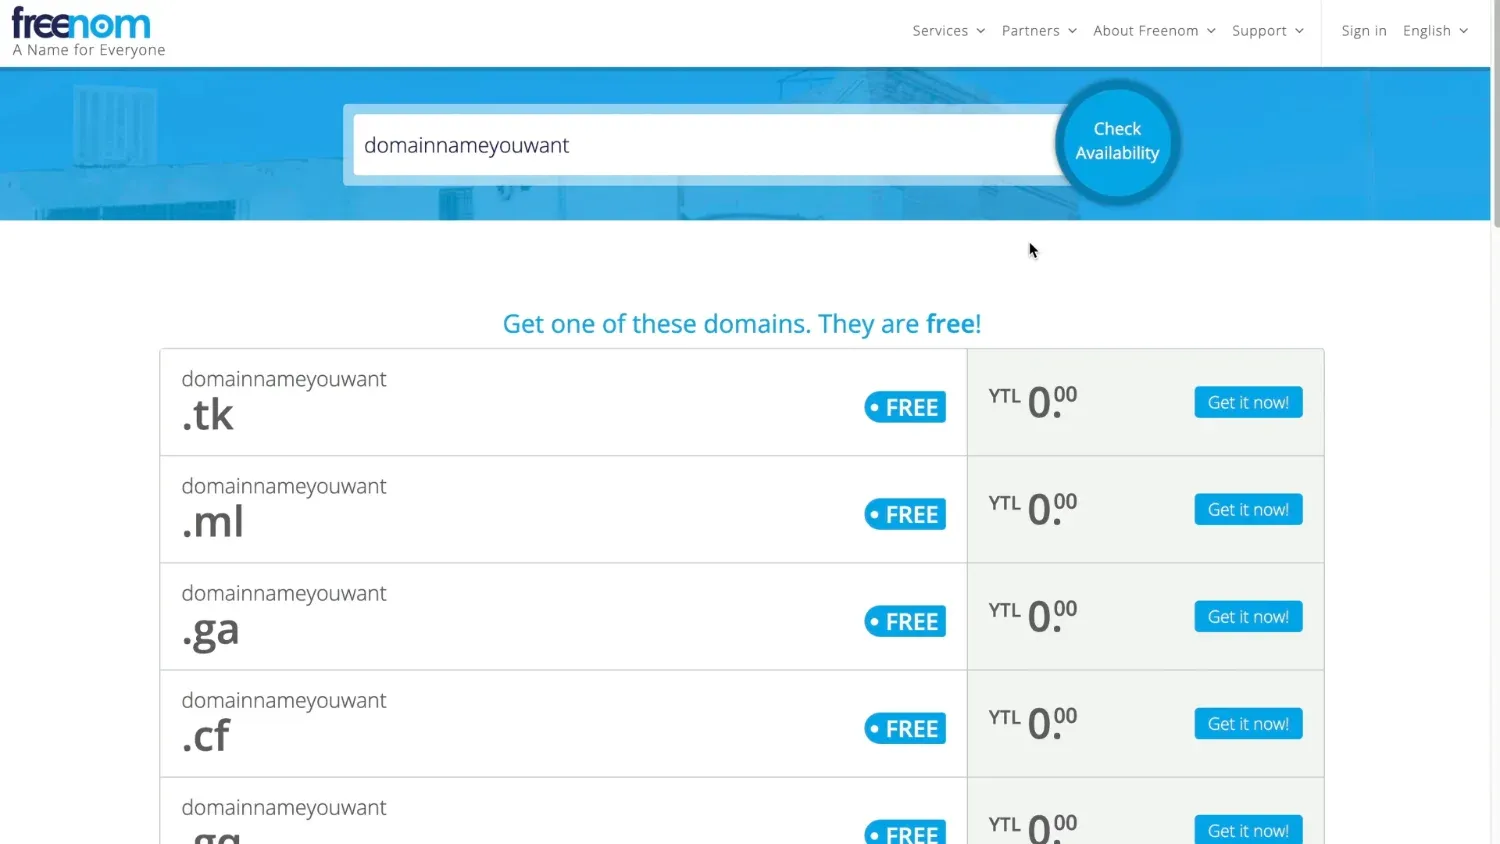
but when I give that a click — it's unavailable right now.
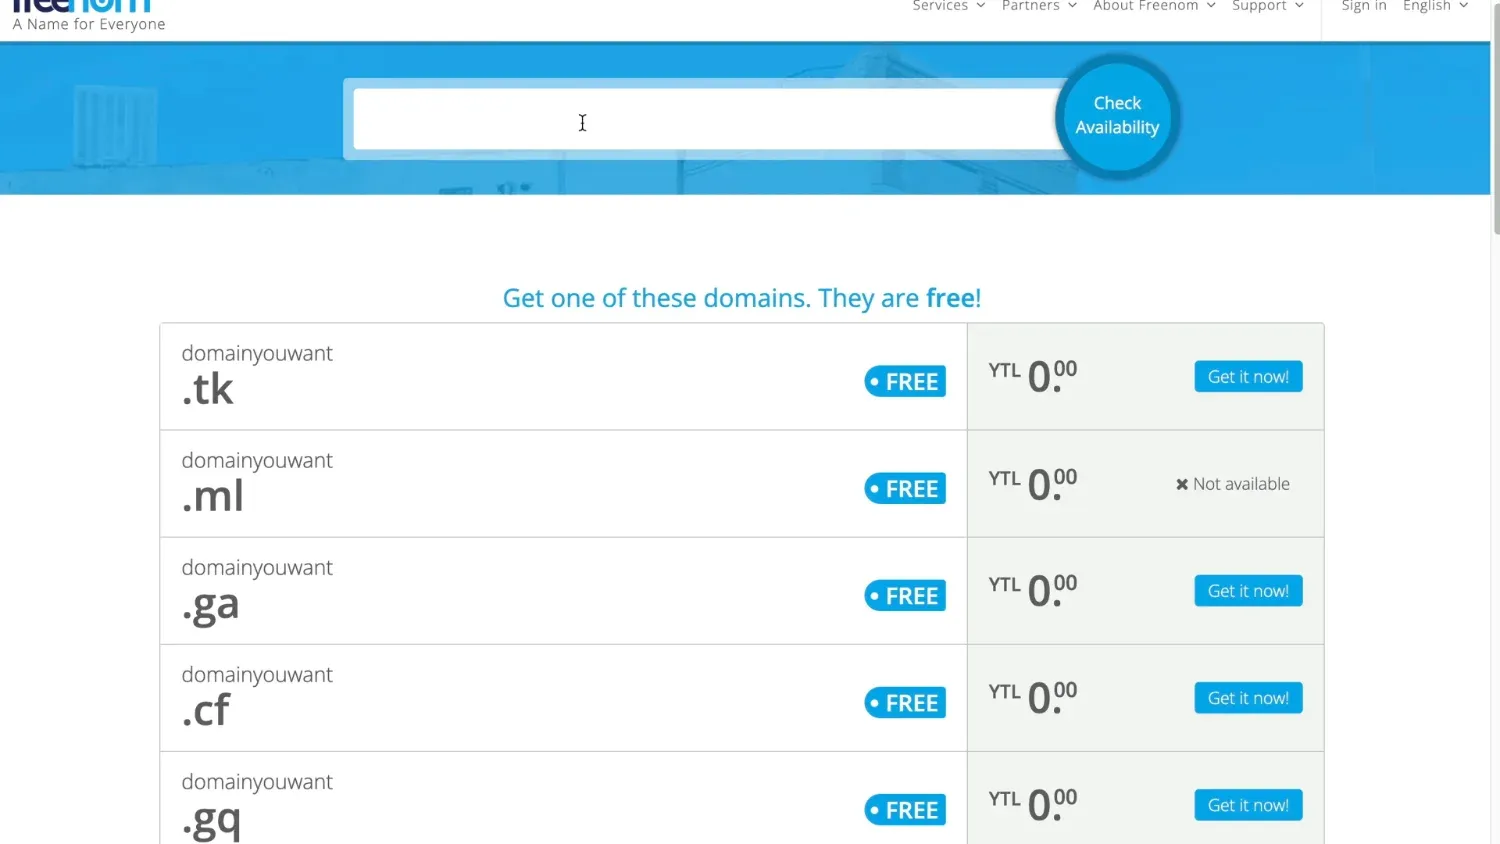
If you run into this, just enter full domain with dot and zone into the search bar — and boom — you can get that now.
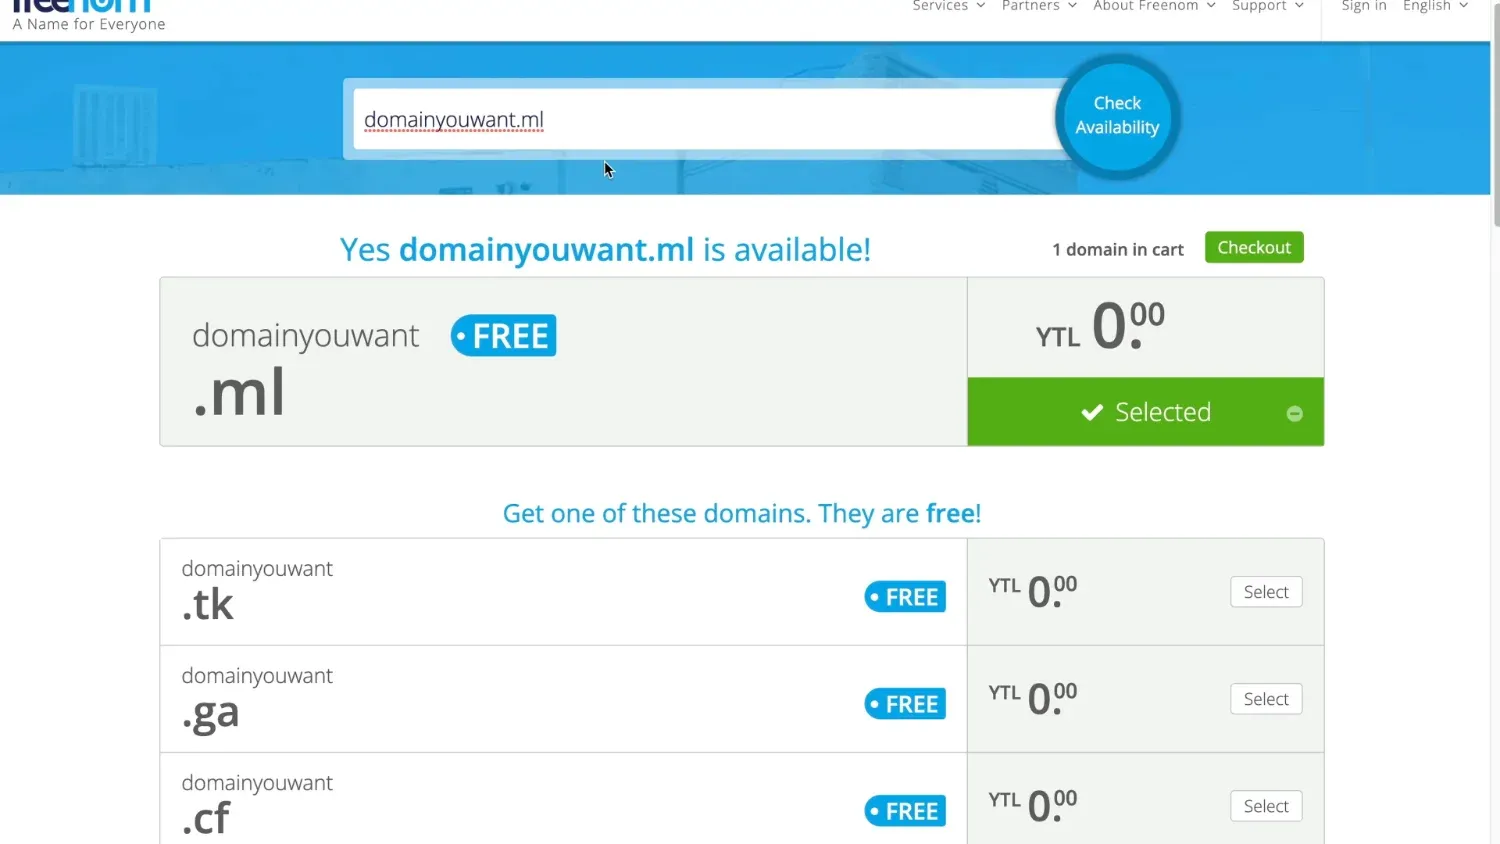
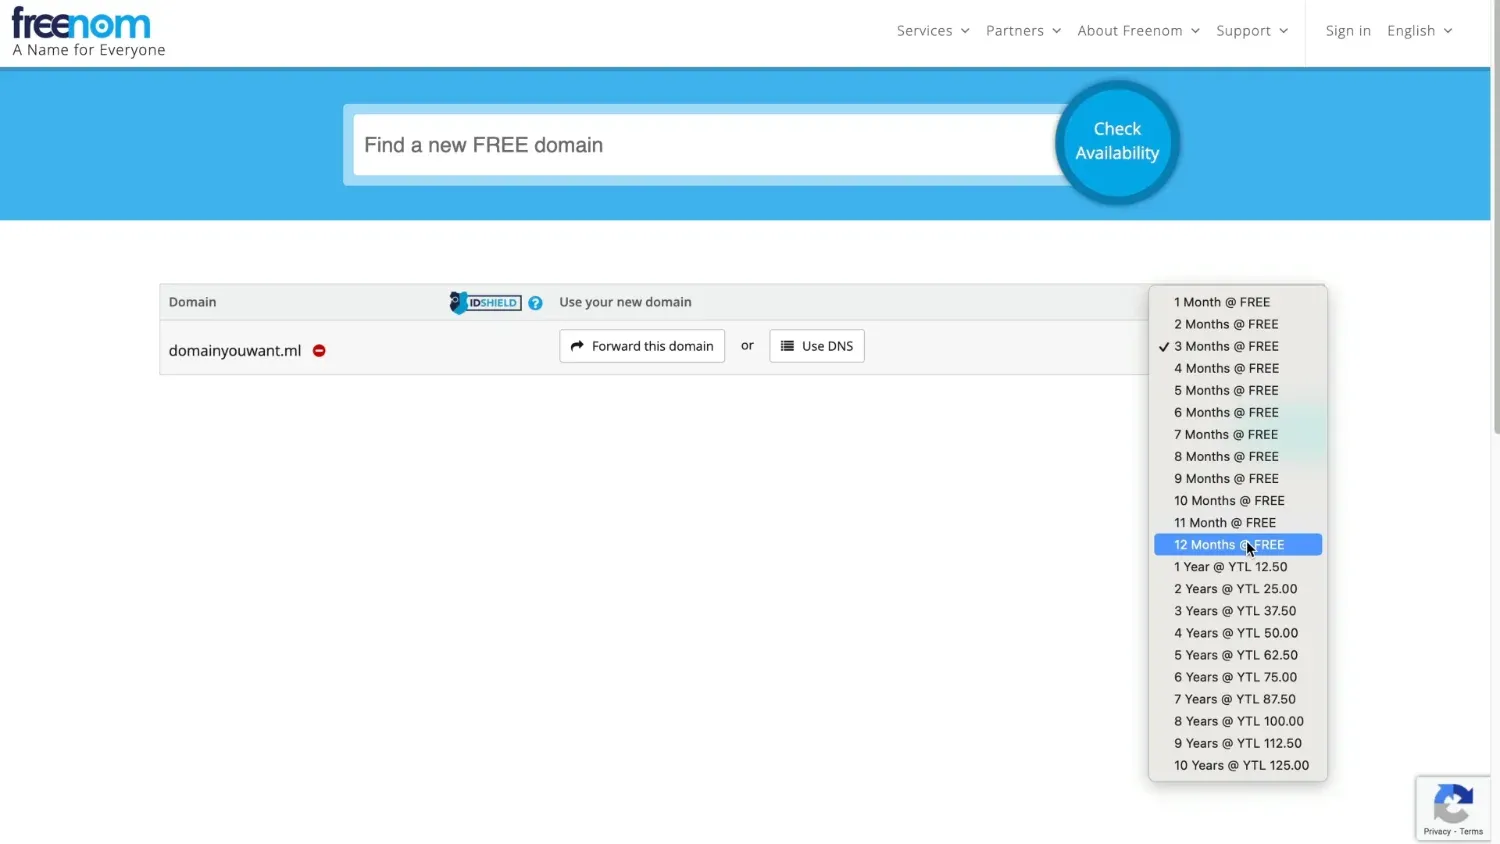
After that — you'll need to renew a domain for another 12 months. This is done for free and you get unlimited renews.
Not that free domain
Okay, I want to be completely honest with you here.
Even though you can go for this free domain name option — just don't.
Thing is when your blog gets traction, starts ranking in search, and brings a lot of visitors the last thing you want is to get some troubles with your domain.
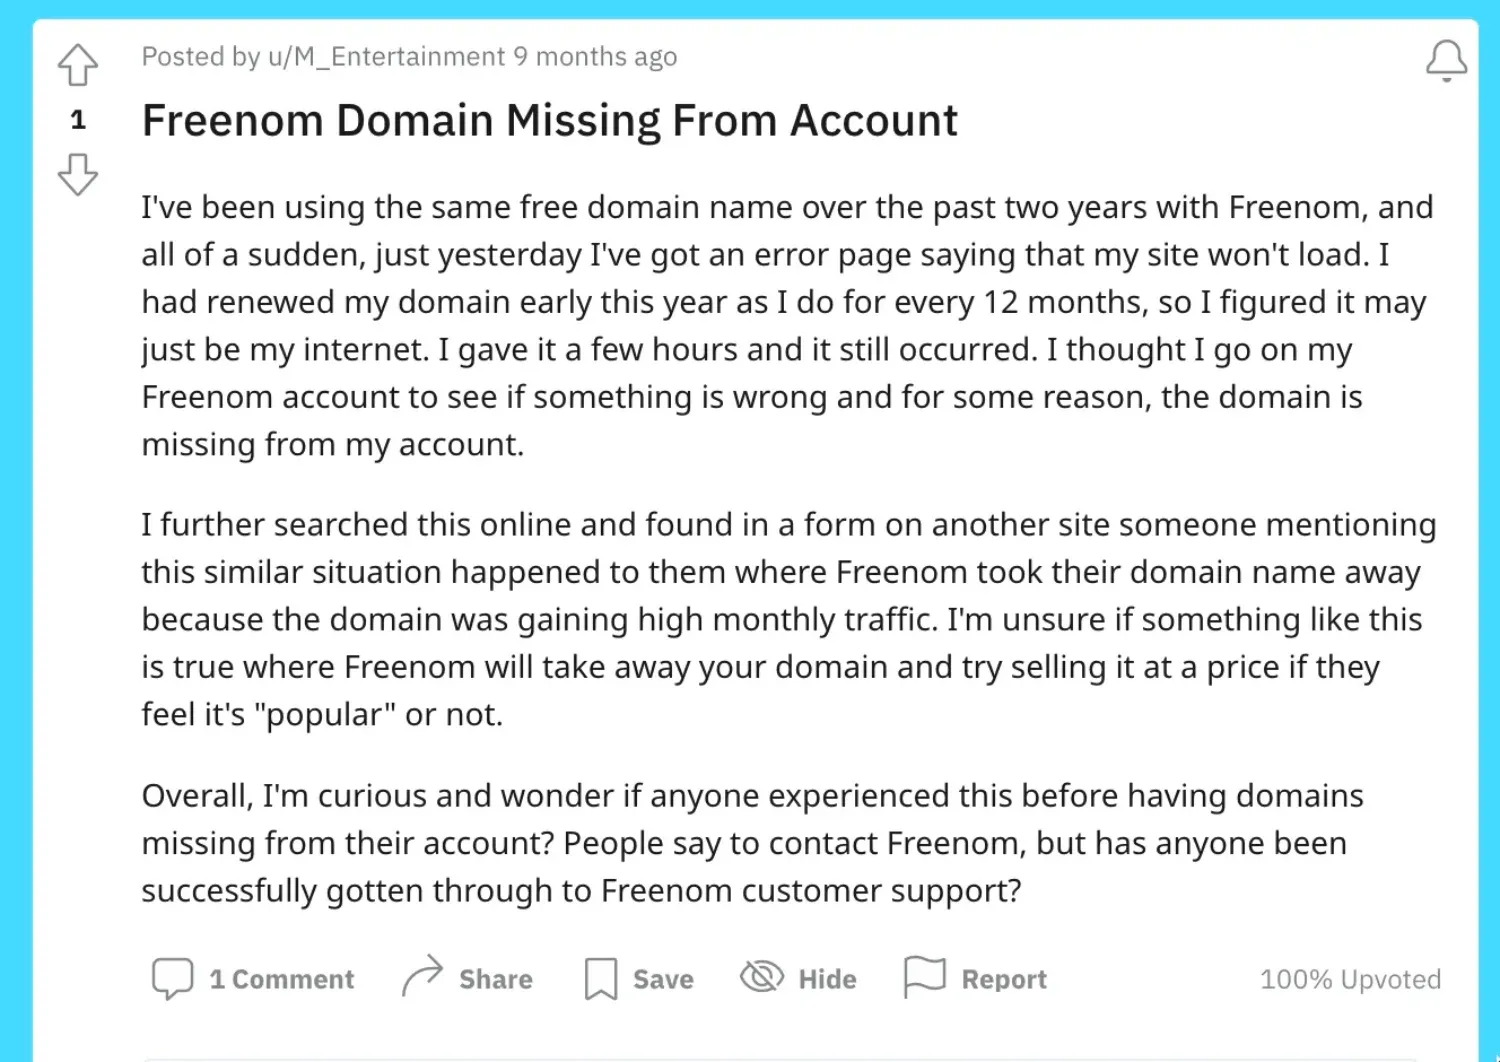
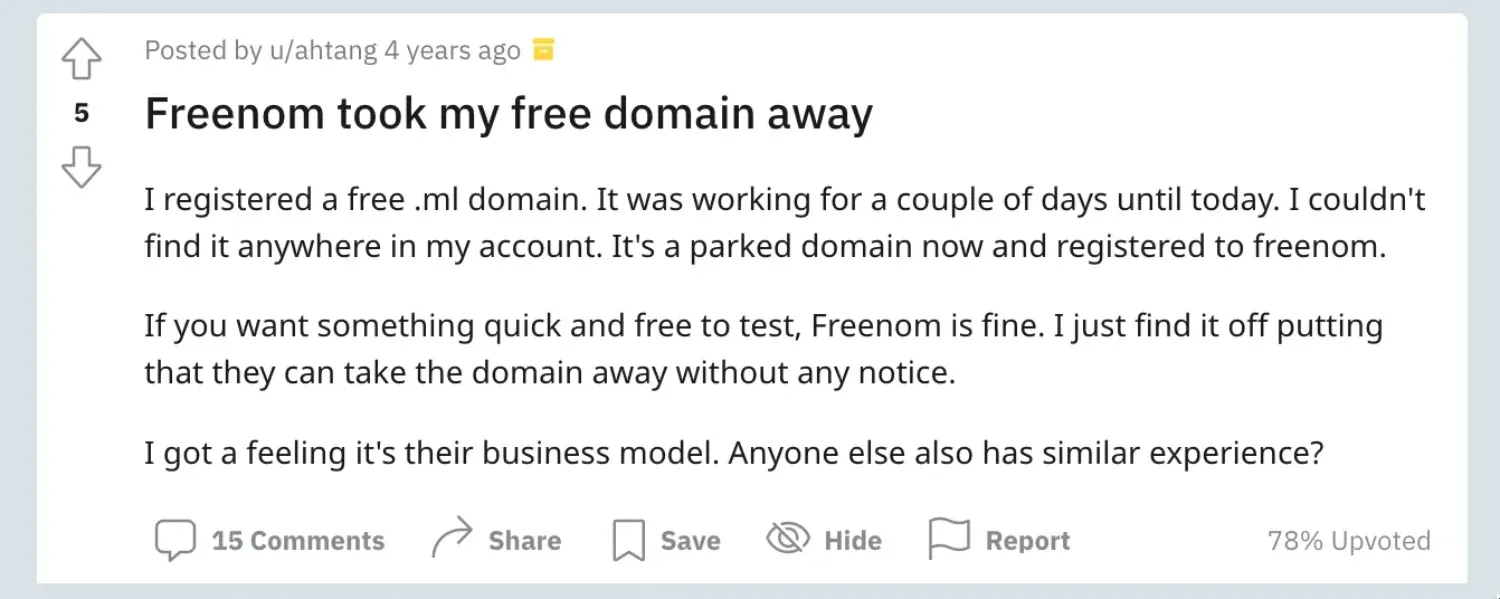
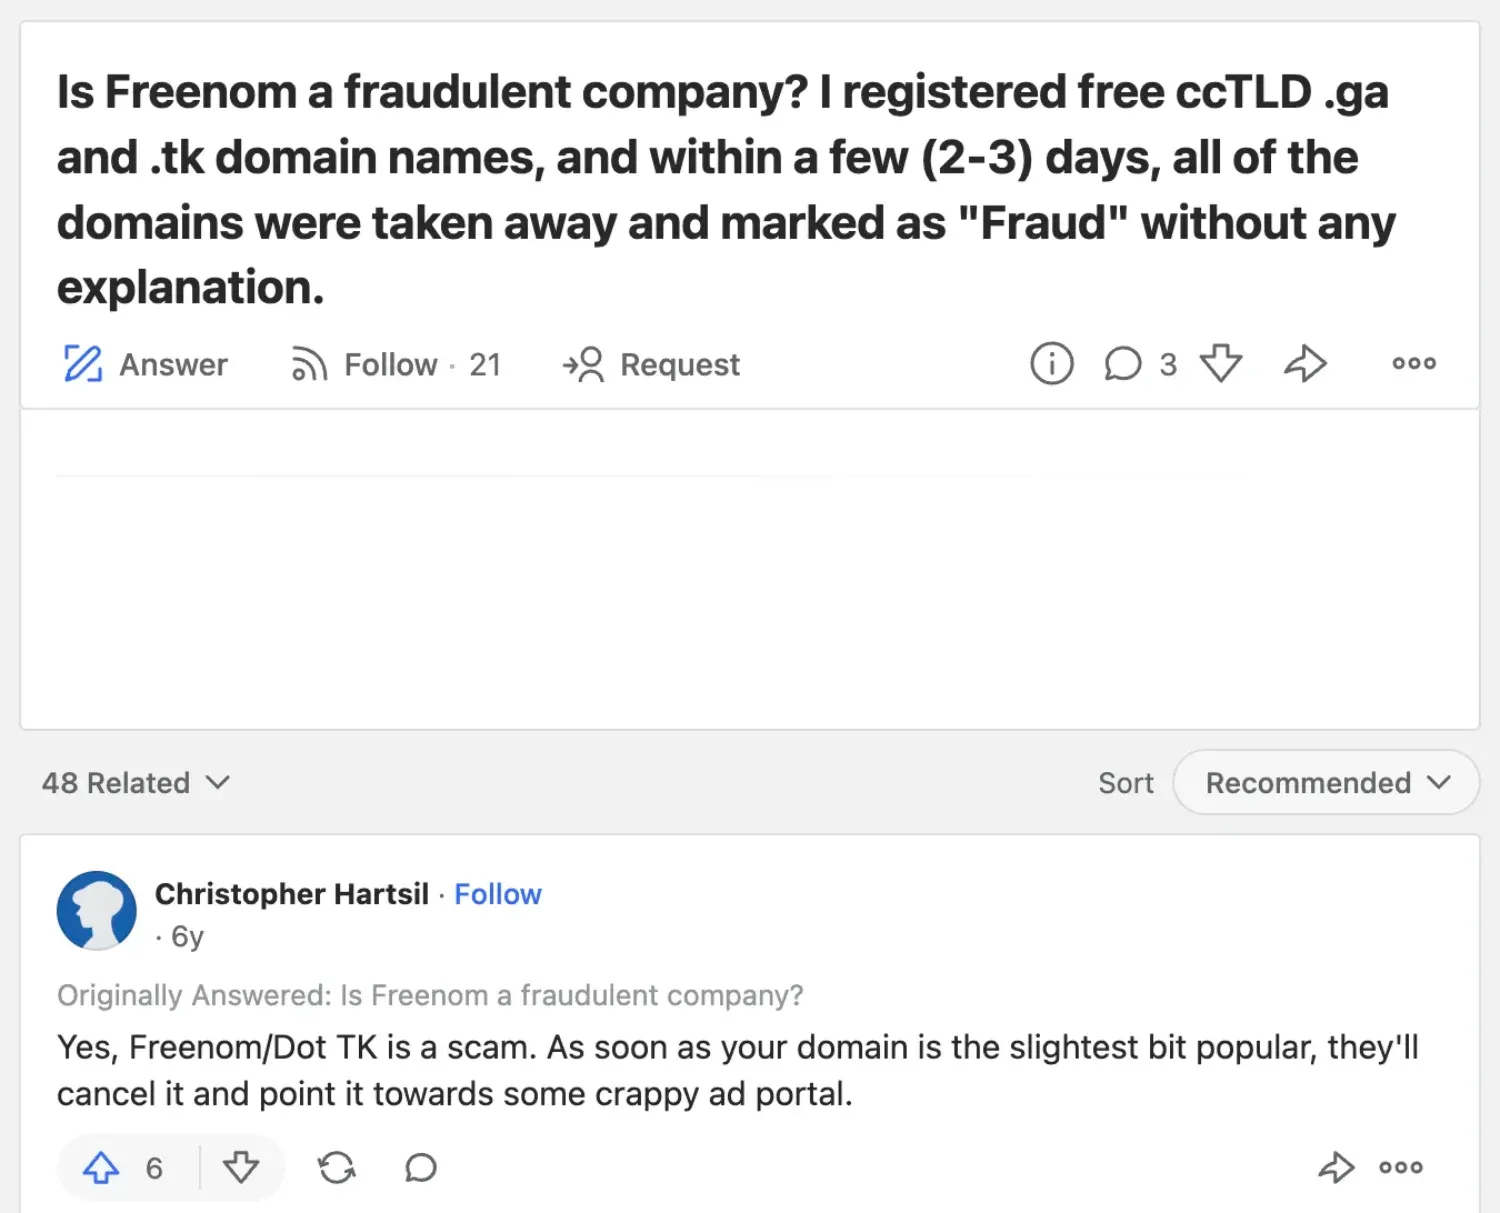
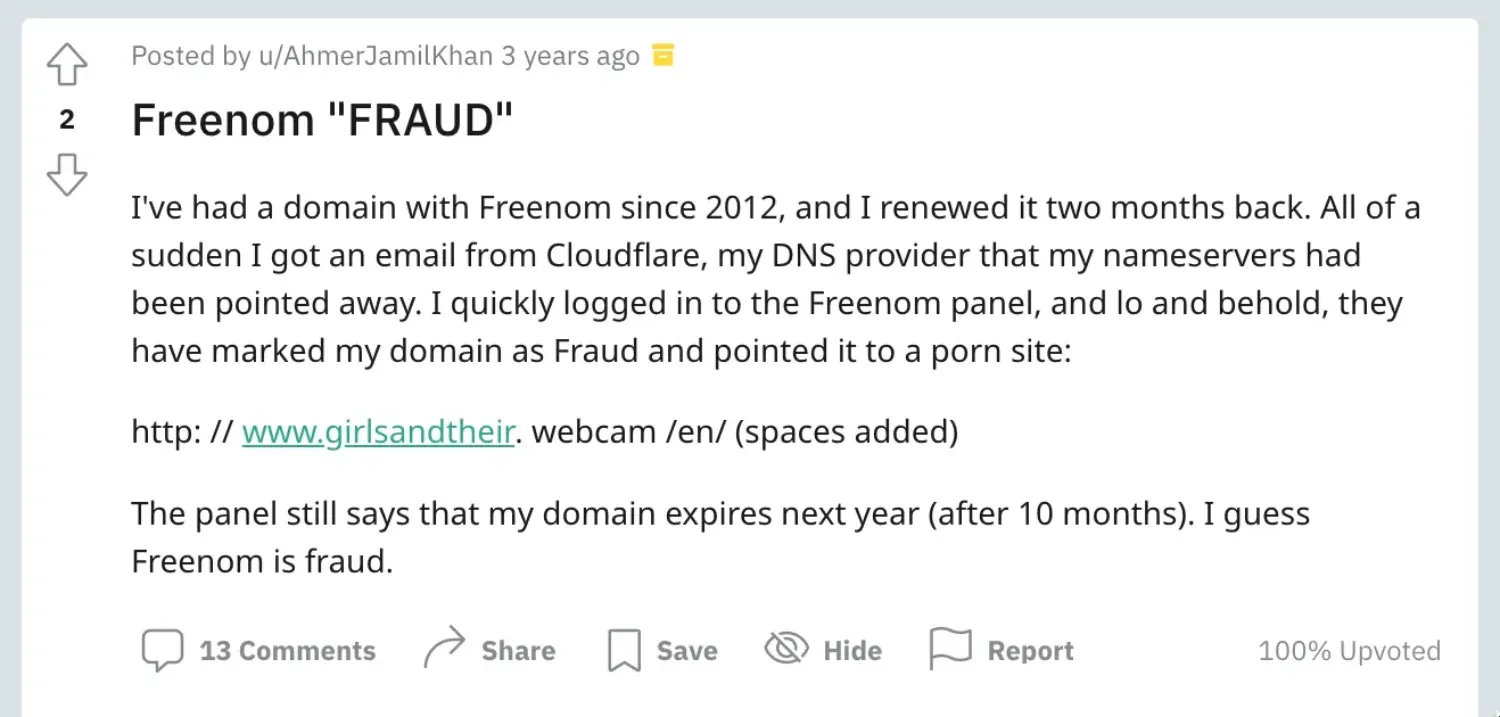
And because a free domain technically is not licensed in your name, if at some point in the future it's taken from you — there's nothing you can do.
Cheapest paid domain registrar

So instead I would like to introduce the cheapest domain registrar out there — Cloudflare.
If you haven't heard anything about them registering domains — it's because they don't have that aggressive marketing like GoDaddy or NameCheap. Why? Well, Cloudflare has no-markup pricing on domains they sell. You literally pay what they pay for a domain name and that's it.
8.57 USD per year for a com domain with domain privacy included.
But how about all that .com deals for 5.98 at NameCheap or even 1$ at ionos?
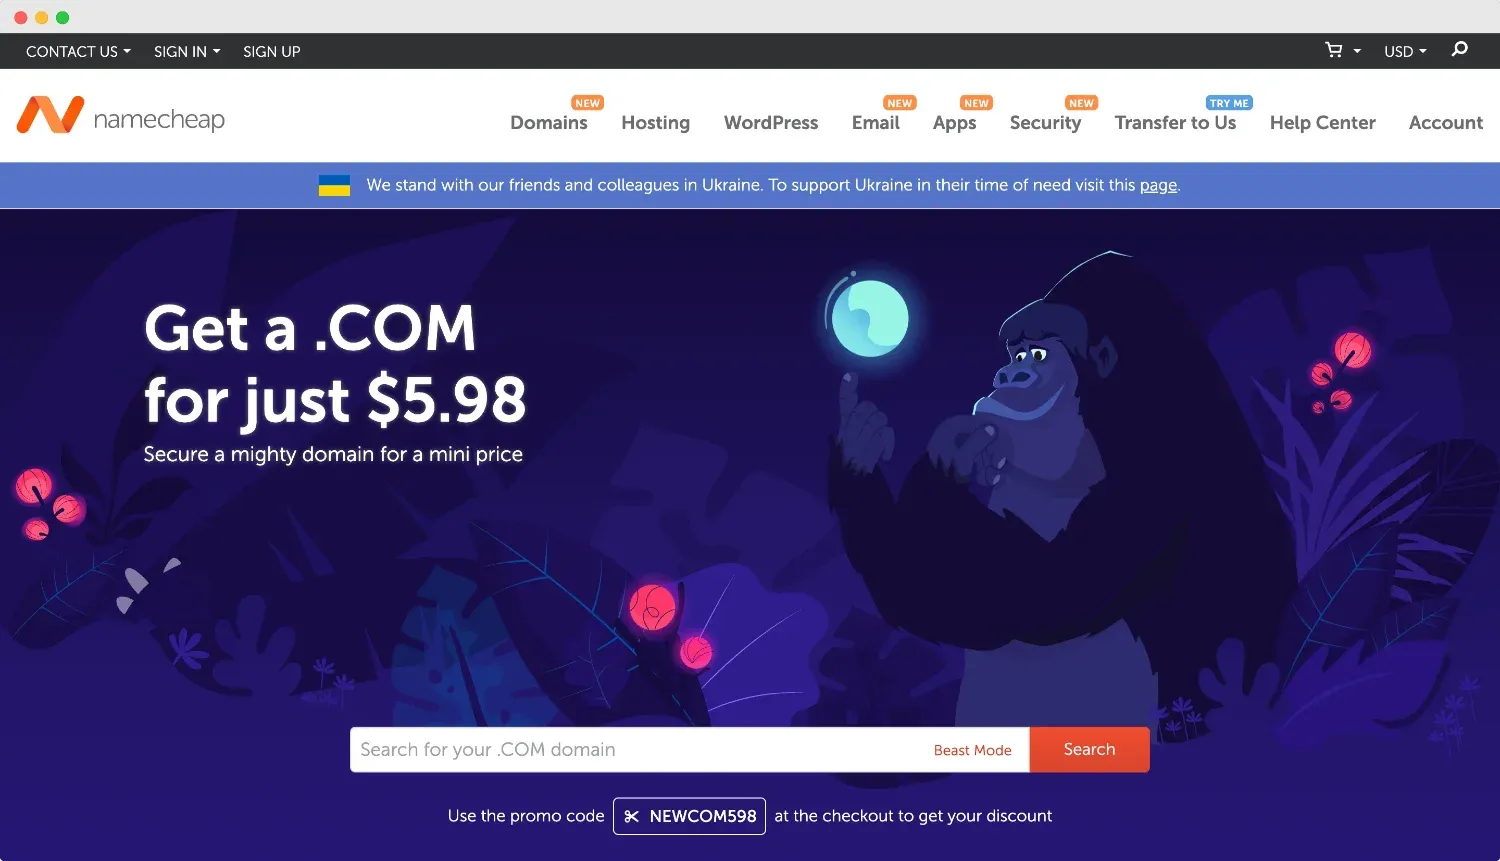
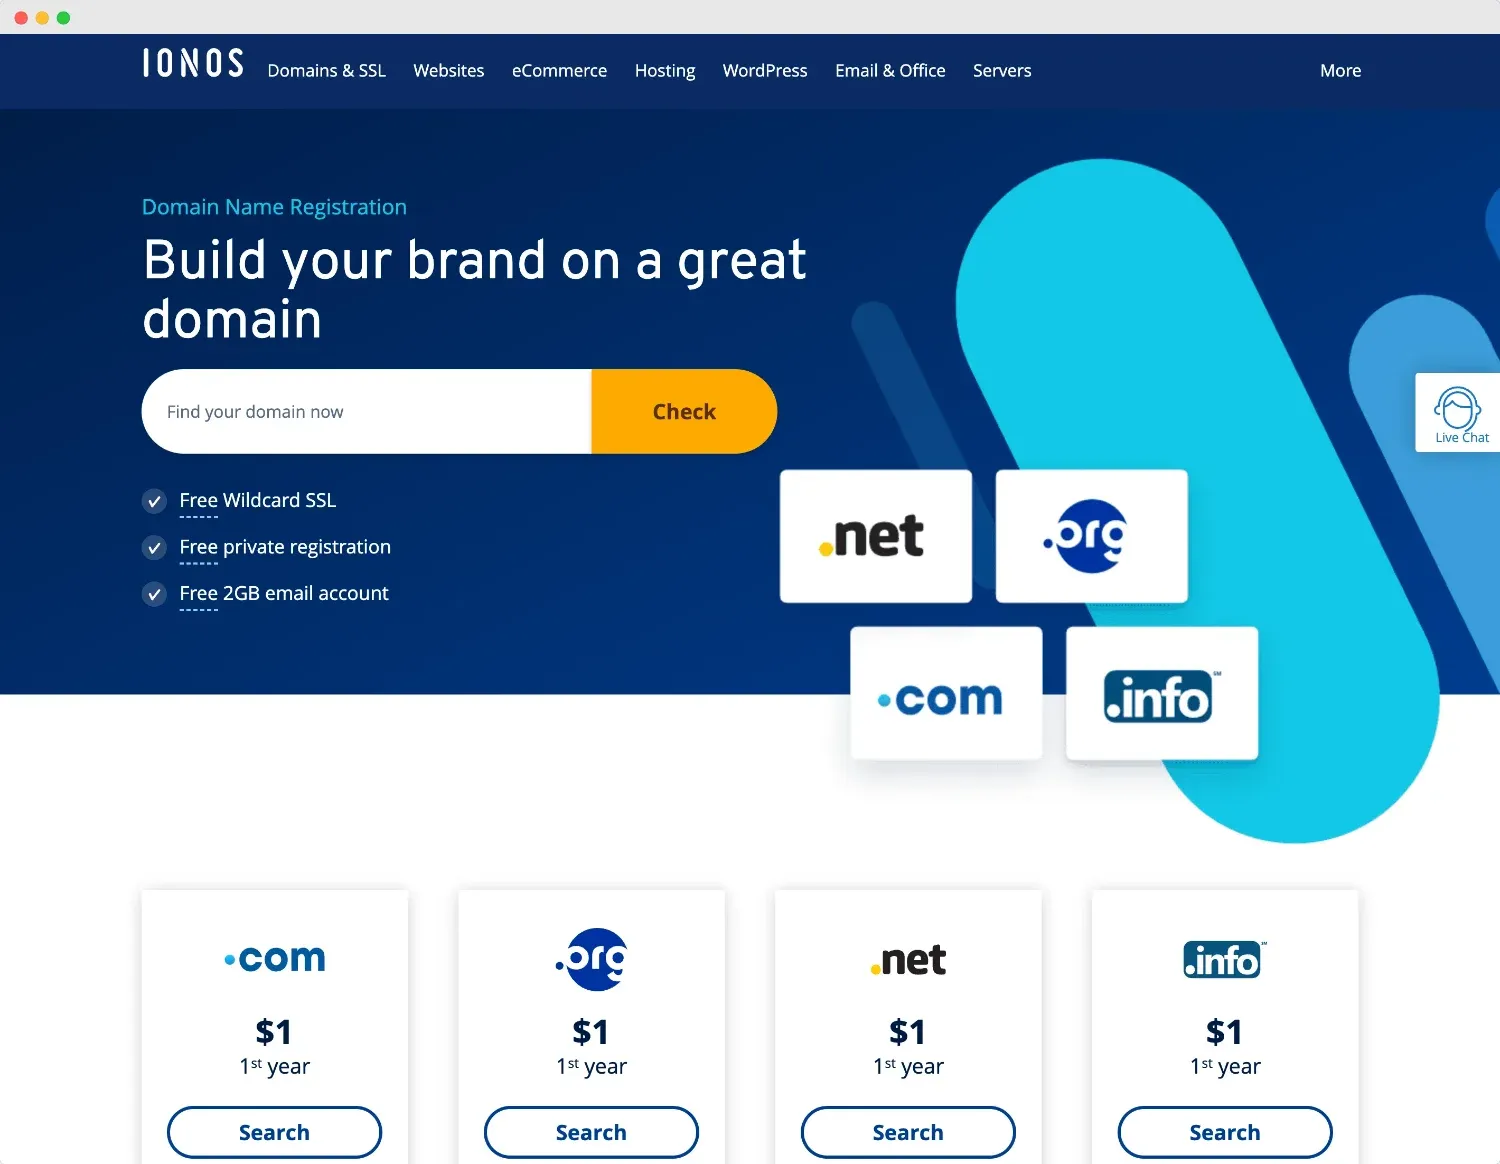
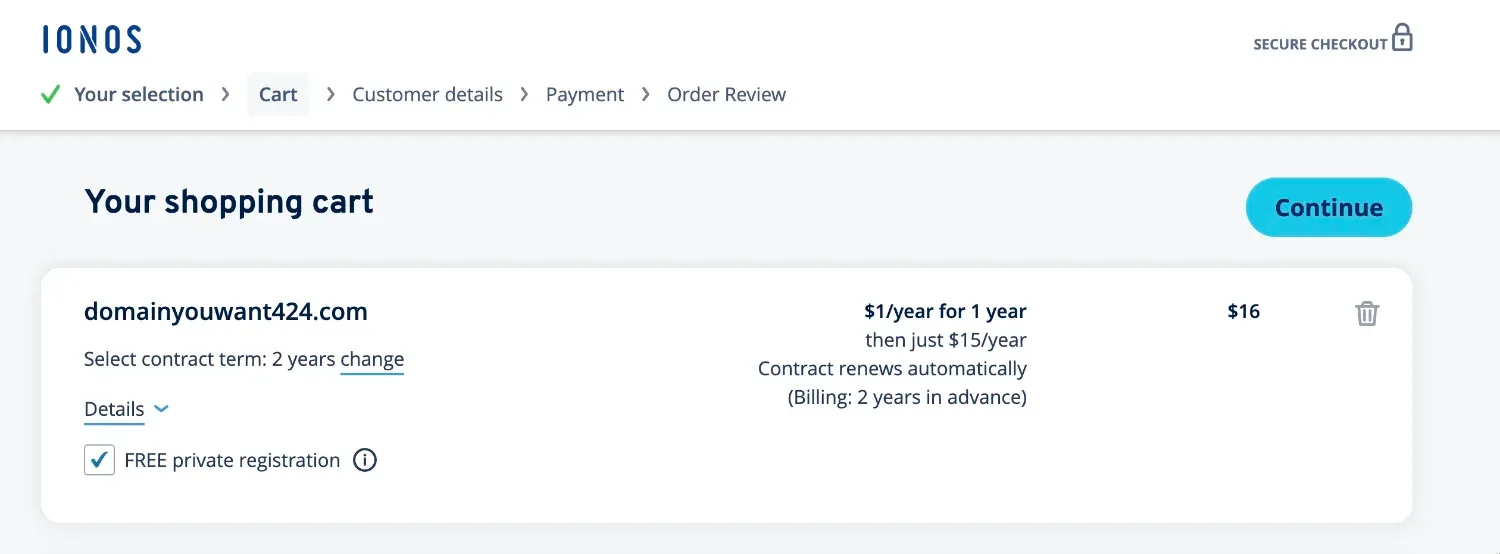
Well, that's the first year only. Every subsequent year you are charged 14+ dollars. And at the checkout, you're obliged to buy 2 years minimum to qualify for a deal like that.
To summarize here's a table of .com domain costs at different registrars.
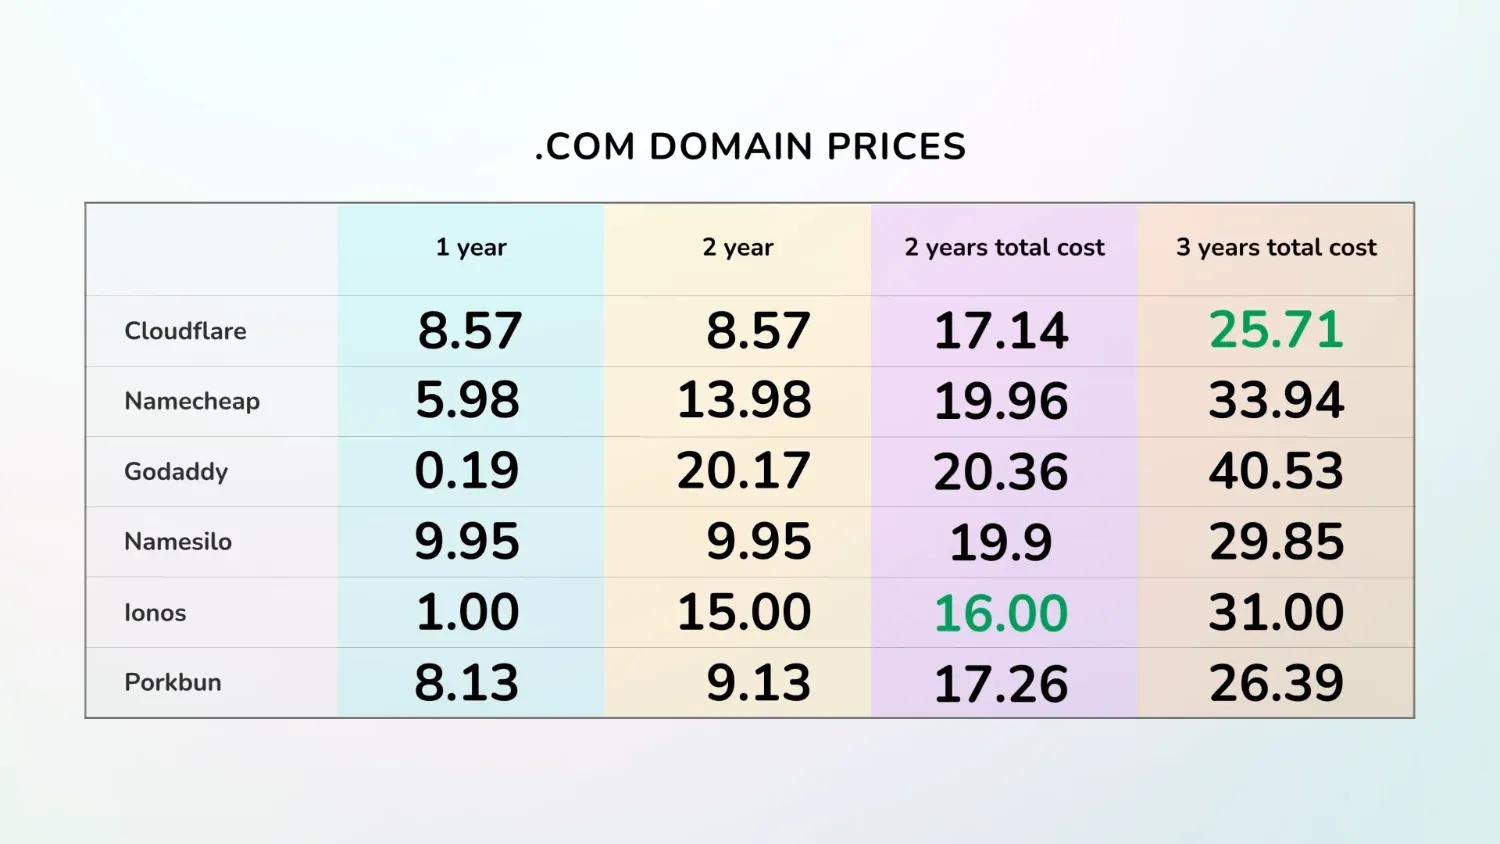
You can probably save around a dollar by using cheap 2 years deal at one registrar and then transferring the domain to Cloudflare, but that's probably not worth the time spent. That's why I simply registered a domain with Cloudflare.
Buying domain at Cloudflare
The process is straightforward.
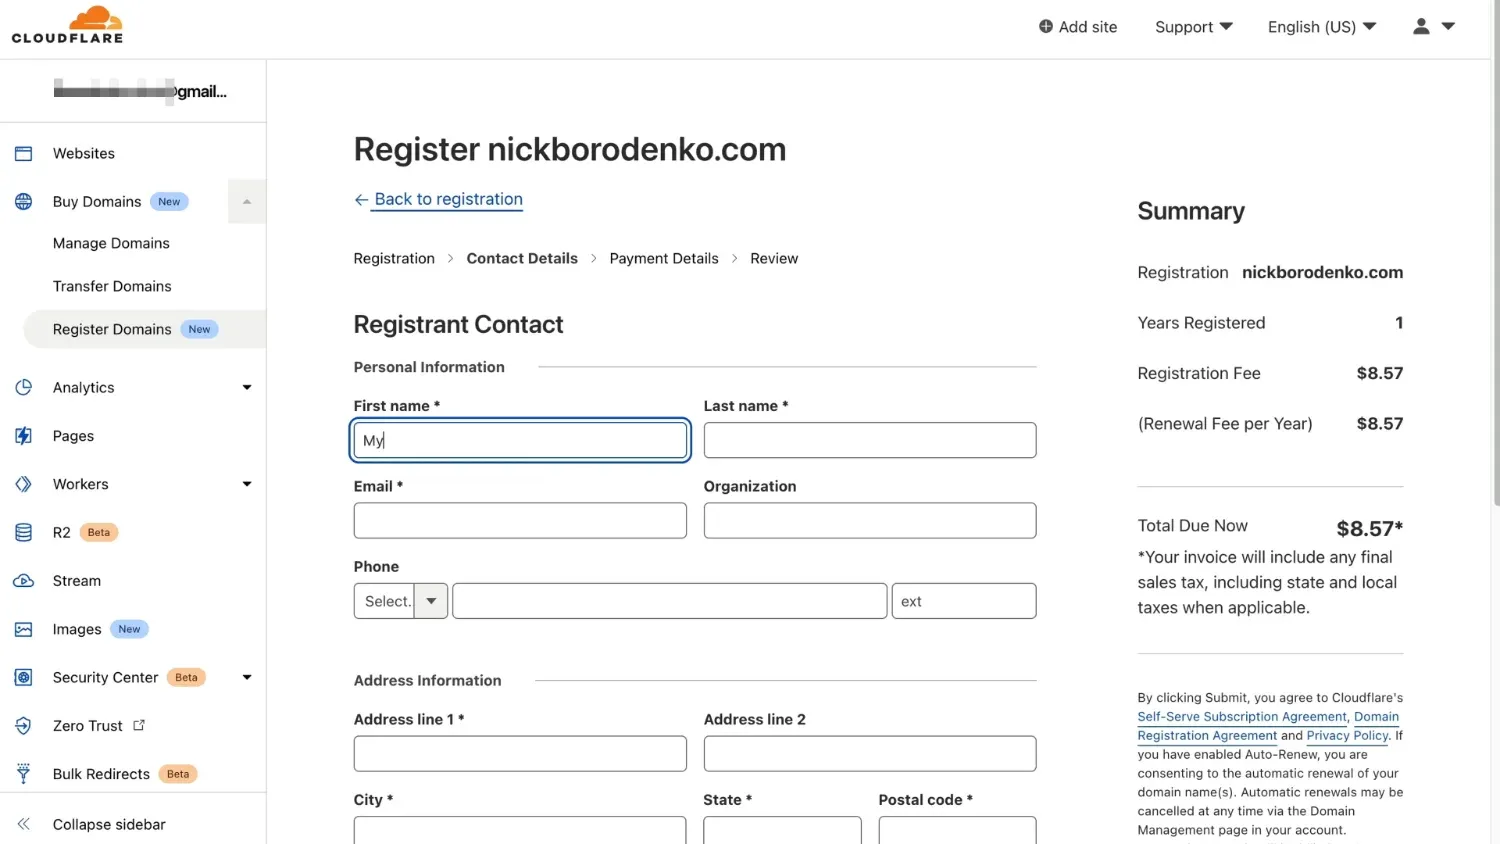
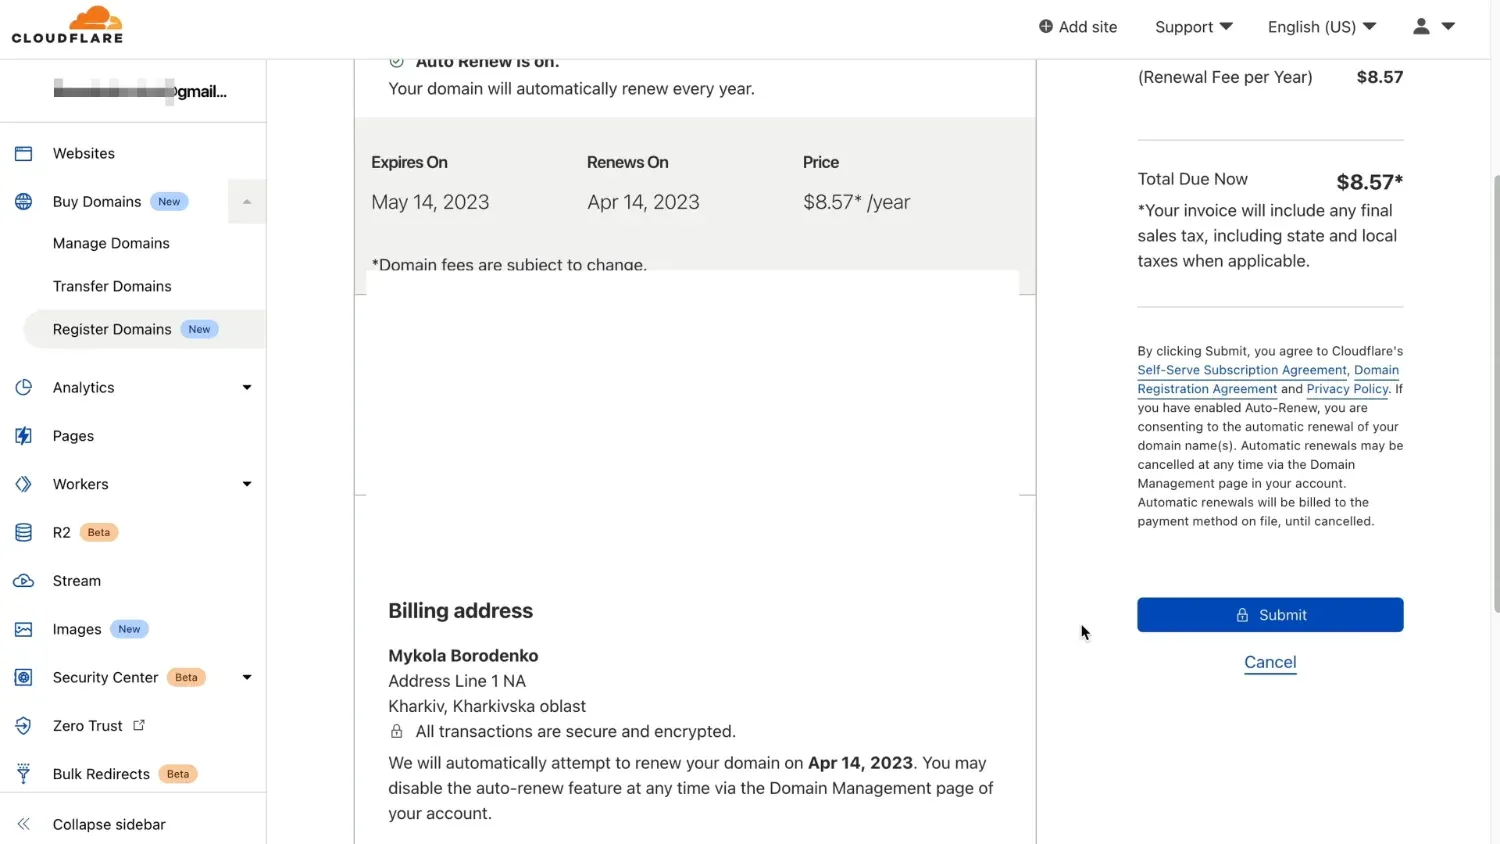
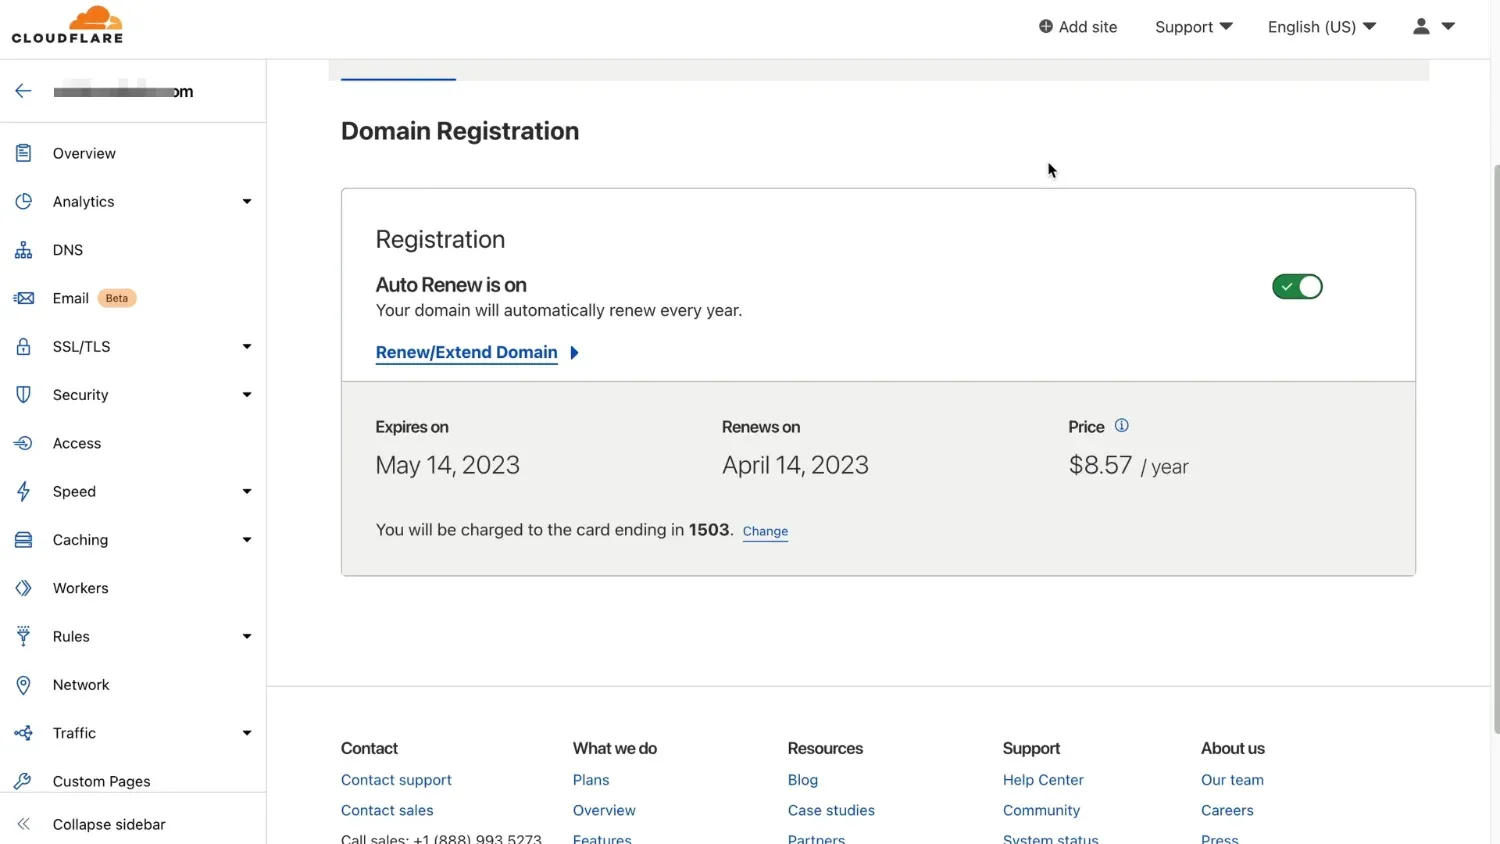
And as you can see your privacy is automatically protected by Cloudflare.
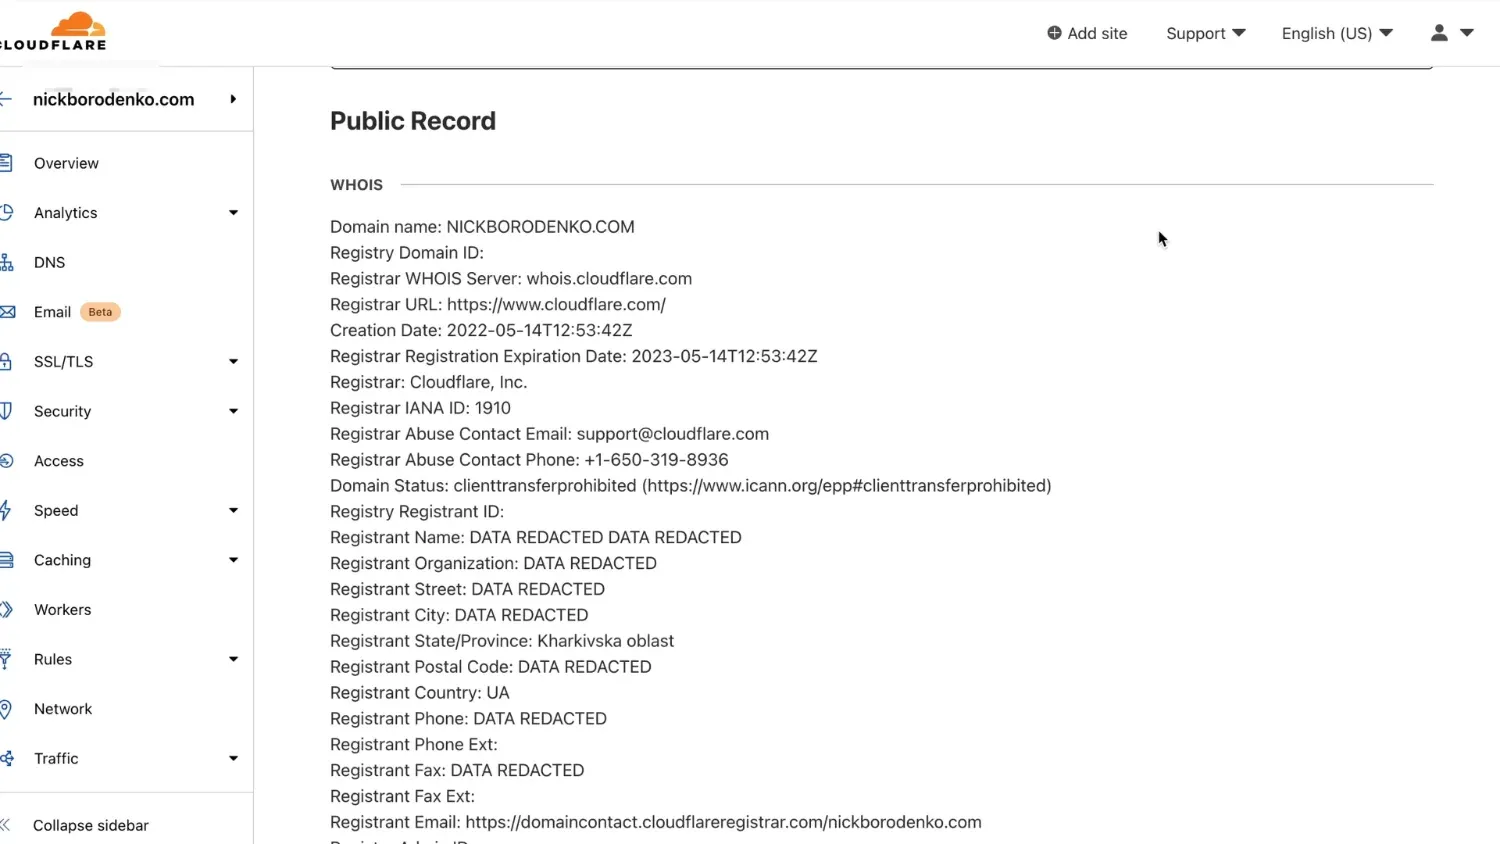
We'll return to domain setup later when we have our free google cloud instance up and running.
Google Cloud instance
Google gives 300$ in free credits for new Cloud customers for 90 days and has a forever free tier, that we will be using.
There are some caveats here, but no worries — I'll walk you through all of them, so there will be no surprises later.
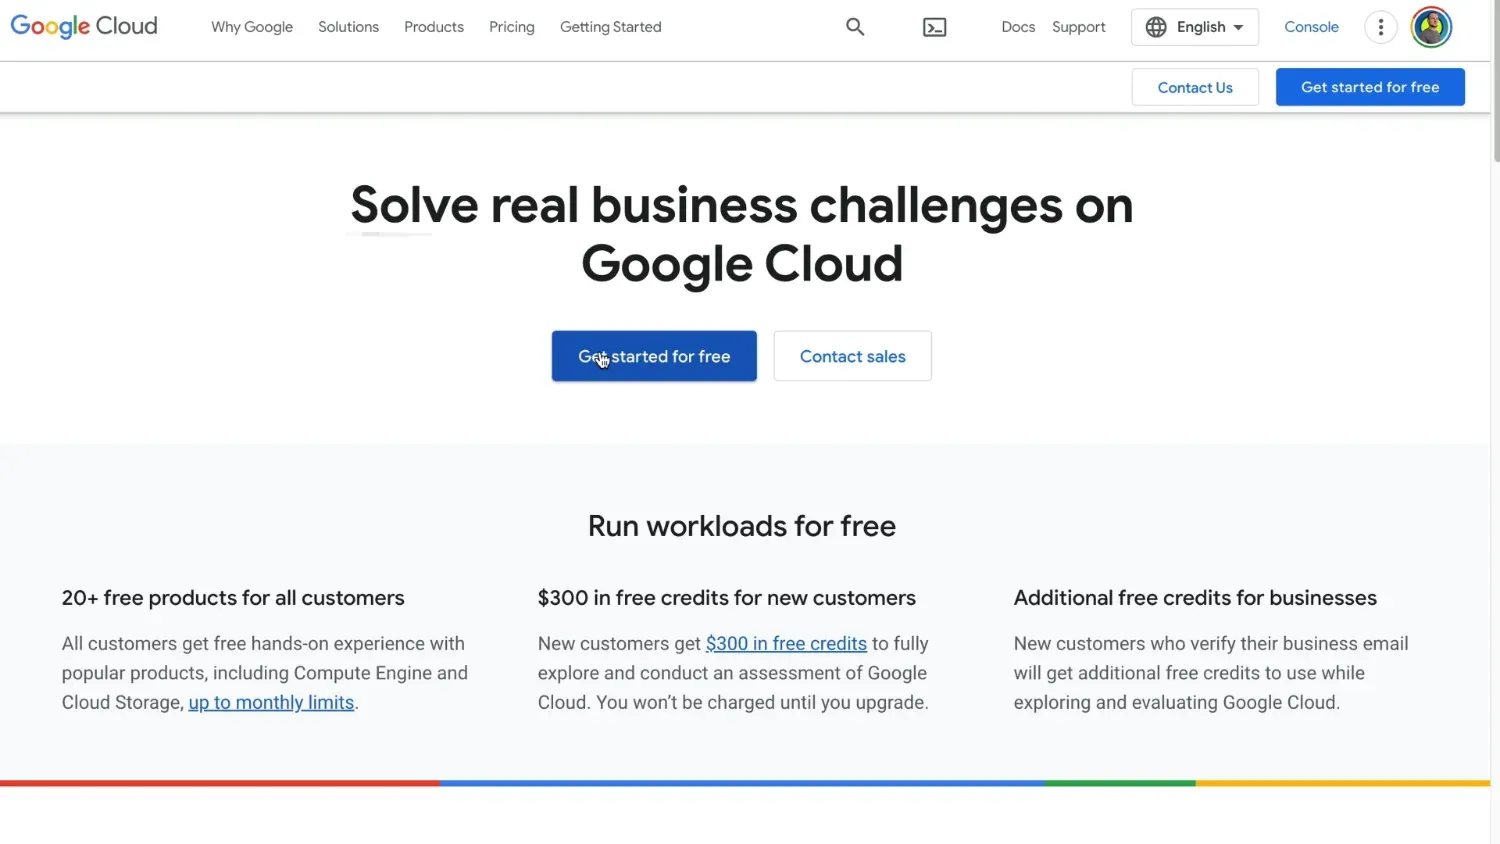
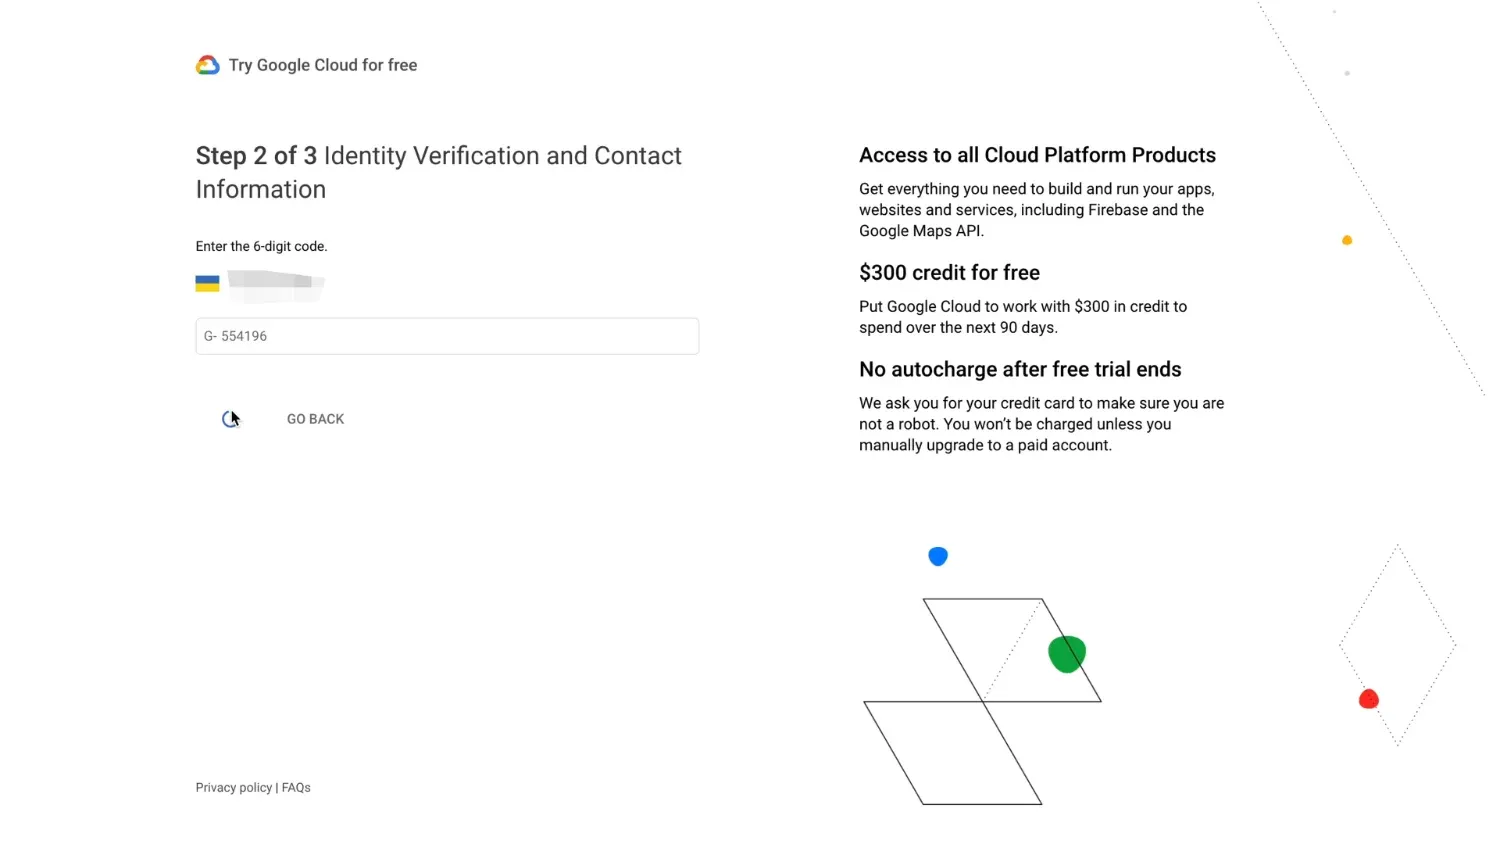
At Google Cloud click Get started, enter your account information, verify your phone, and enter billing details. Google will charge a small amount and return it immediately.
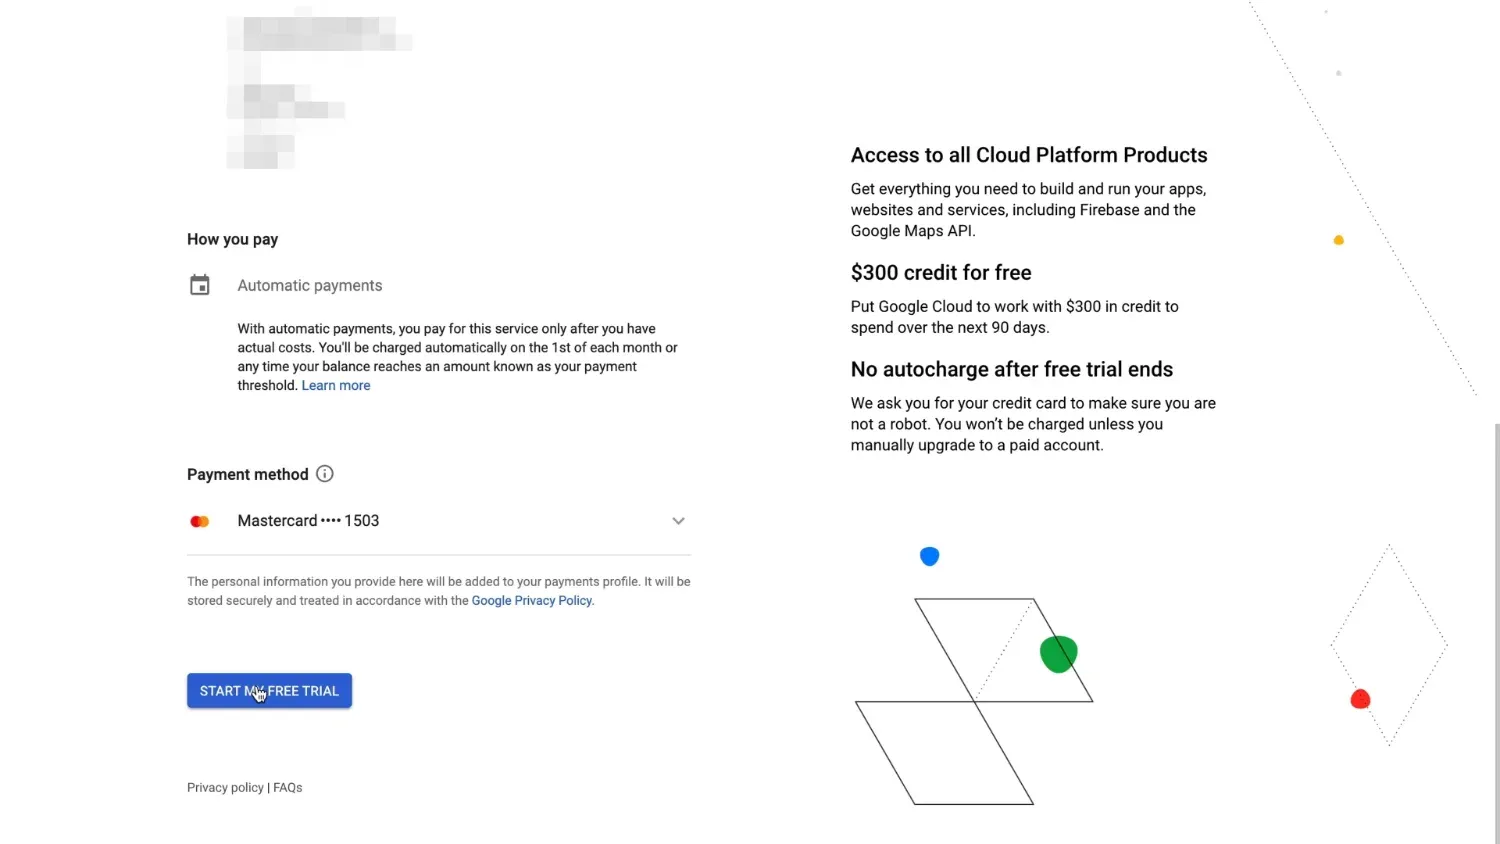
But right now we want to set up our free tier cloud instance.
Complete the short survey.
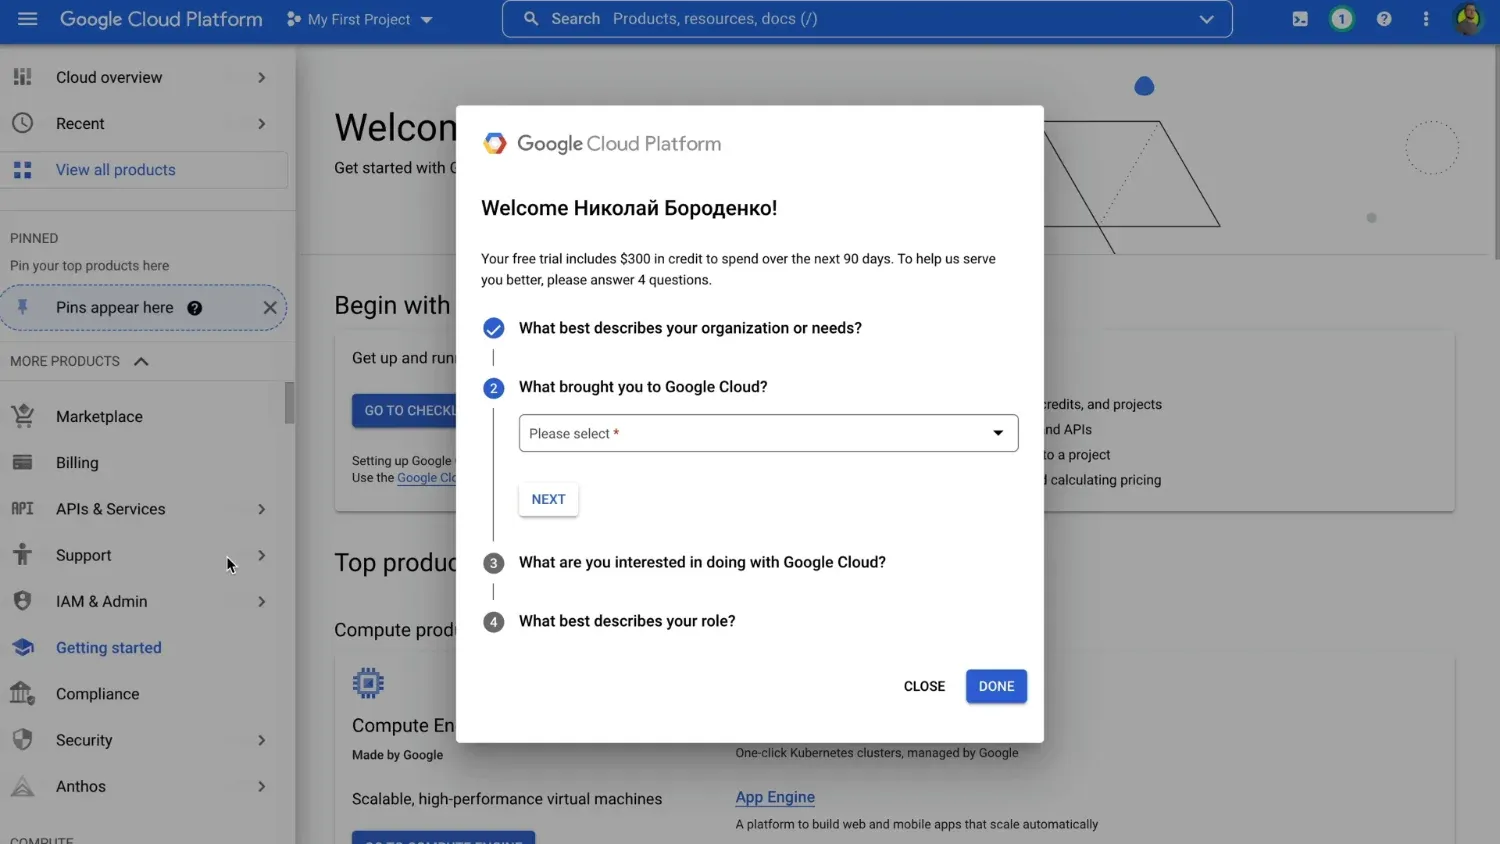
It's not really important, what answers you choose here. Google will provide some recommendations based on info you've entered,
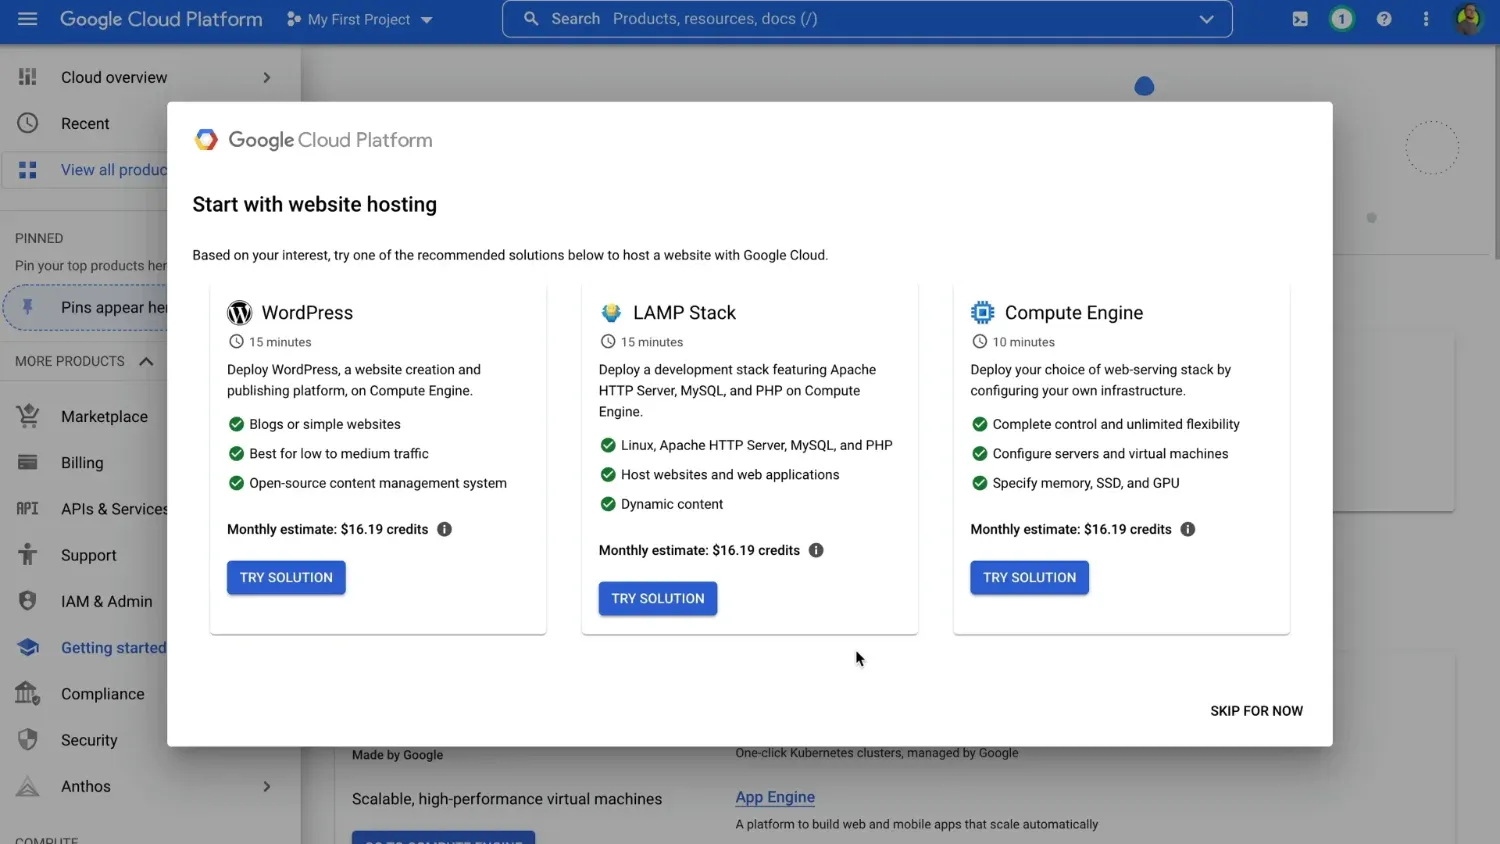
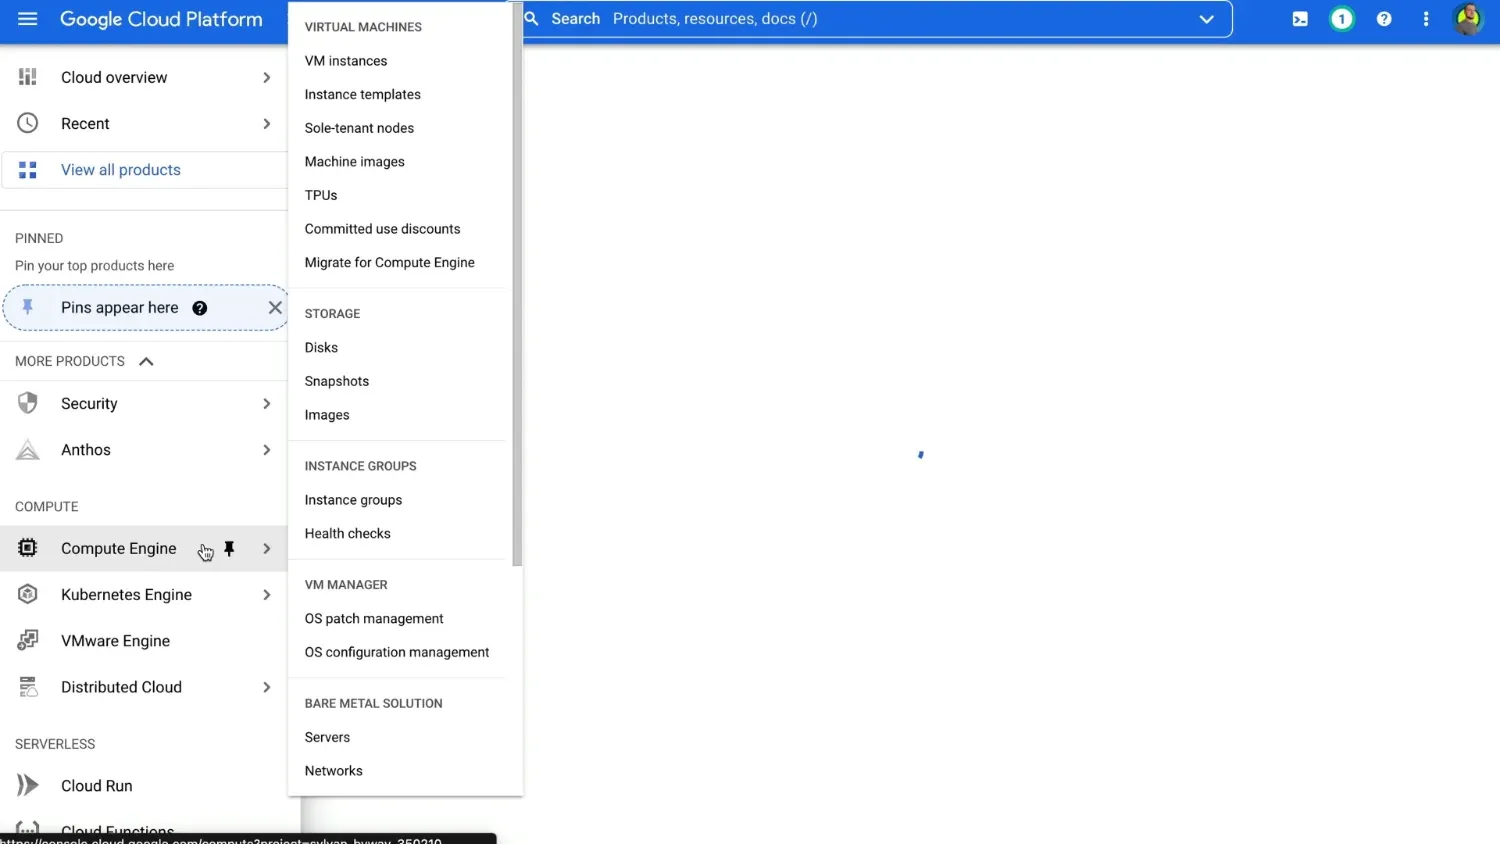
just skip that and head to Compute Engine.
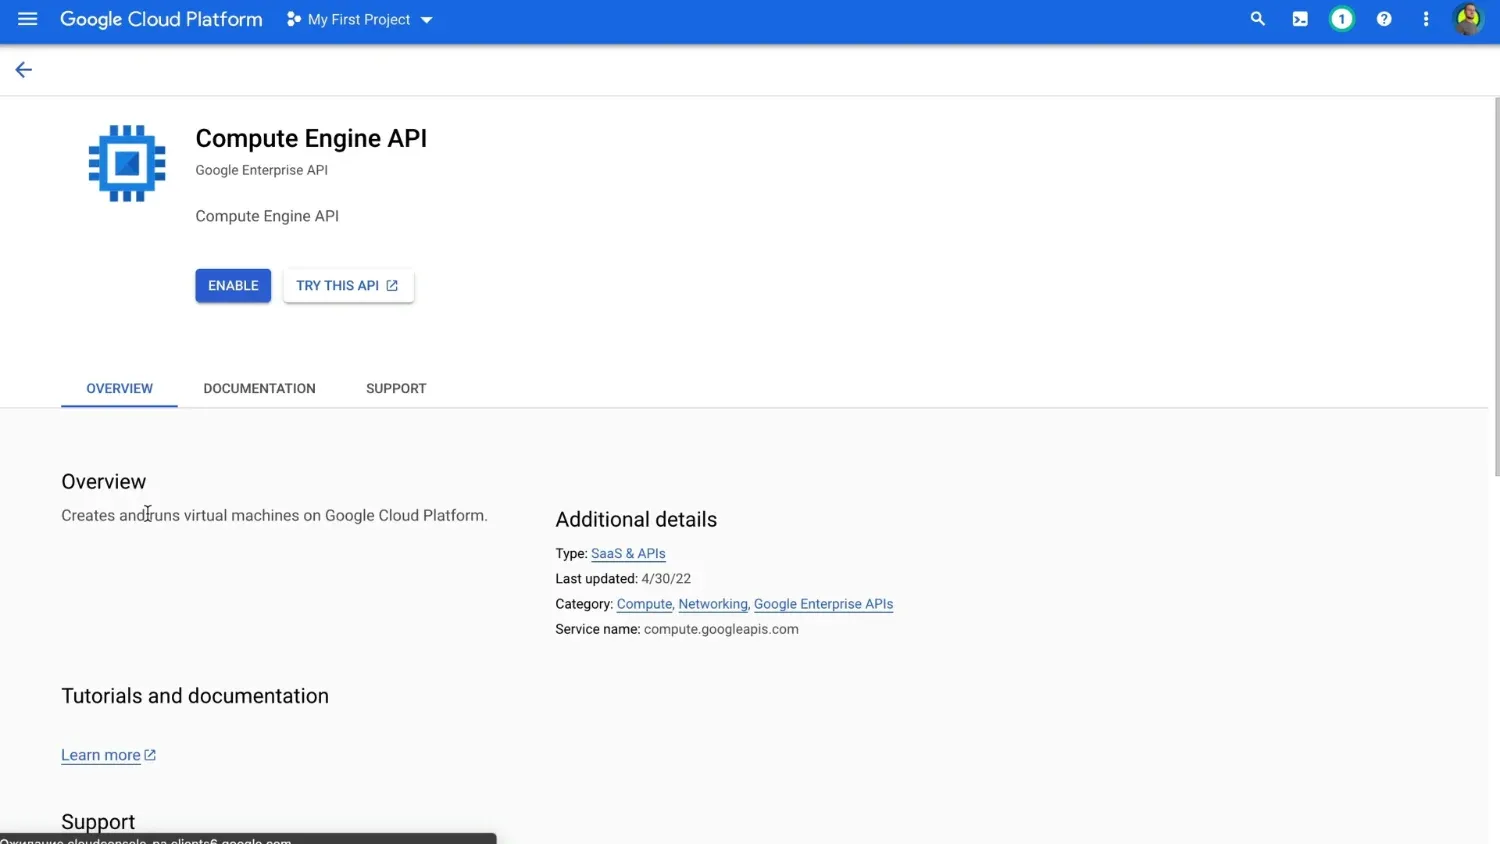
Enable Compute Engine API. Once it's ready, click Create instance button at the bottom.
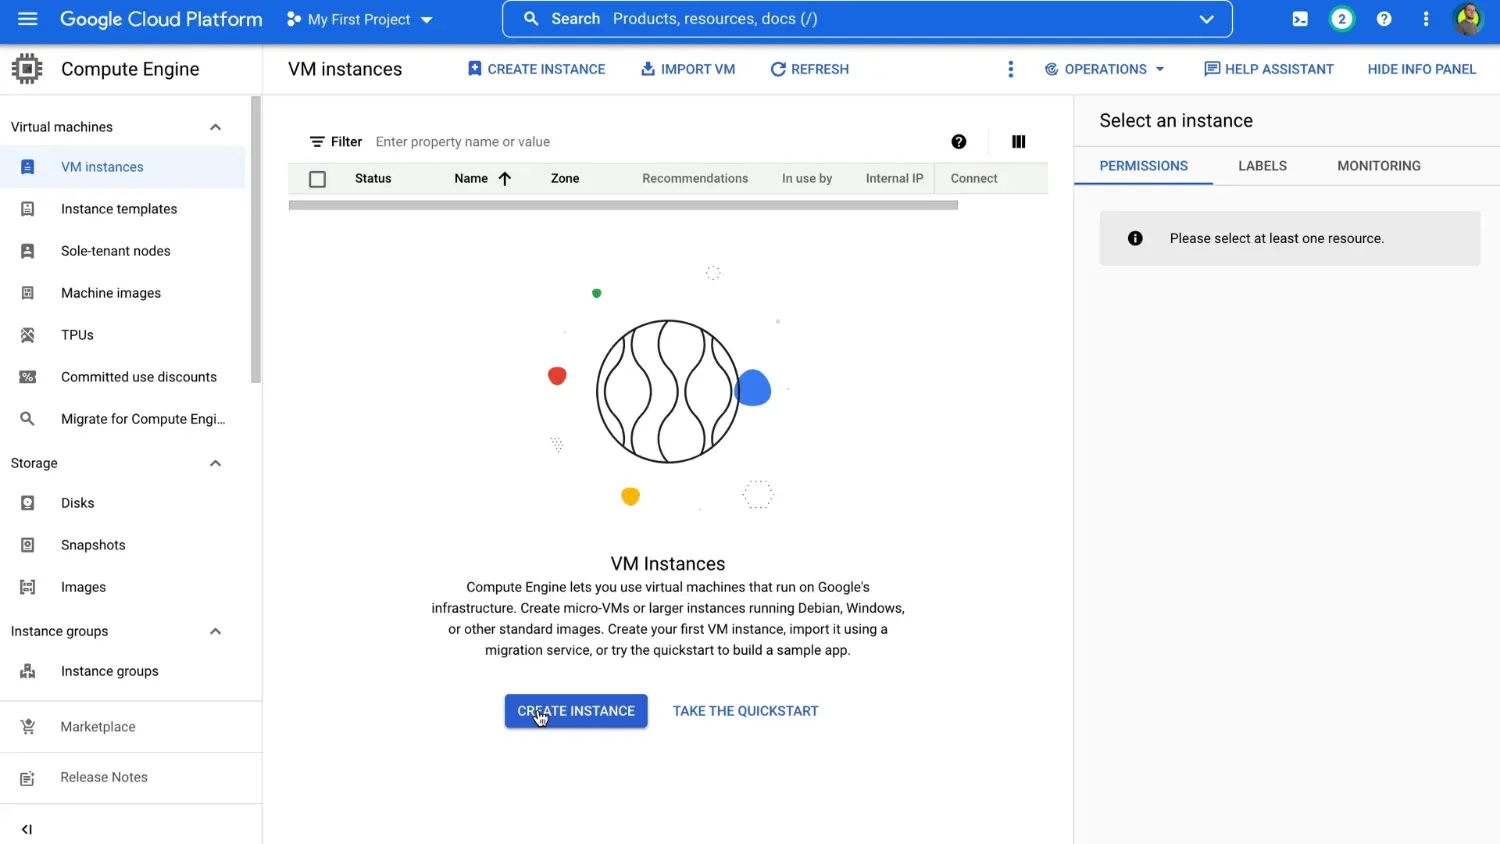
Ok, here's a detailed article on what qualifies for the free tier.
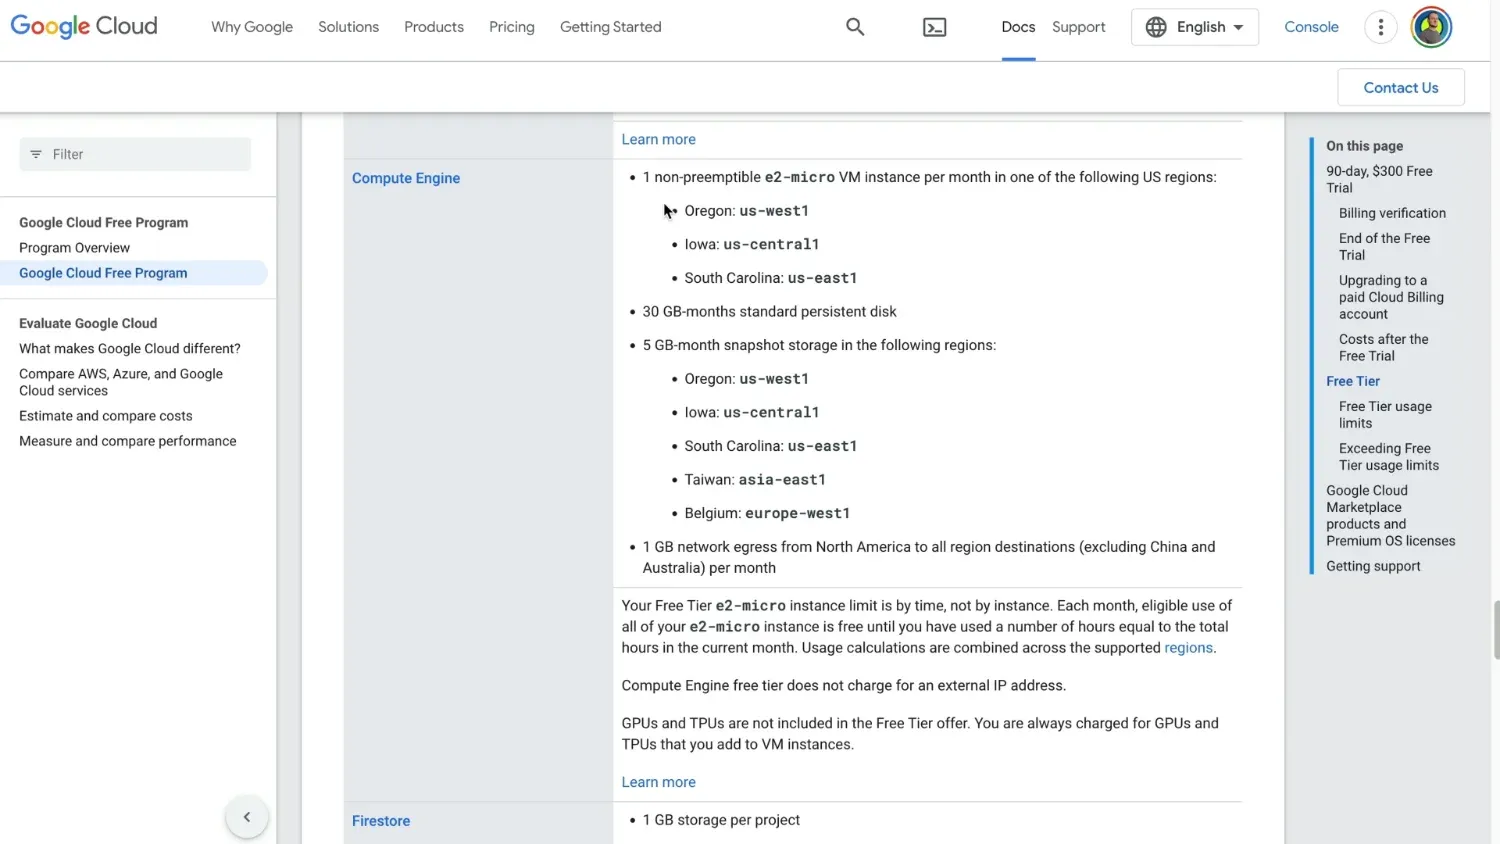
And we want our instance to be within that limits, so it stays free.
What do we get for free:
- e2-micro VM instance;
- 3 US-based locations;
- 30 Gb-months standard persistent disk;
- 1 Gb per month network egress to all regions excluding China and Australia.
Back to the setup.
Choose the name you want, I went with blog.
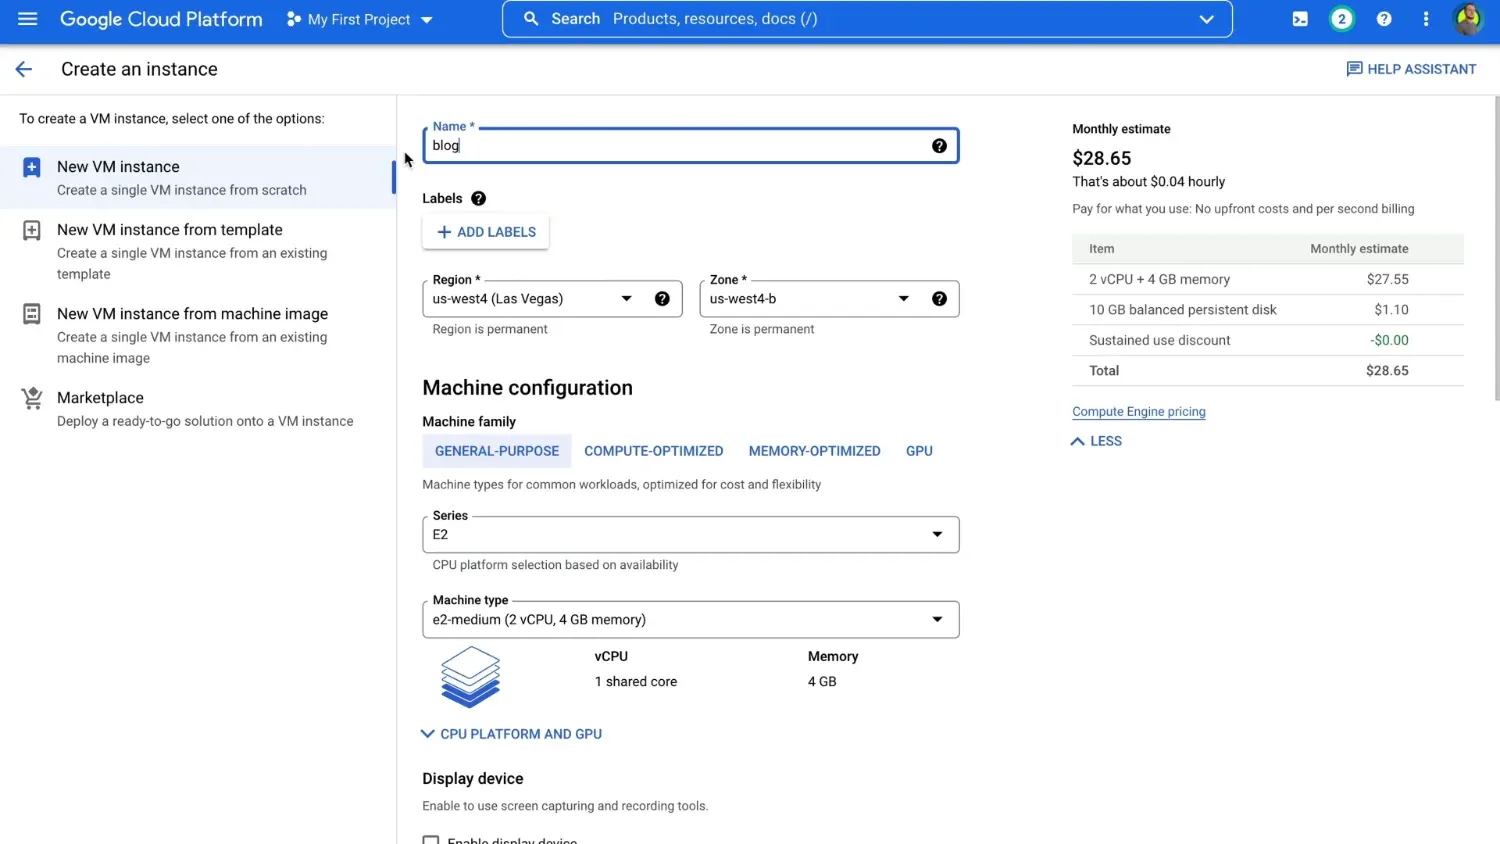
Choose a free location (it has to be either us-west1, us-central1, or us-east1).
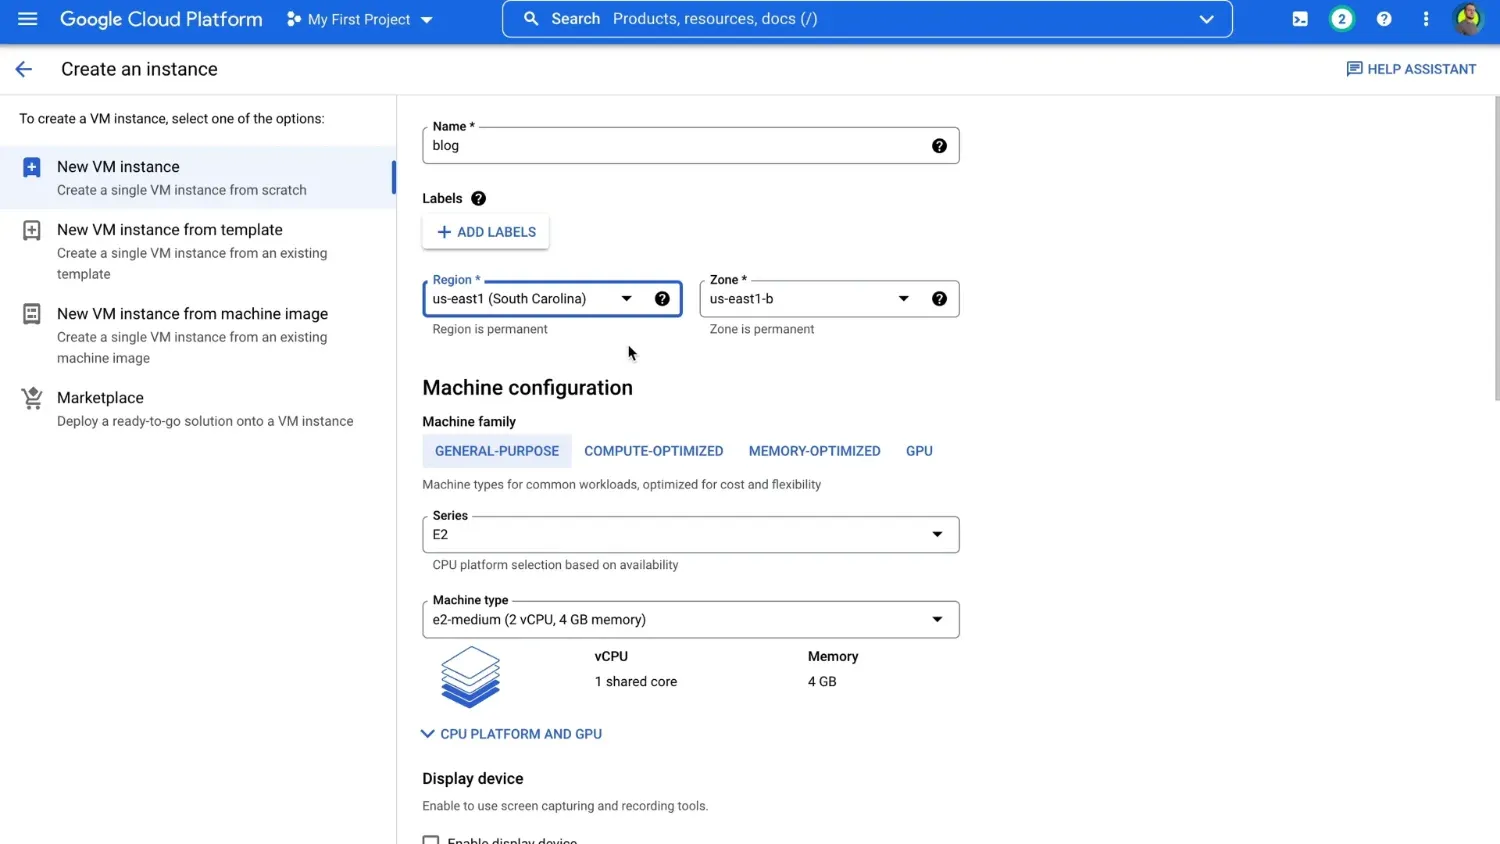
A general rule is to get a server closer to your visitors, but as all free locations are in the US and we'll use a very optimized platform, this is not critical, but I went with US east because it's a bit closer to Europe.
As for the zone — just leave the default one.
For machine type select e2-micro — that's the free option.
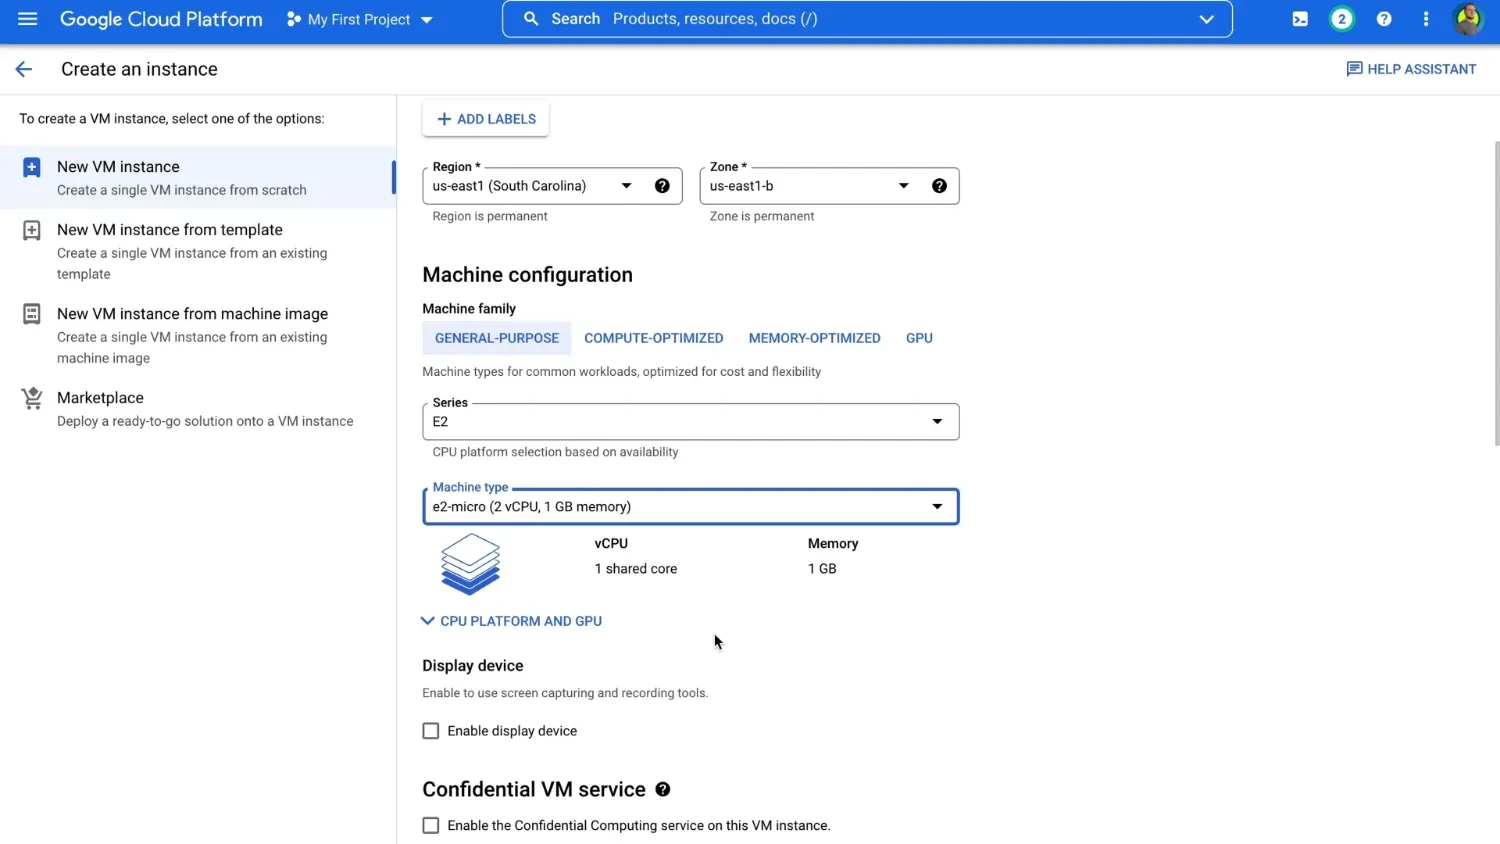
Next in Boot disk section click on Change.
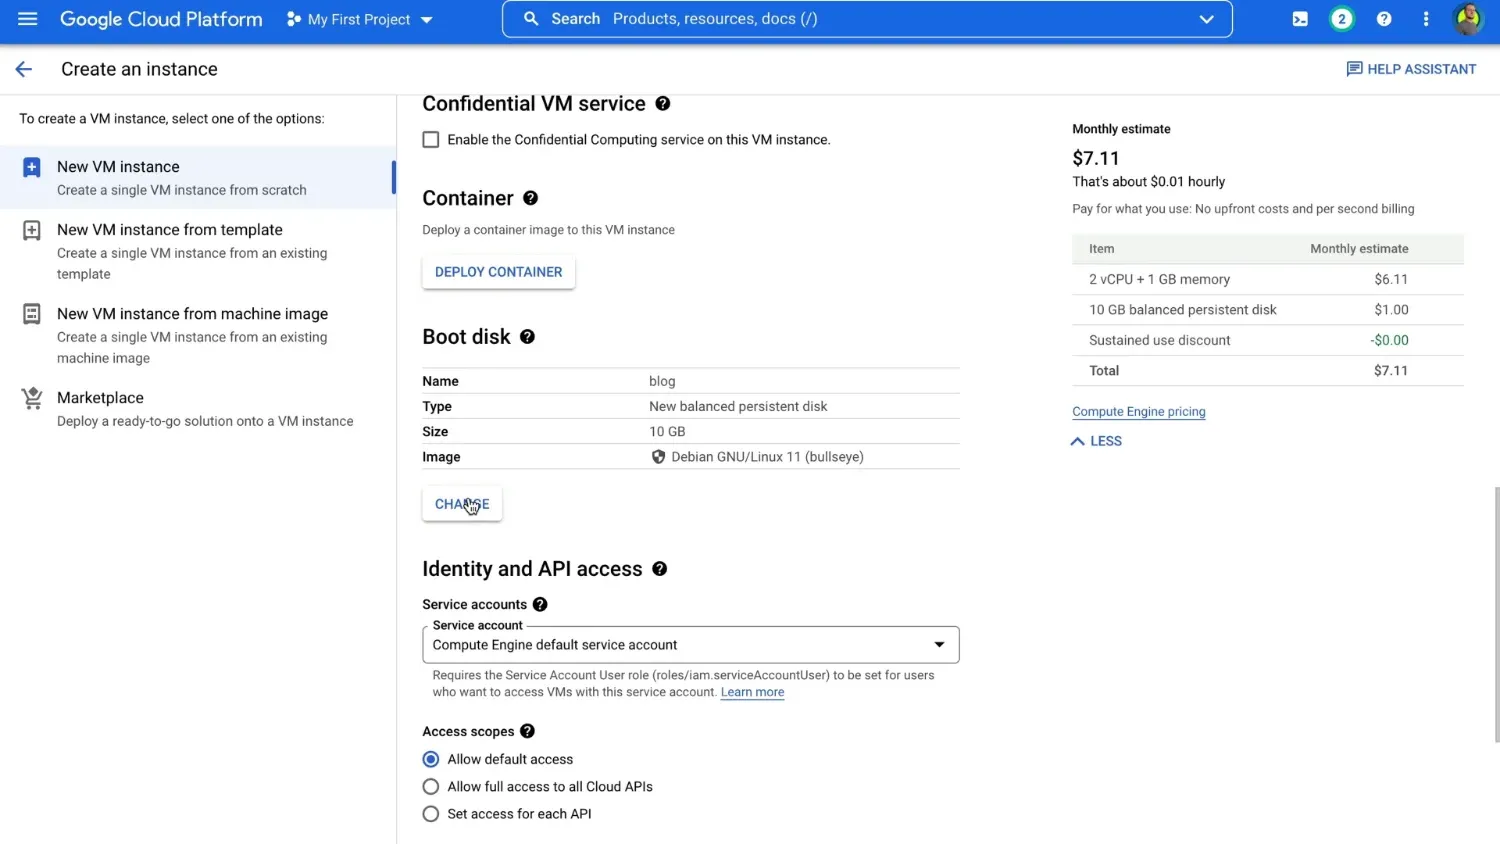
Here select Ubuntu, version 20.04 LTS — that's the one recommended for Ghost.
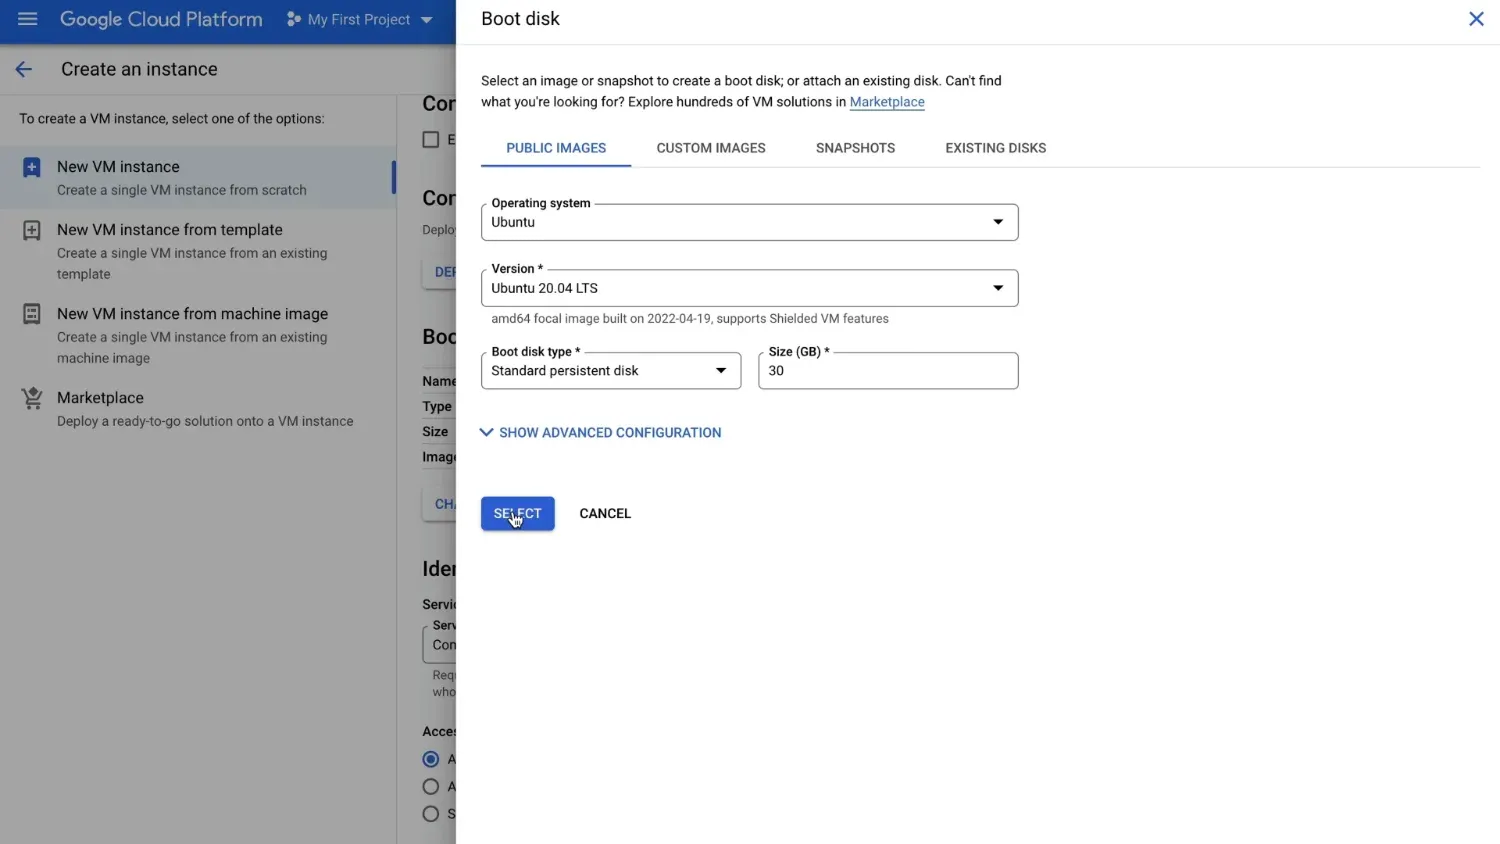
Change disk size to 30 gigabytes and boot disk type to standard persistent drive. And press Select to save changes.
Scroll down to Firewall. Allow both HTTP and HTTPS traffic.
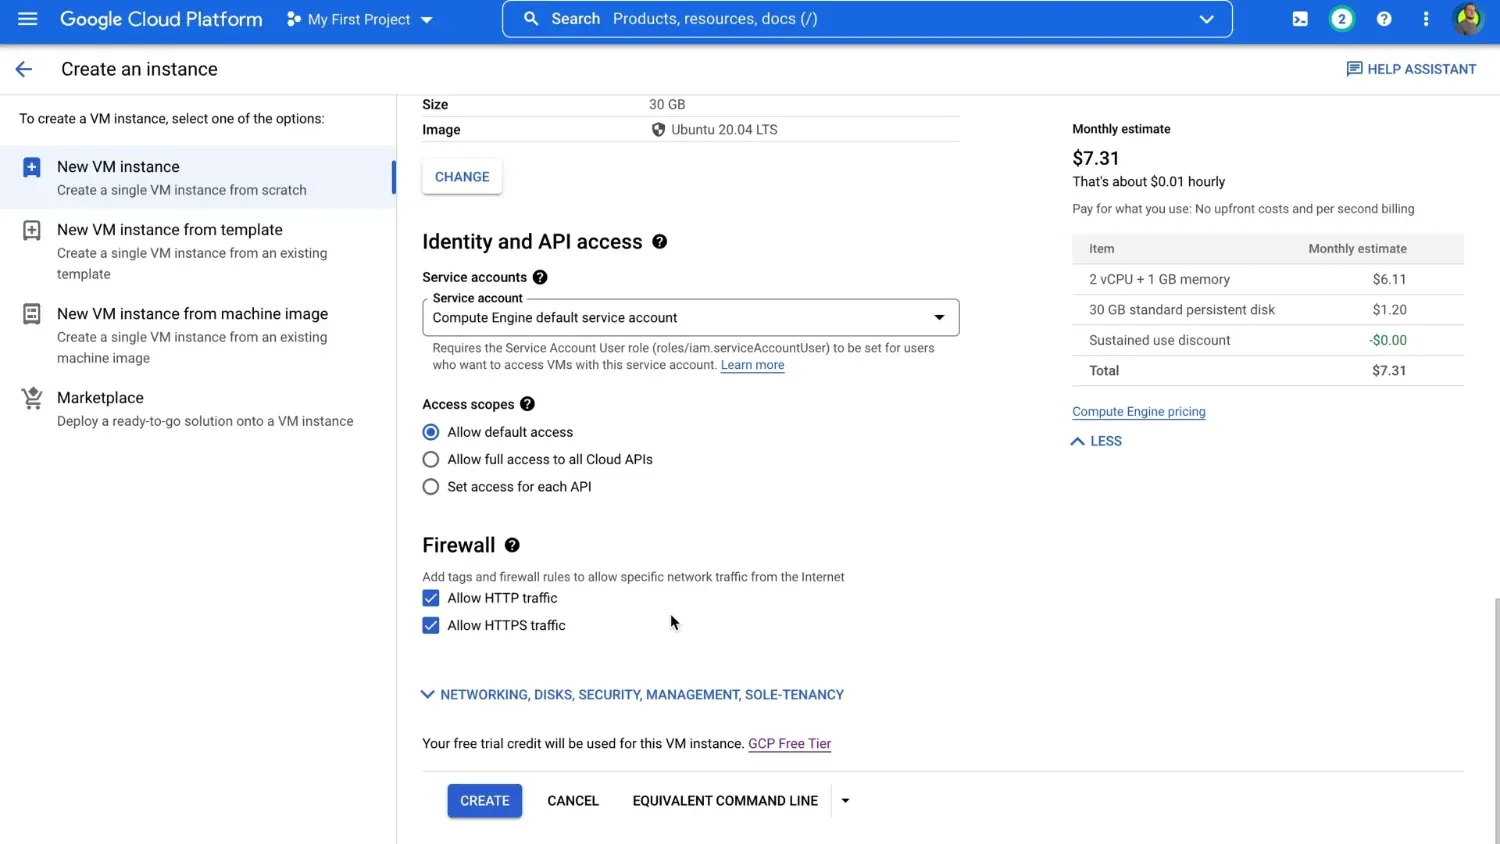
Leave default Networking parameters, with premium network tier preselected.
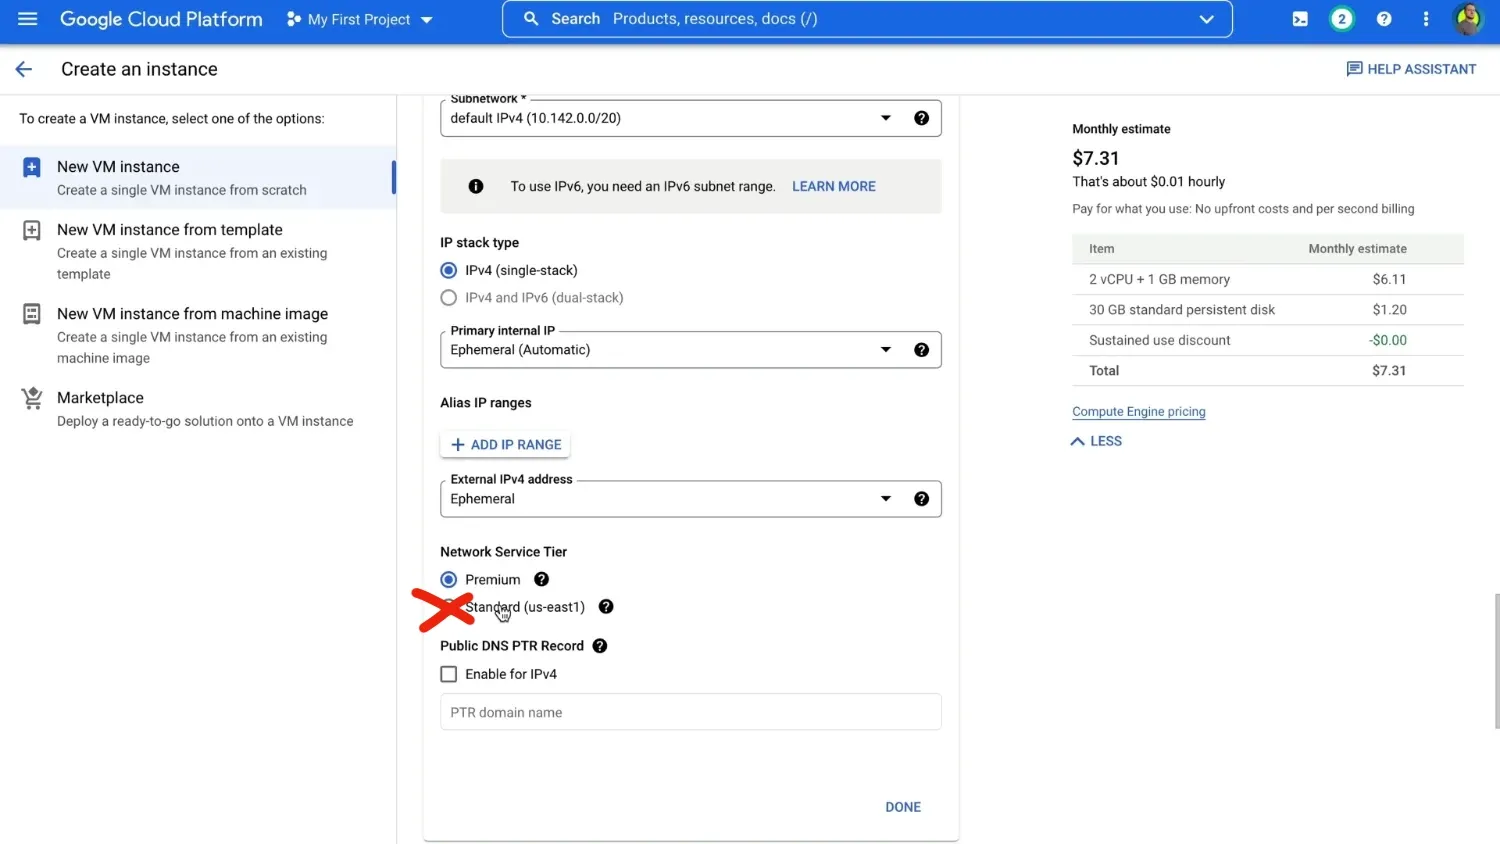
⚠️ Do not change network tier to standard. If you do that — the free tier limit of 1 Gb egress won't be applied and all outbound traffic will be paid.
On the right side, you'll see a monthly estimate. That's just the estimate, and Google won't bill your free-tier usage.
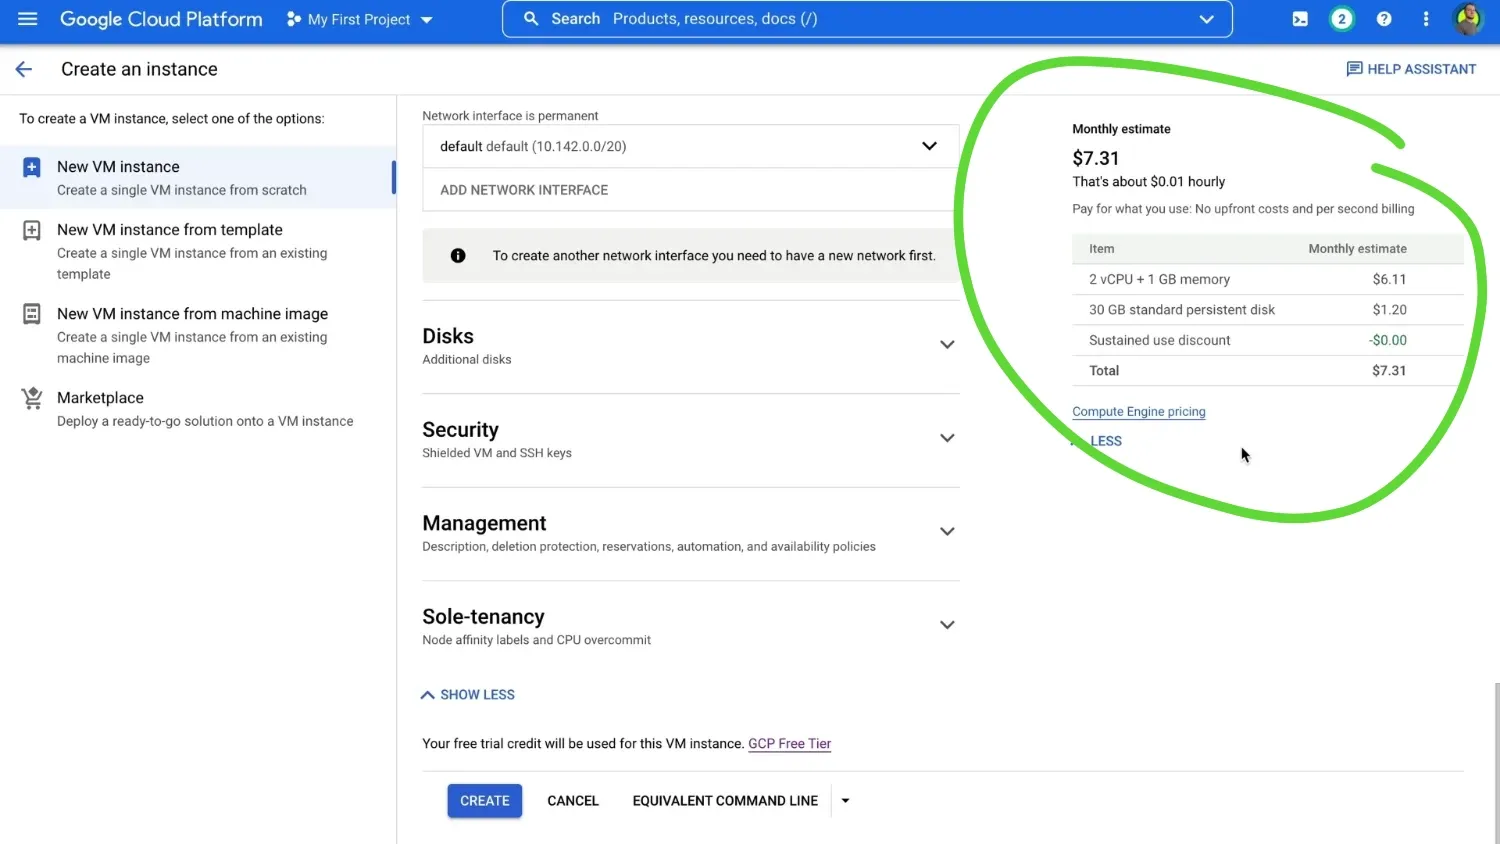
Click create and wait until cloud instance is ready.
Domain configuration
Ok, our virtual machine is ready, and now we can proceed with domain configuration at Cloudflare. If you've bought a domain at Cloudflare like I did — skip to the next step.
Changing nameservers (domains outside Cloudflare)
If you registered your domain at Freenom or any other registrar, there will be an additional step — changing domain name servers to the ones provided by Cloudflare. First, enter your account at Cloudflare - Websites - Add a Site.
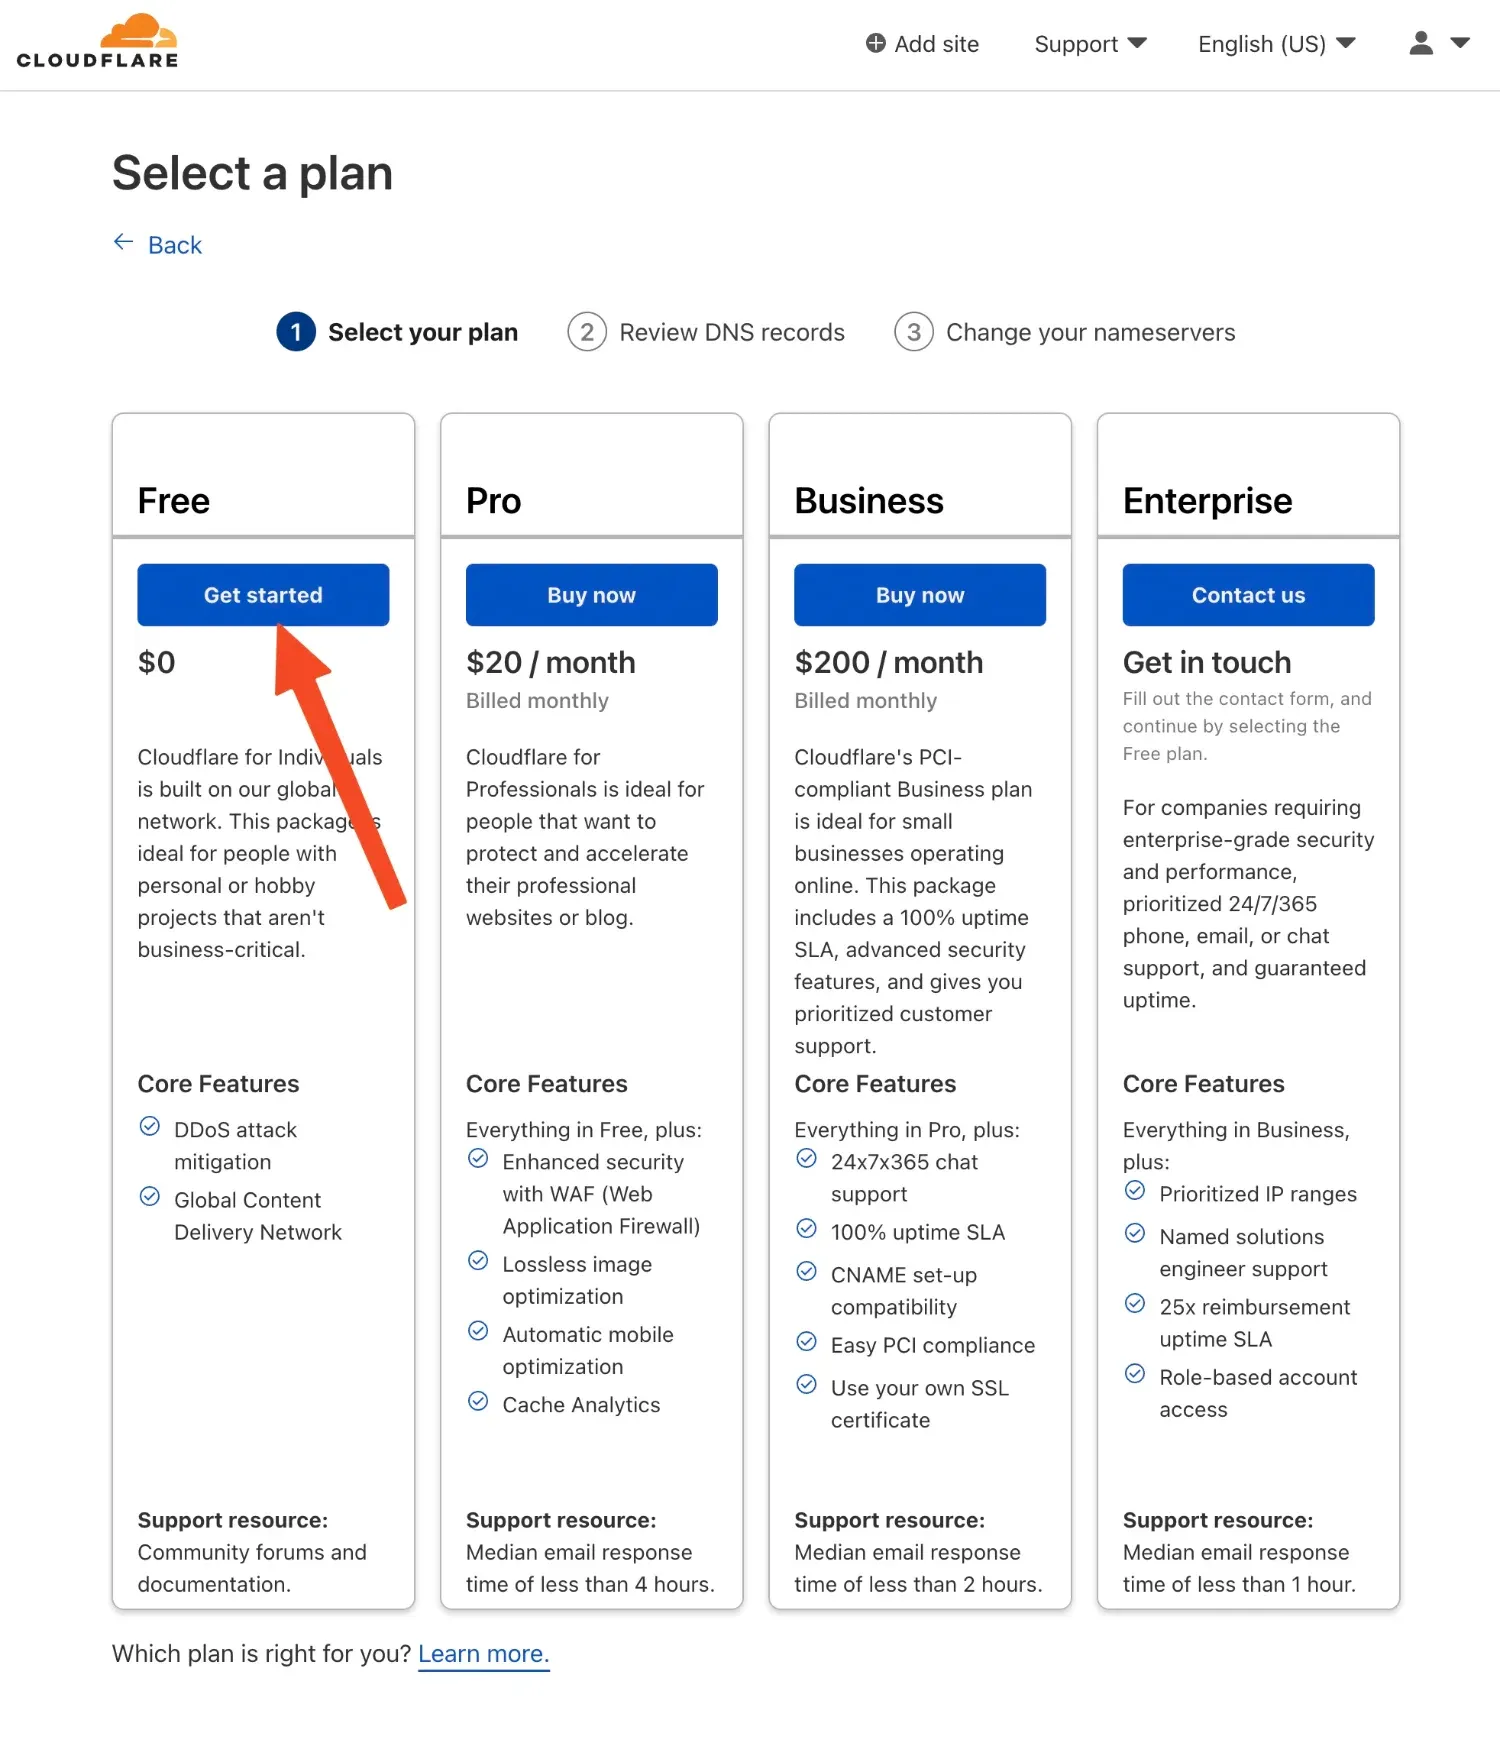
Select a free plan,
skip the next step
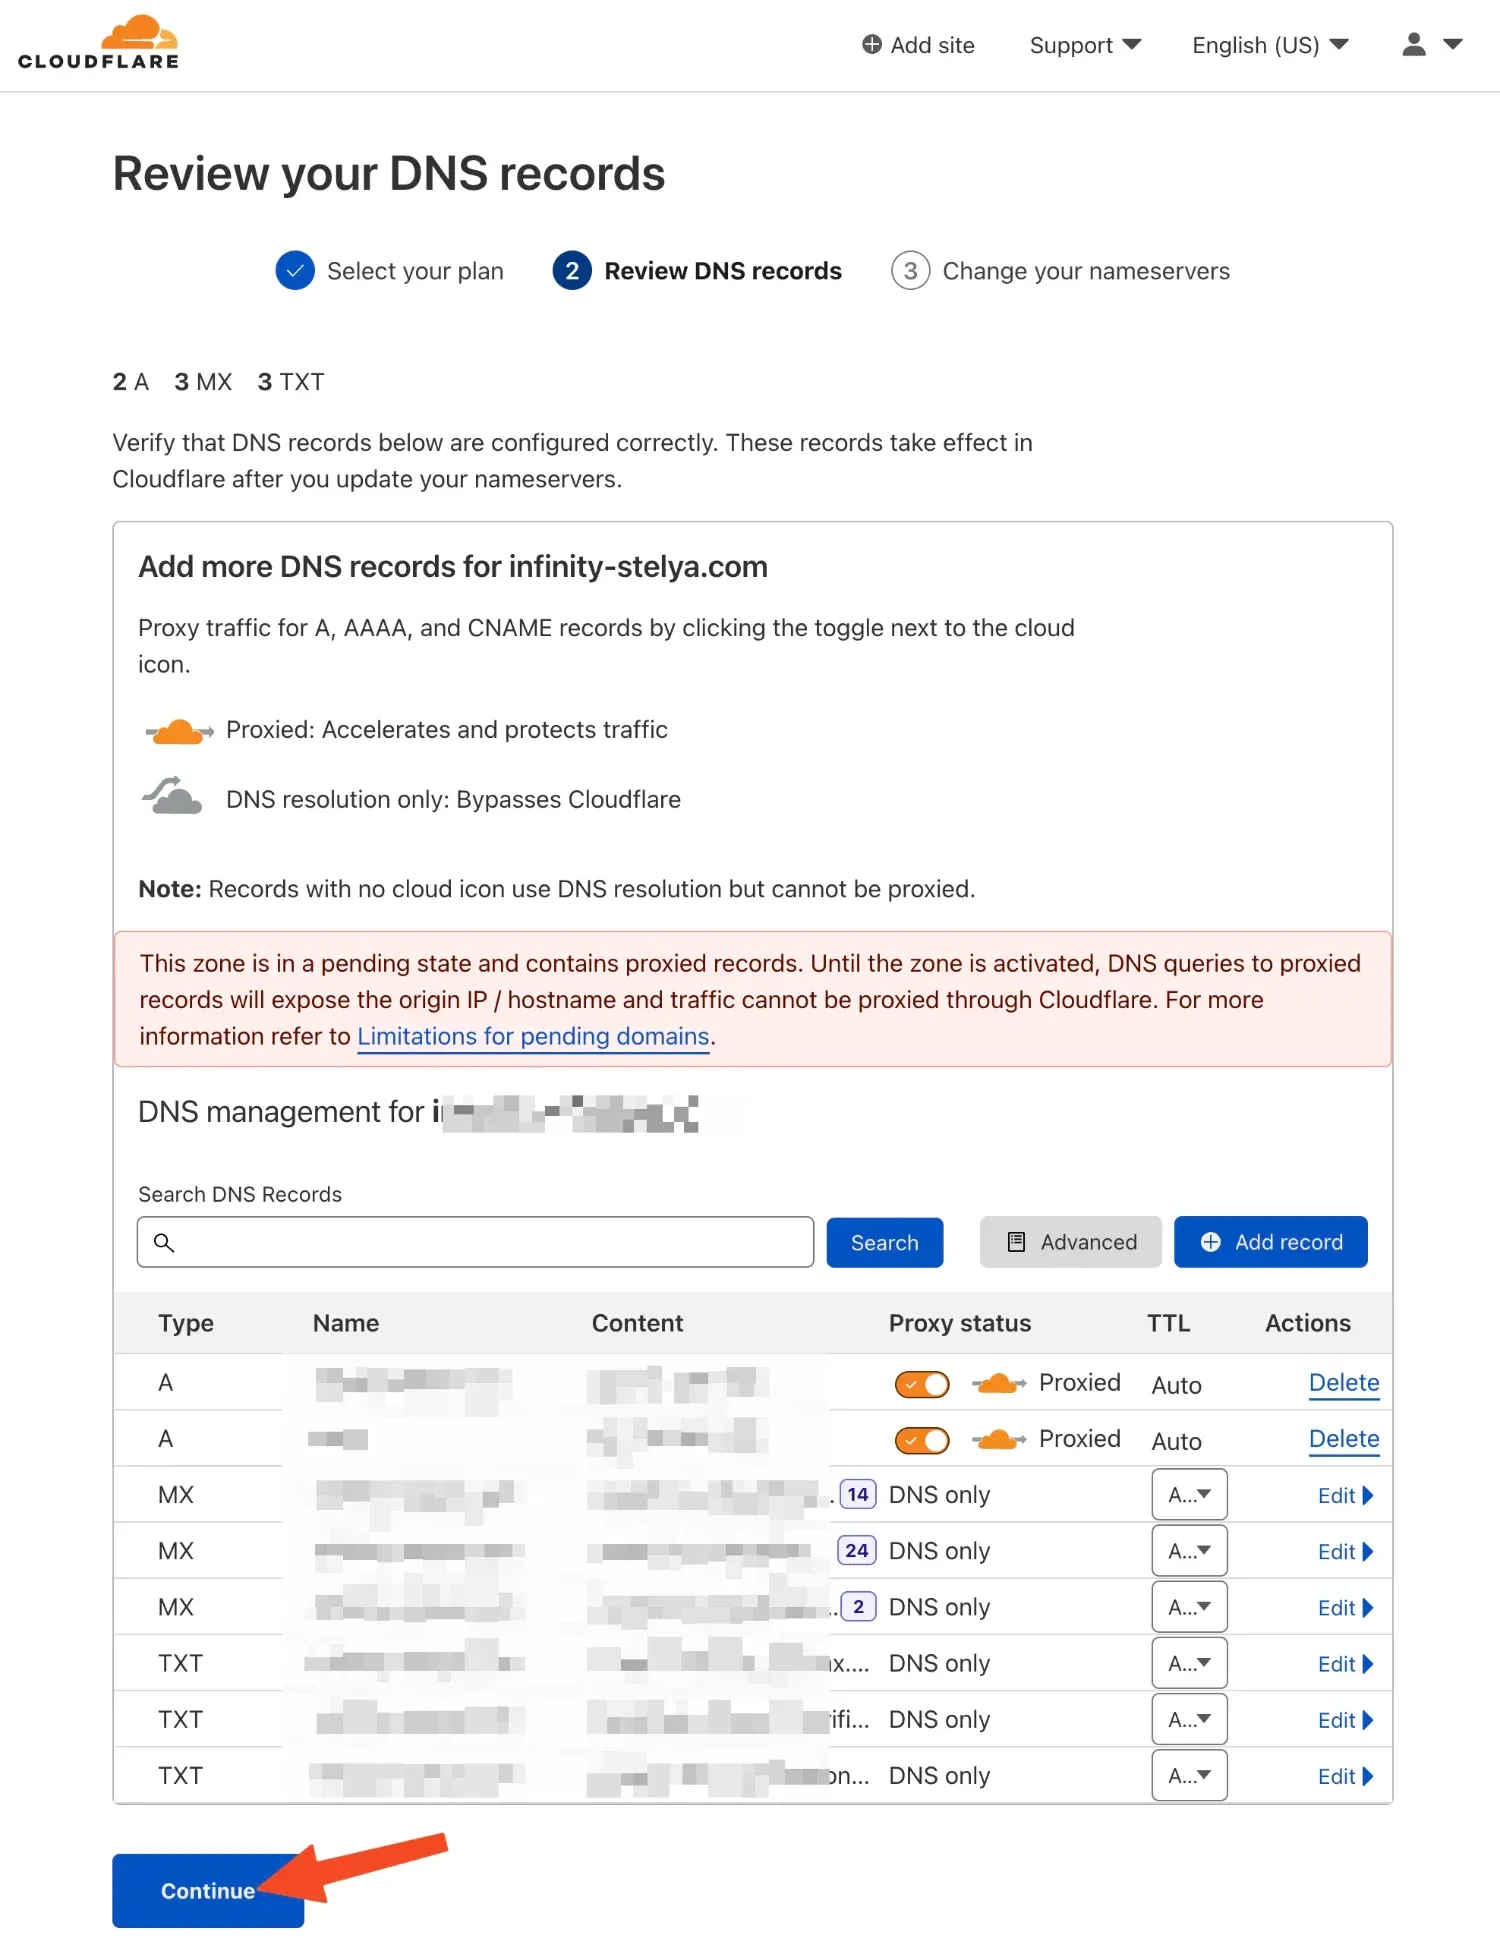
and you'll see the nameservers you'll need to change to.
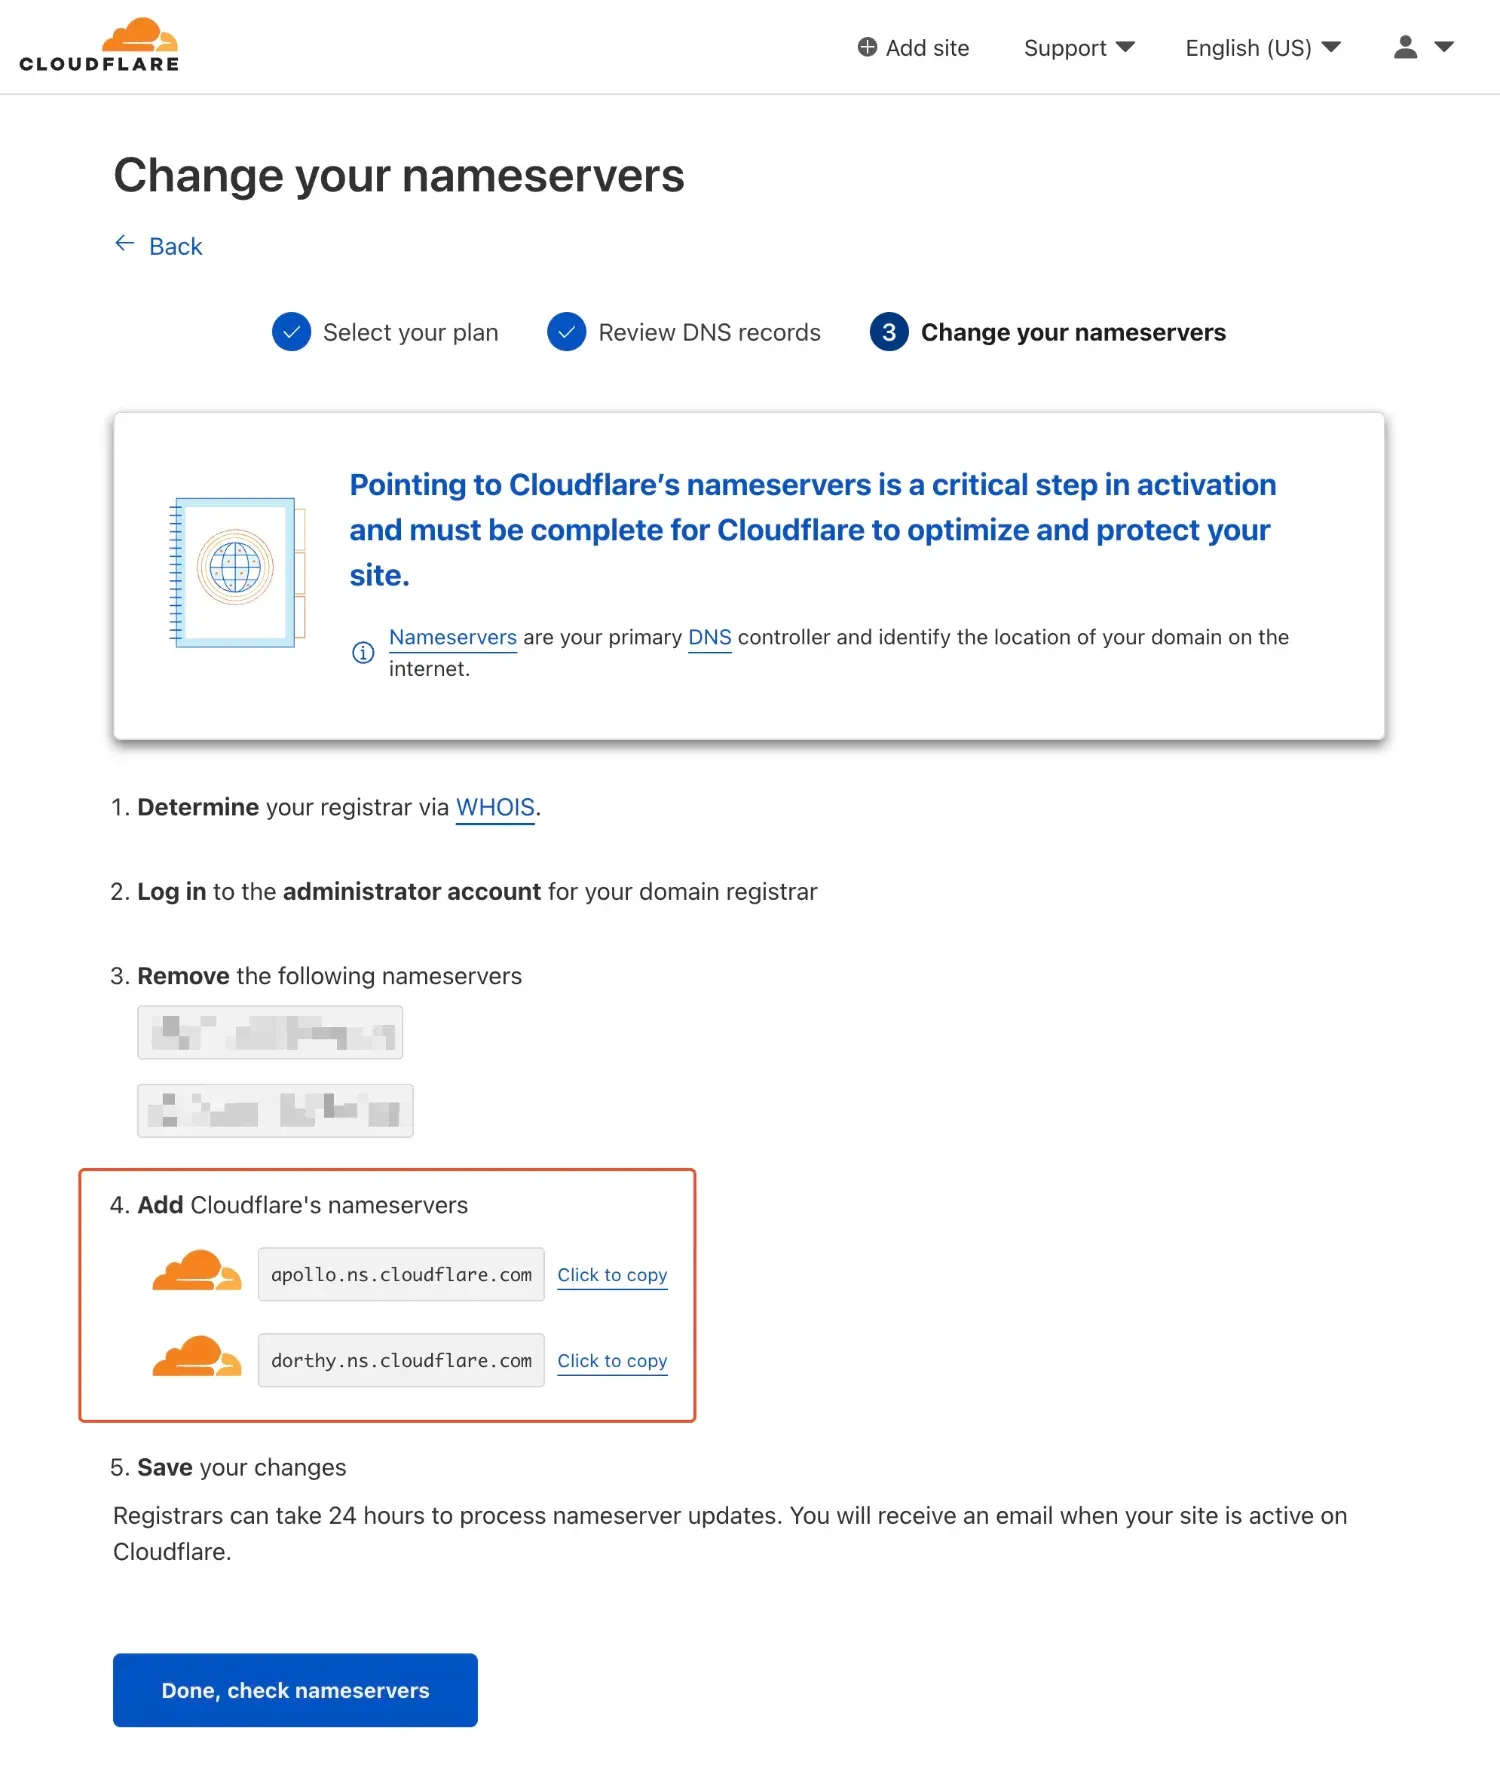
How to change nameservers depends on your registrar.
Changing domain nameservers at Freenom
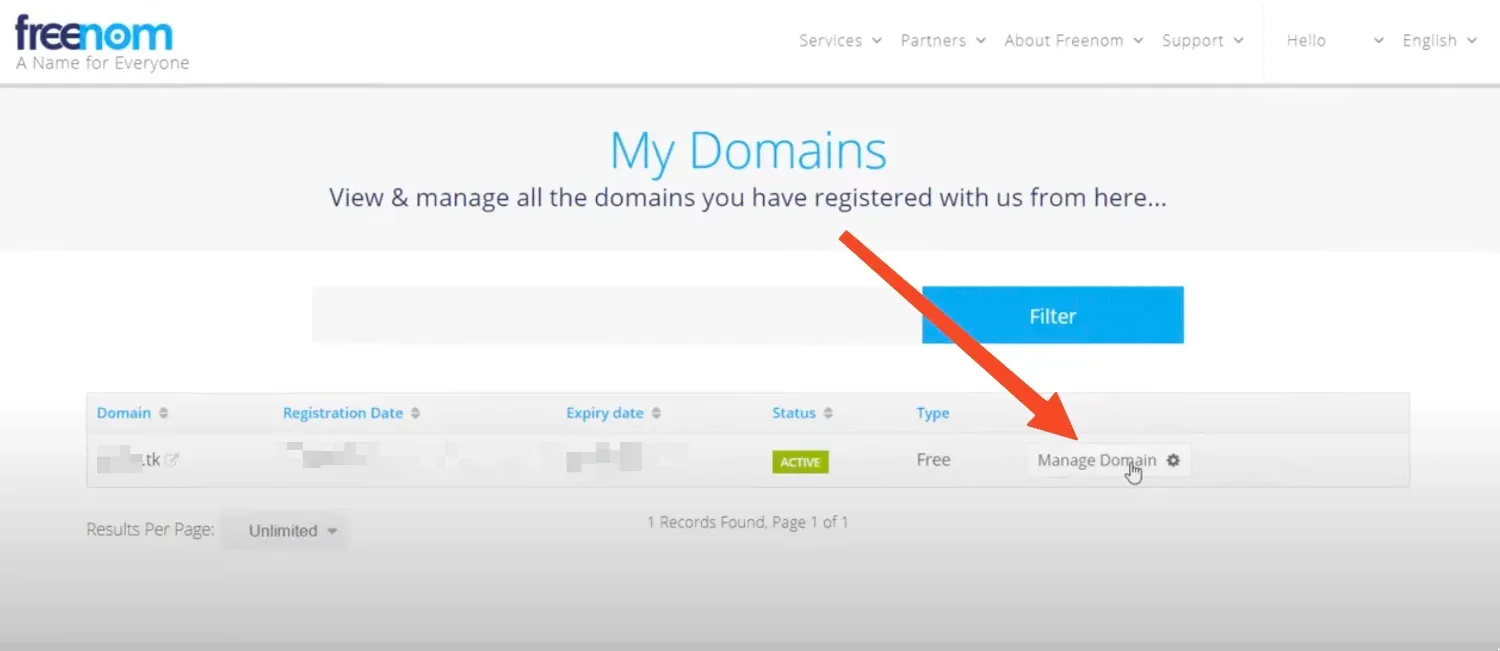
Head to My Domains
Click on Manage Domain
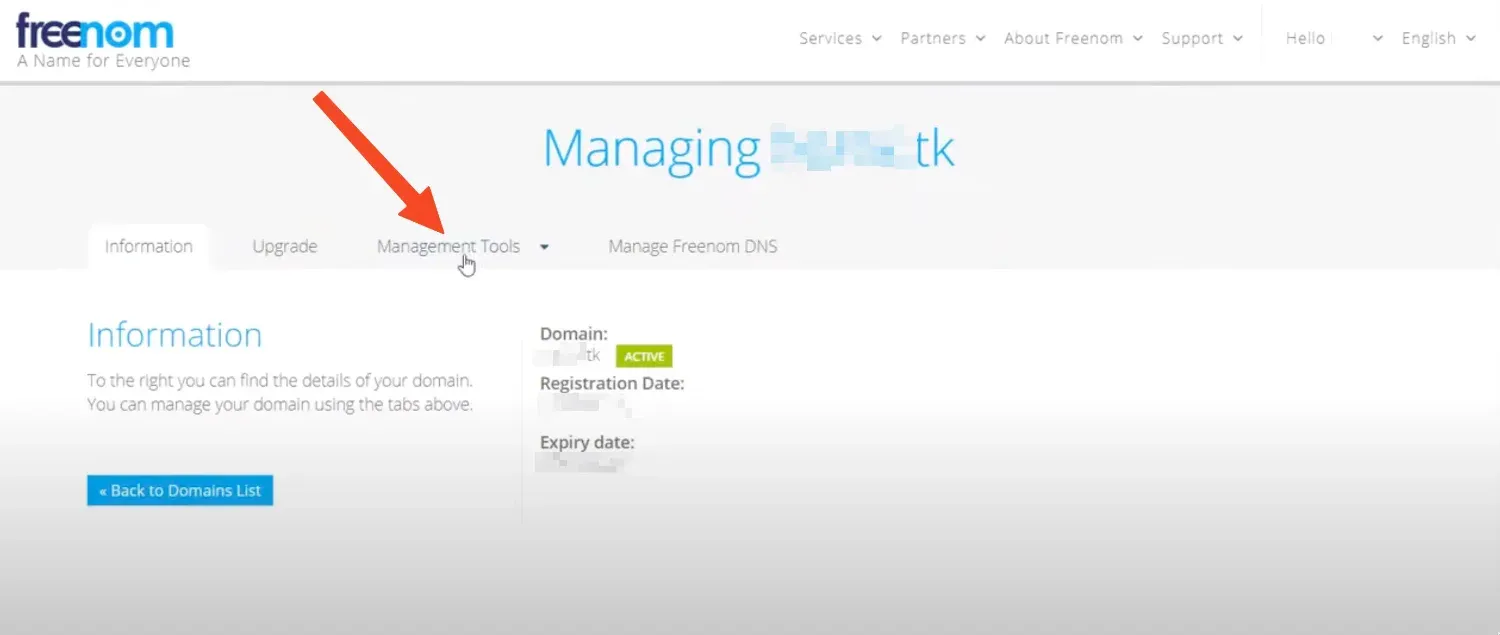
Click on Management Tools
Then on Nameservers
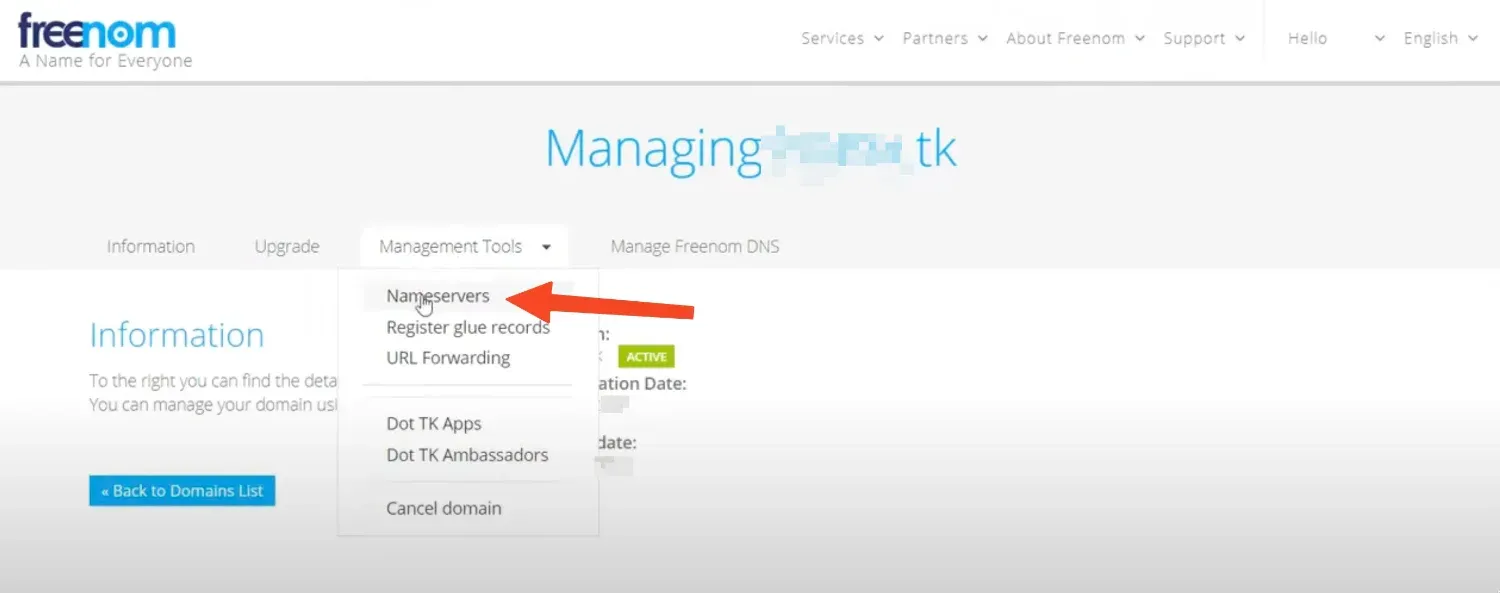
And enter nameservers provided by Cloudflare.
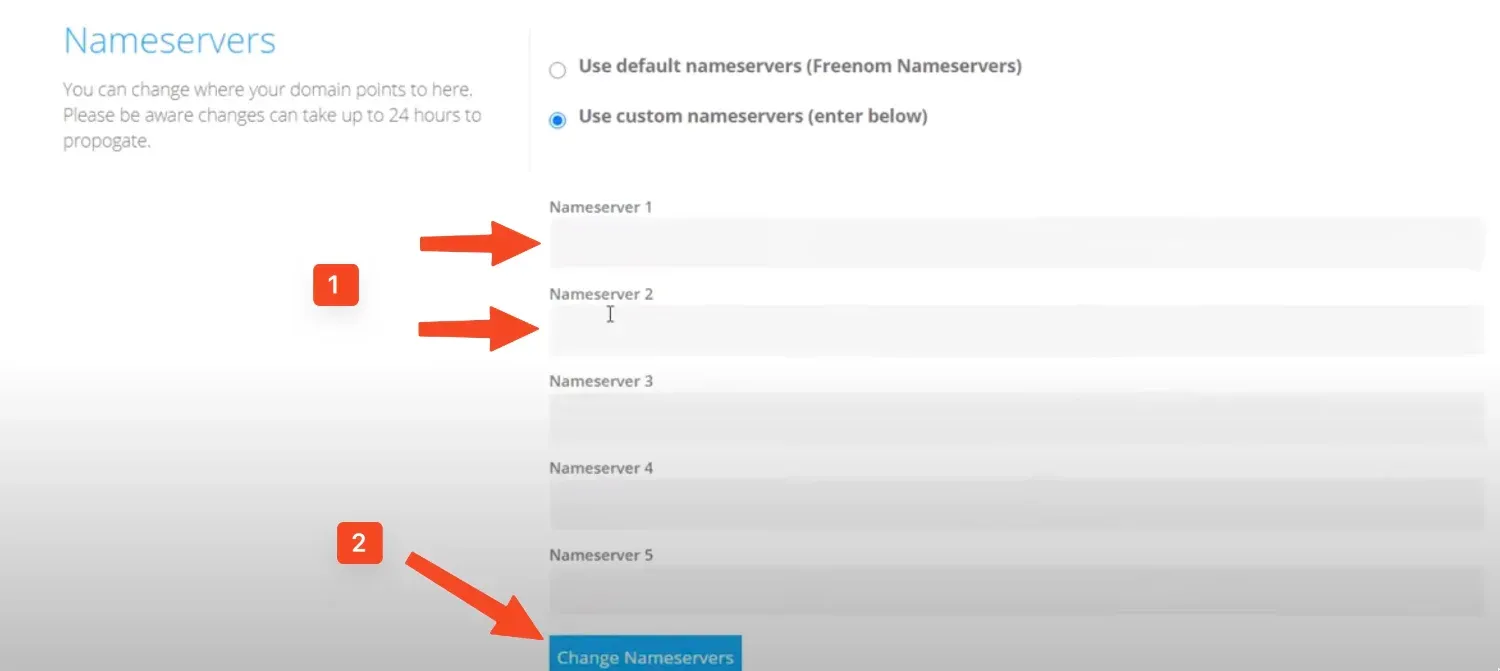
Press Change Nameservers, wait for 15-30 minutes, and press check button back at Cloudflare.
DNS configuration at Cloudflare
Ok. We're at DNS section in Cloudflare dashboard. Press Add record.
Leave its type as it is, and copy external IP of your Google cloud instance.
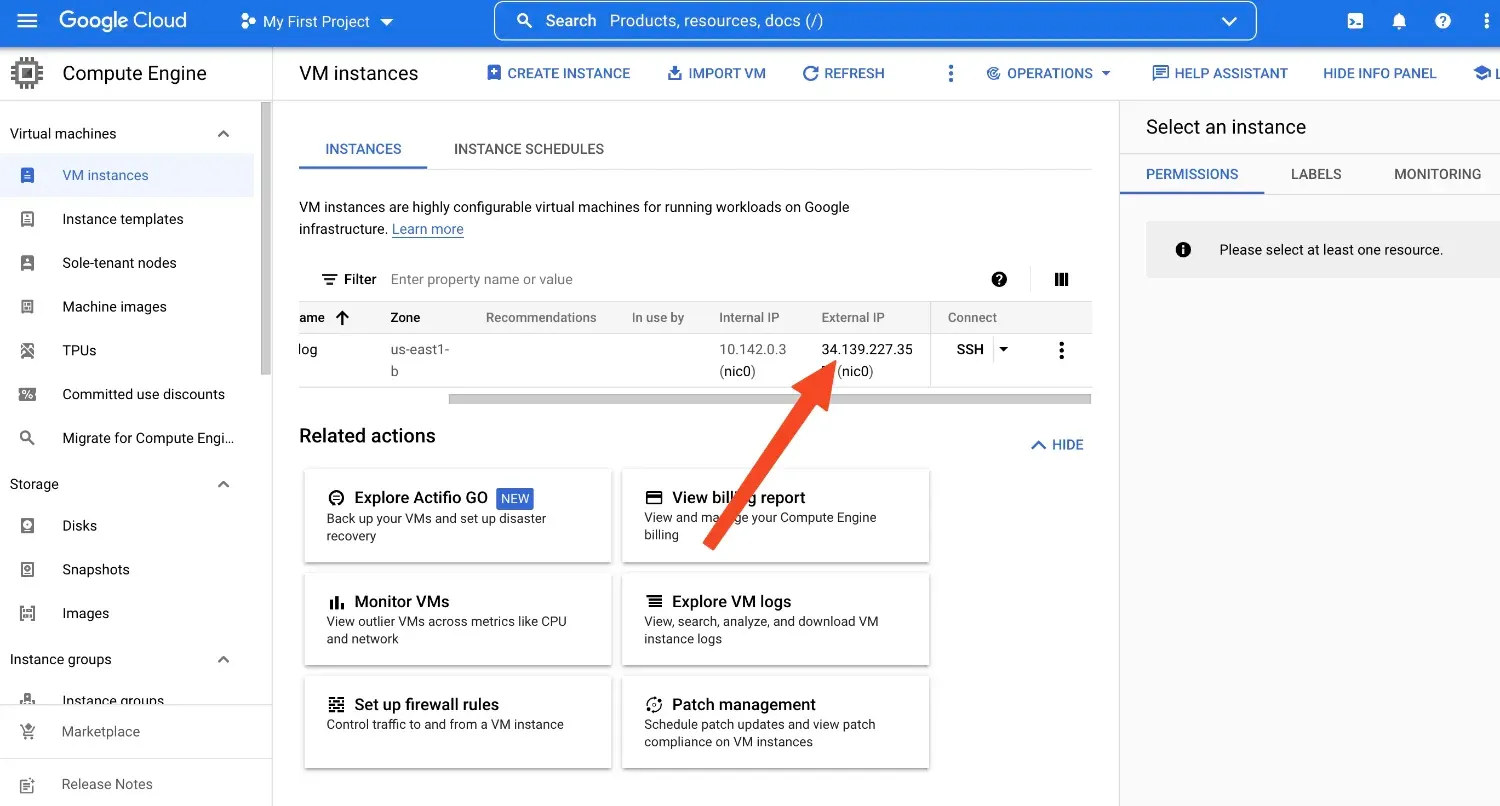
Enter "at" for the name, and paste ip you've copied as IPv4 address.
Click Save.
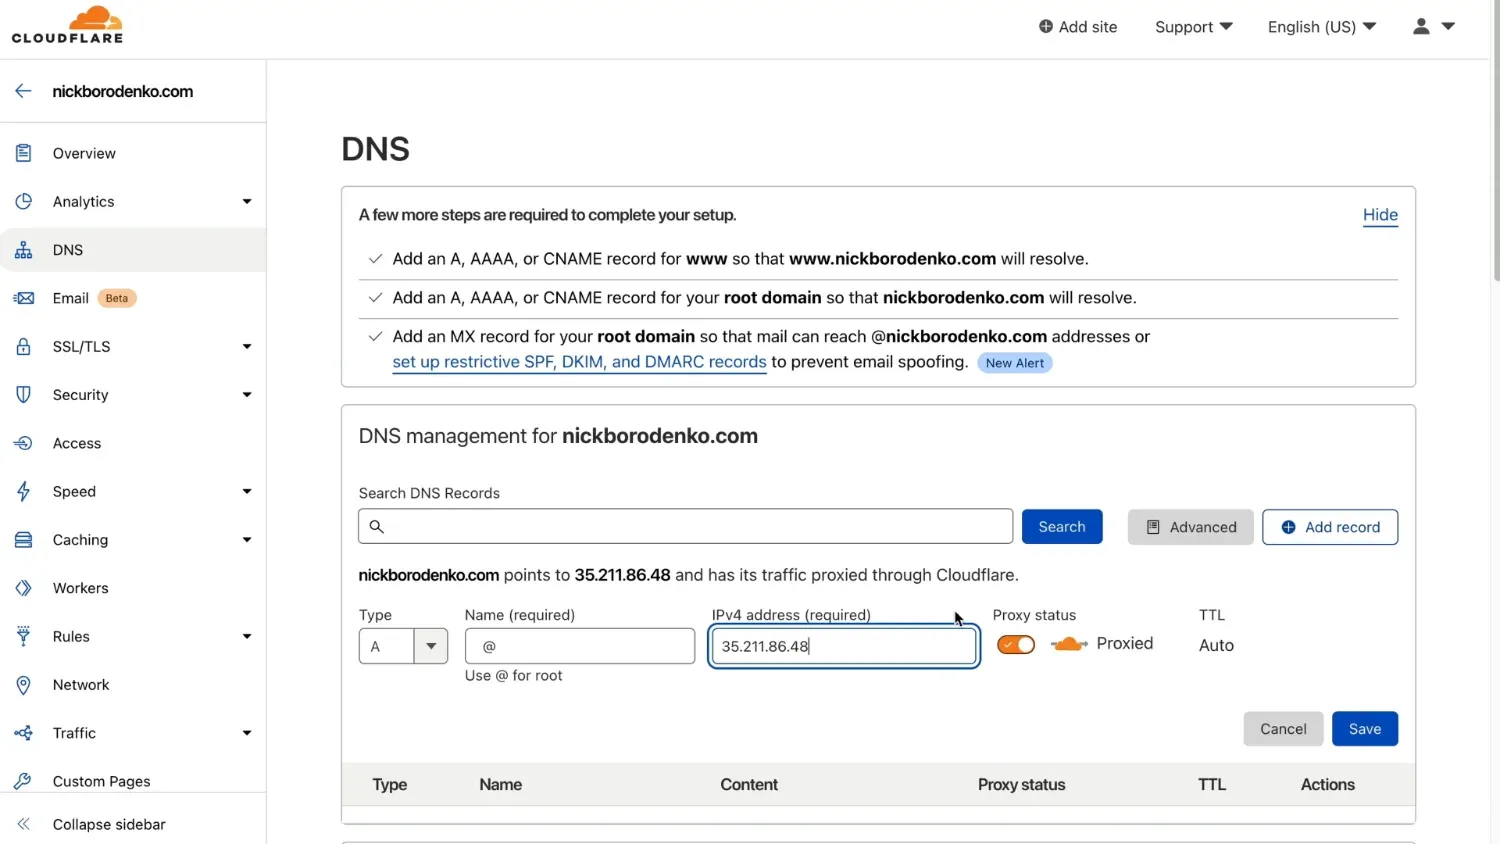
Next, add a new record. Change its type to CNAME. Name will be www, in the target field write down your domain name.
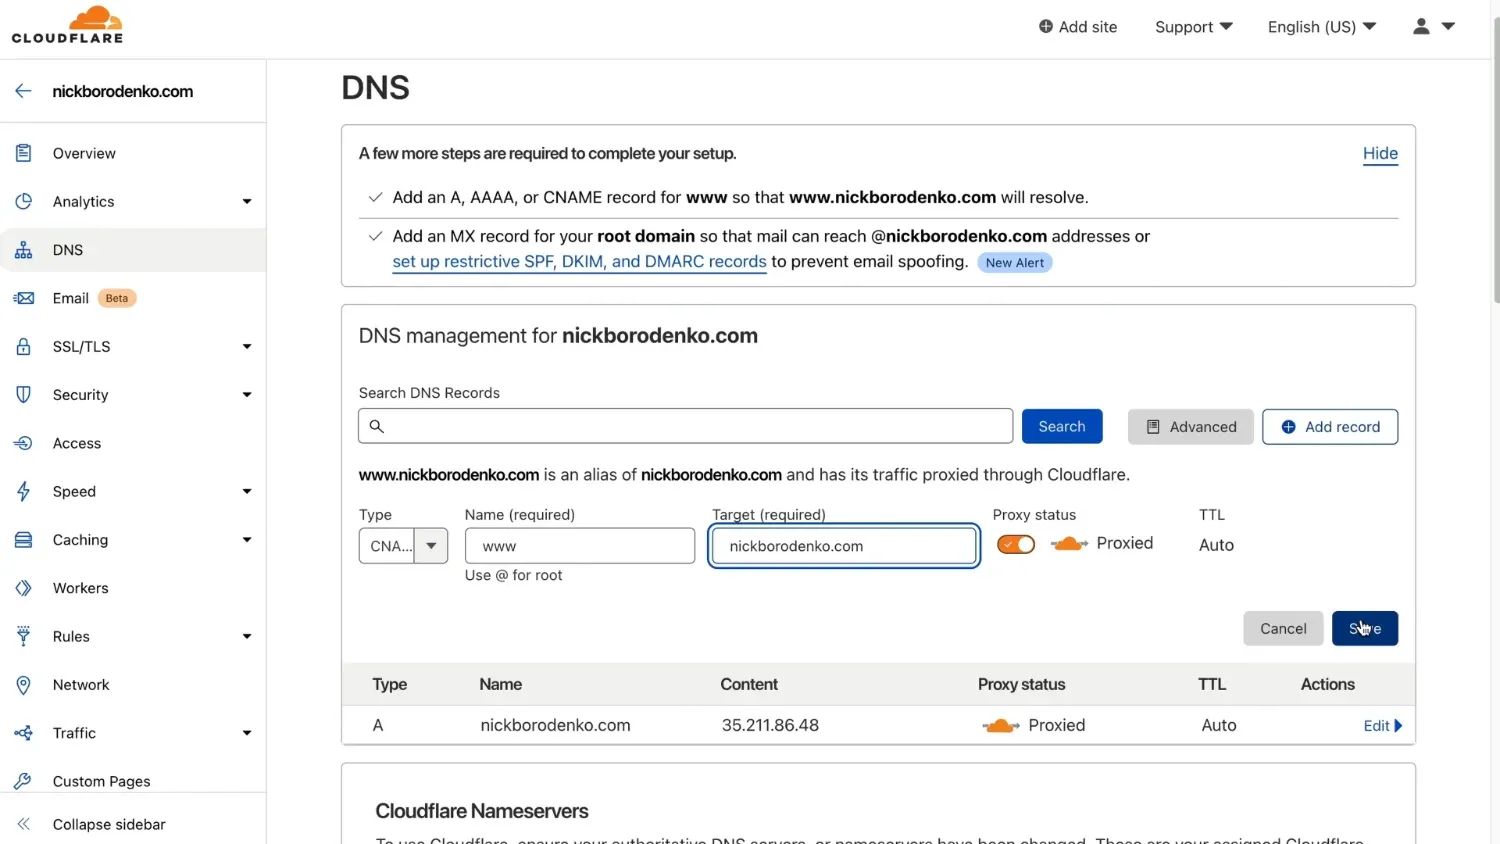
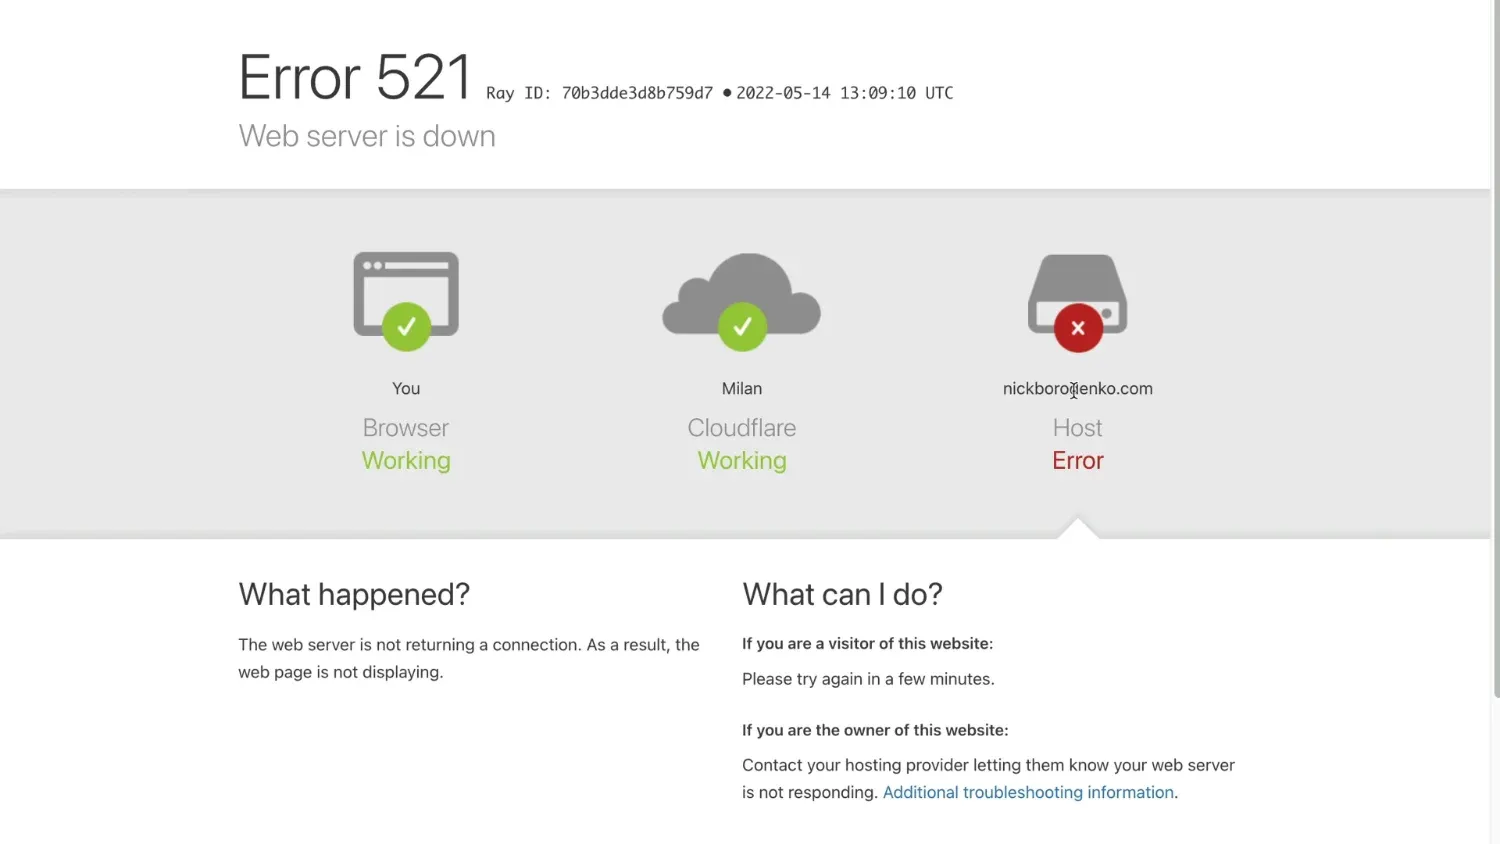
Enter your domain in a browser tab — it should be showing something like this.
Installing Cyberpanel
Ok. Now we are going to install ghost. It's possible to do that by installing it directly through the server terminal, which is not user-friendly, or installing Cyberpanel first to later configure ghost in a simple user interface.
Even with Cyberpanel we still will have to use the console, but - no worries - it will be easy.
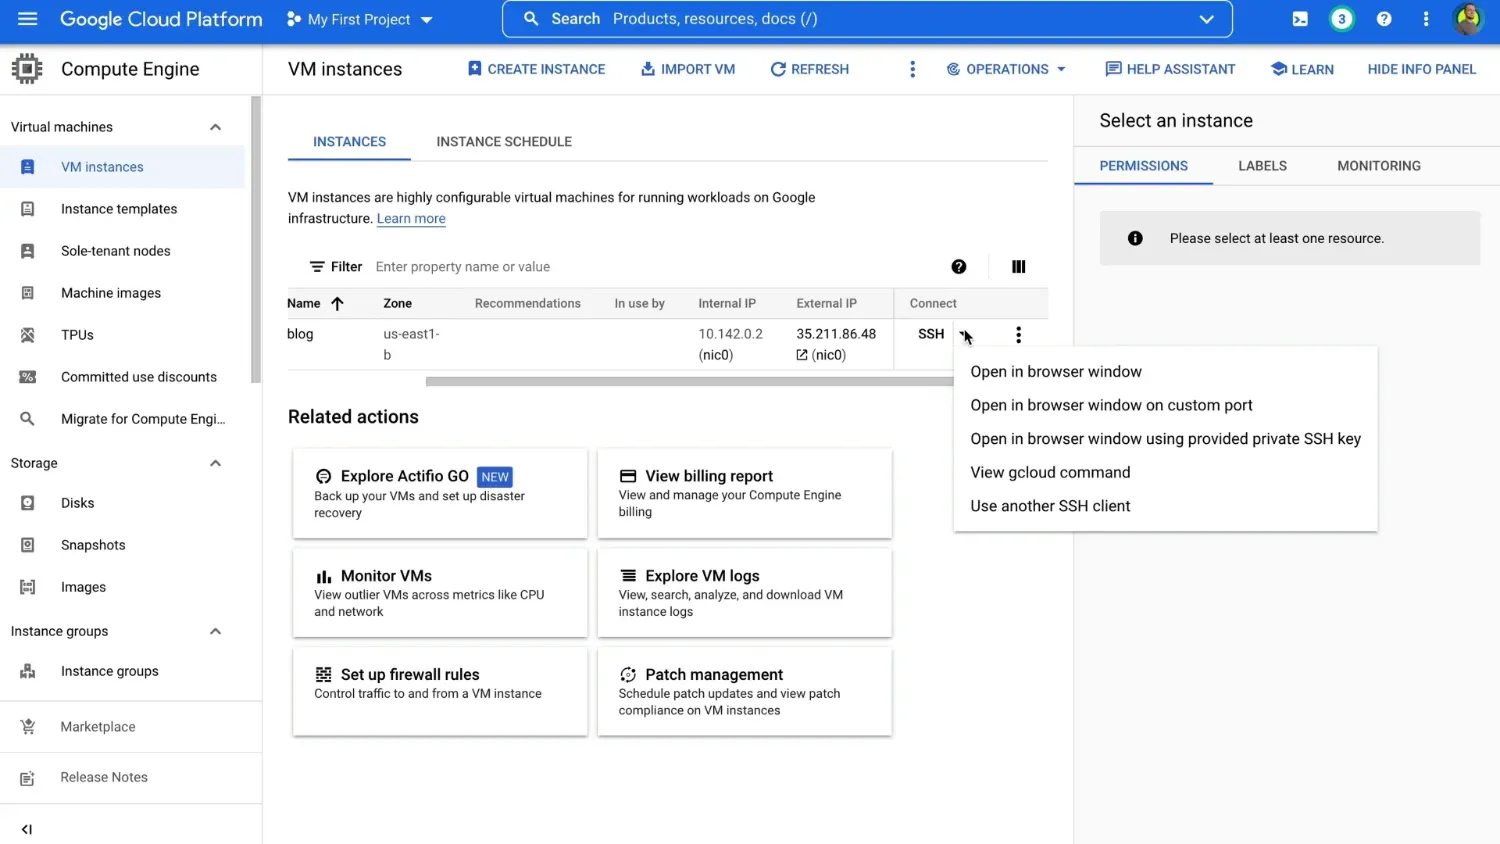
Get back to Google Cloud Platform. Press on the arrow next to SSH right here, and select Open in a browser window.
Copy-paste commands one by one. You can use either Ctrl V or Cmd V on mac to paste or right mouse button click and select paste.
Wait until each command is completed. And then proceed to the next one.
First, we want to update our operating system components.
sudo apt update -y && sudo apt upgrade -y
When the update is completed, we need to restart the server.
shutdown -r nowLet it reboot for a minute and press Retry to enter console again.
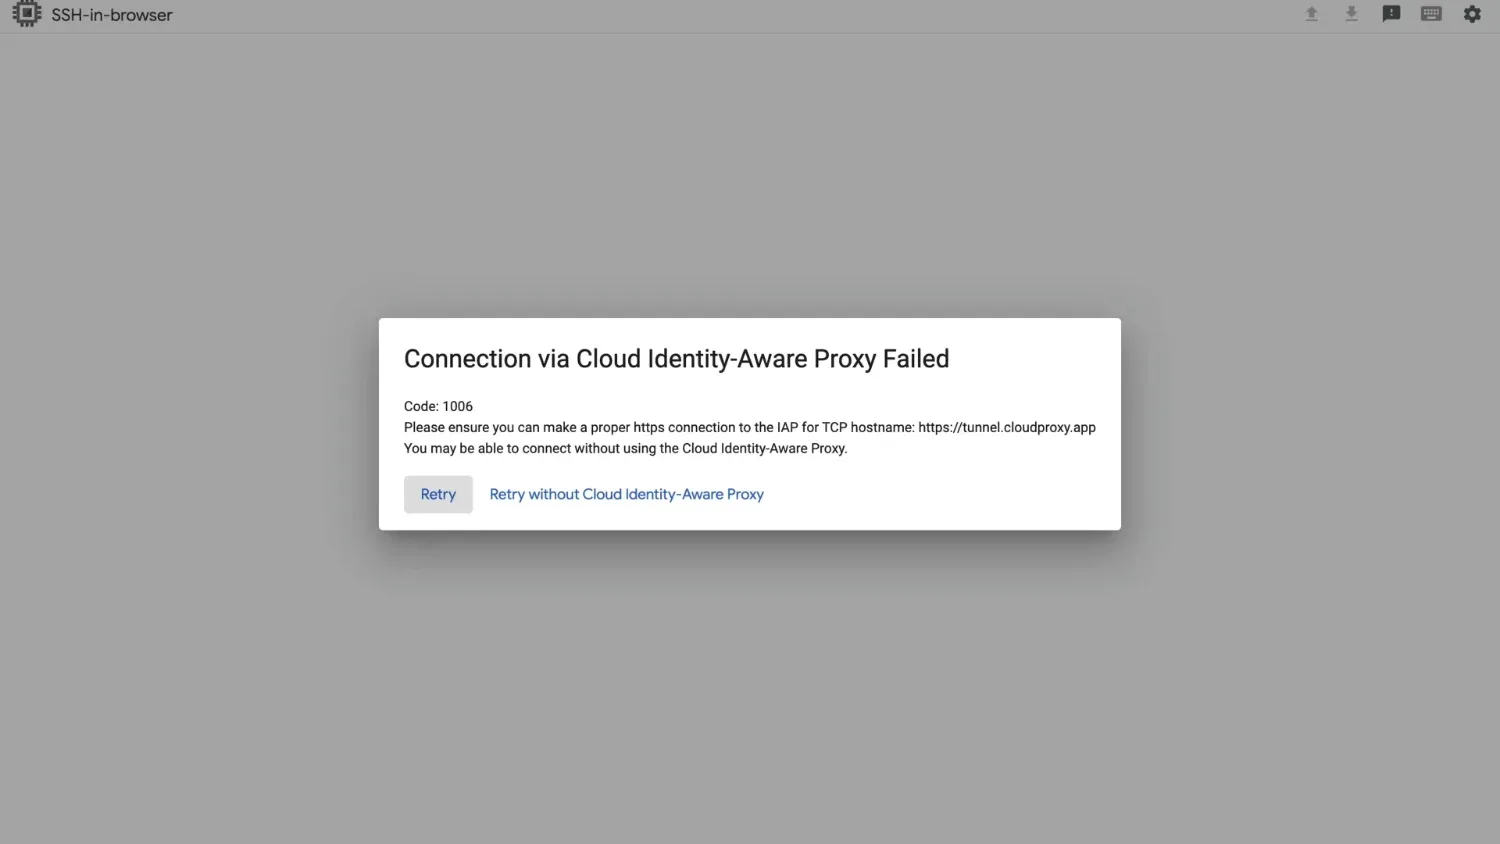
You will need to have root permission. So, use the following command:
sudo su -Now we'll install Cyberpanel. Copy-paste this command
sh <(curl https://cyberpanel.net/install.sh || wget -O - https://cyberpanel.net/install.sh)and follow on-screen installation process.
We want to select 1 - Install Cyberpanel
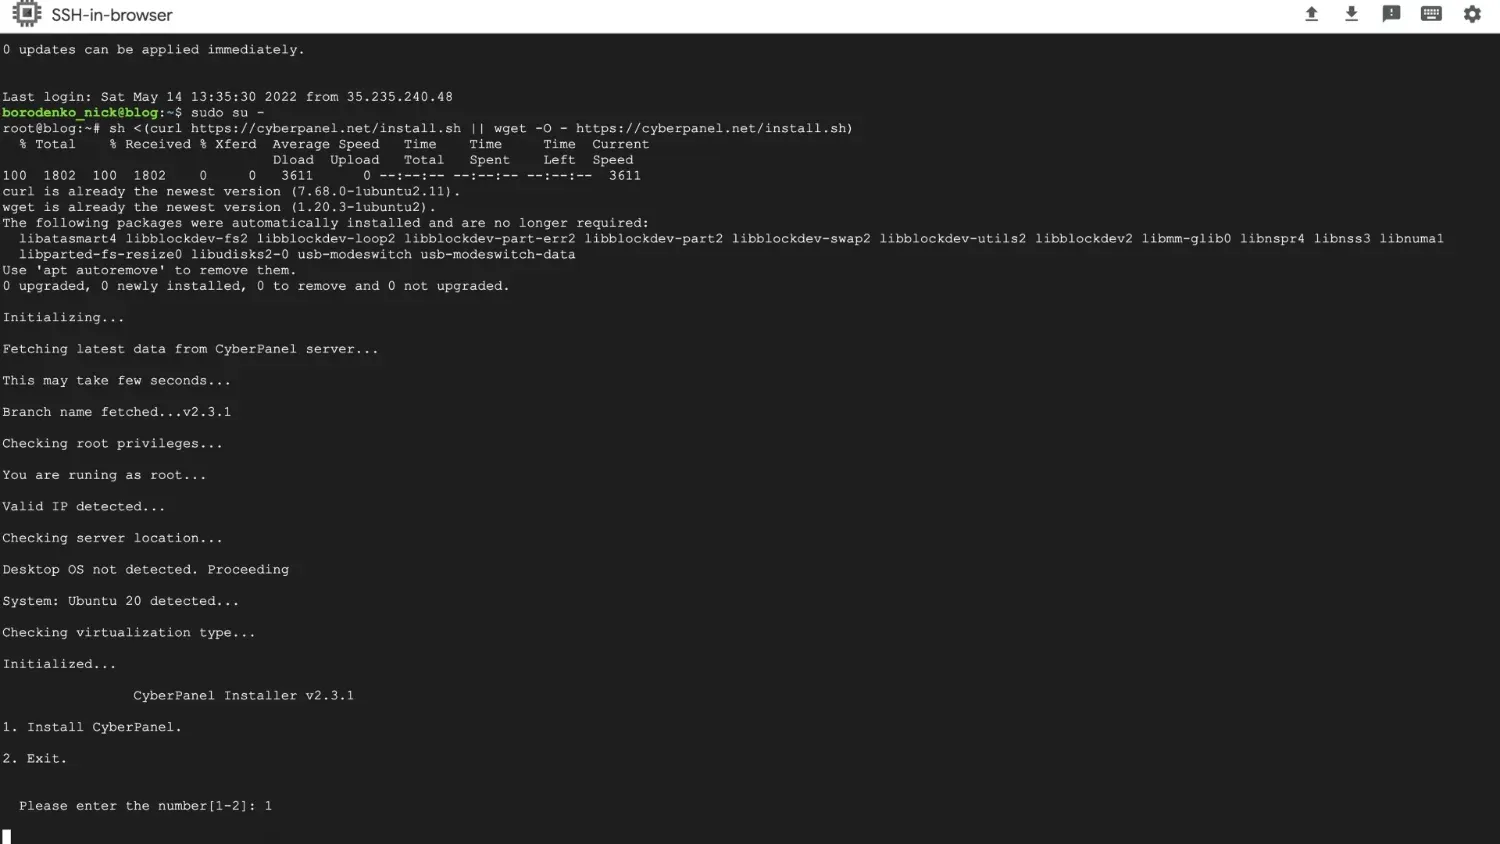
1 - Install with OpenLiteSpeed which is free
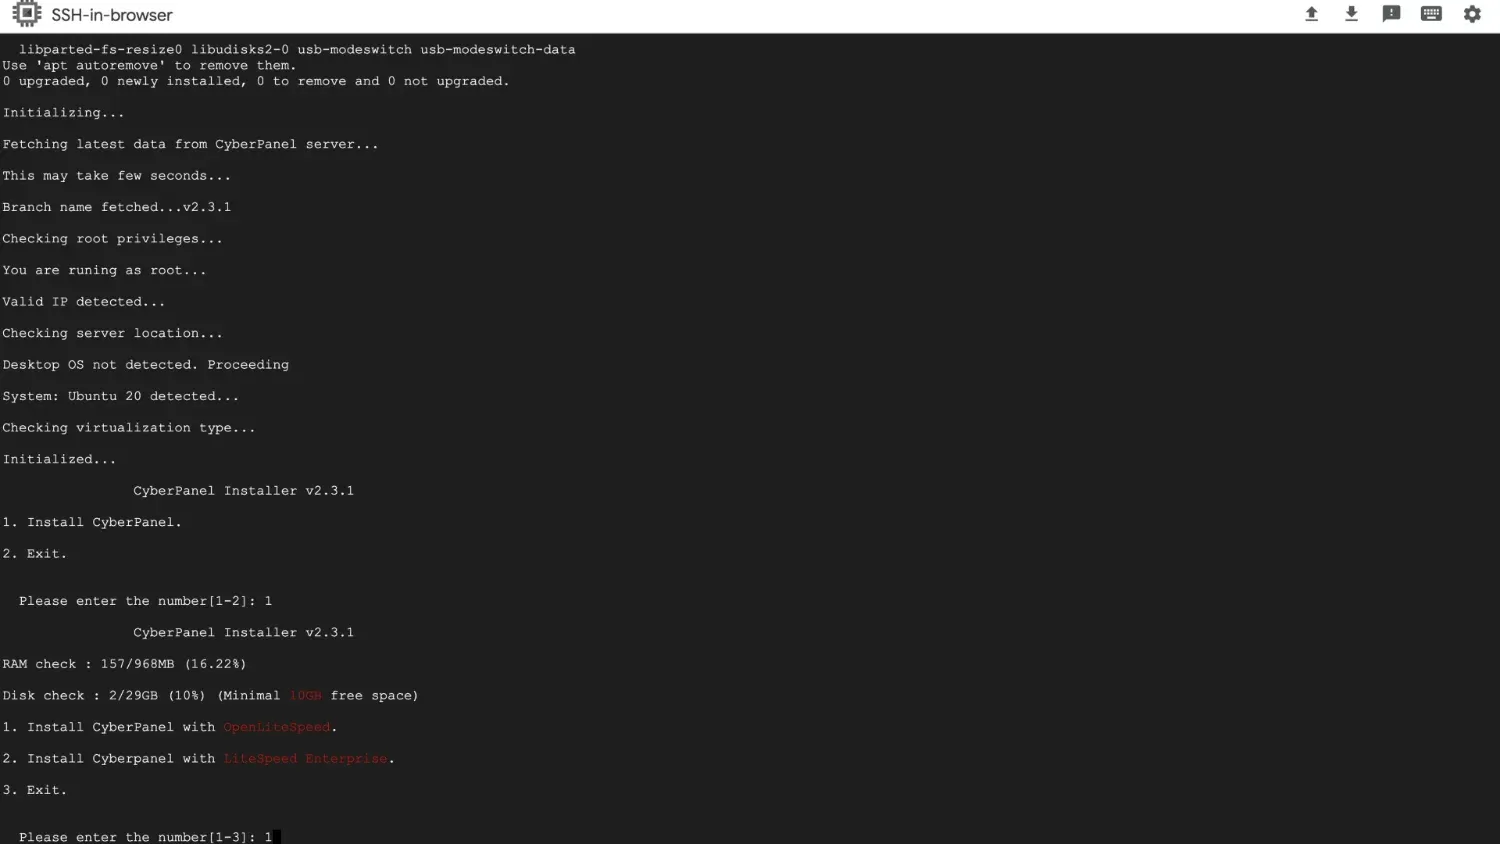
Install Full service - Enter Y
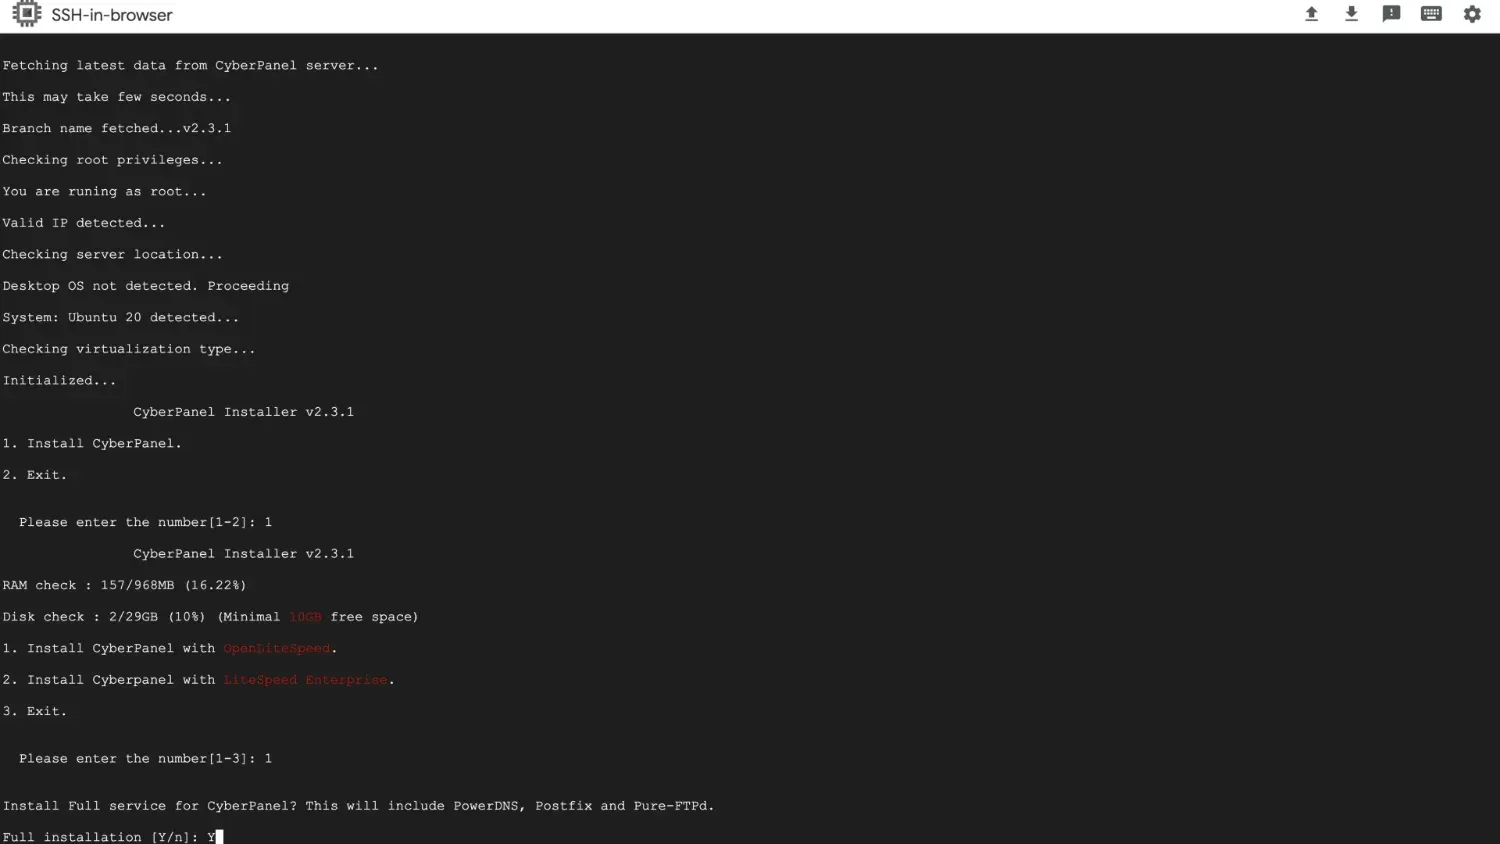
For remote MySQL enter N
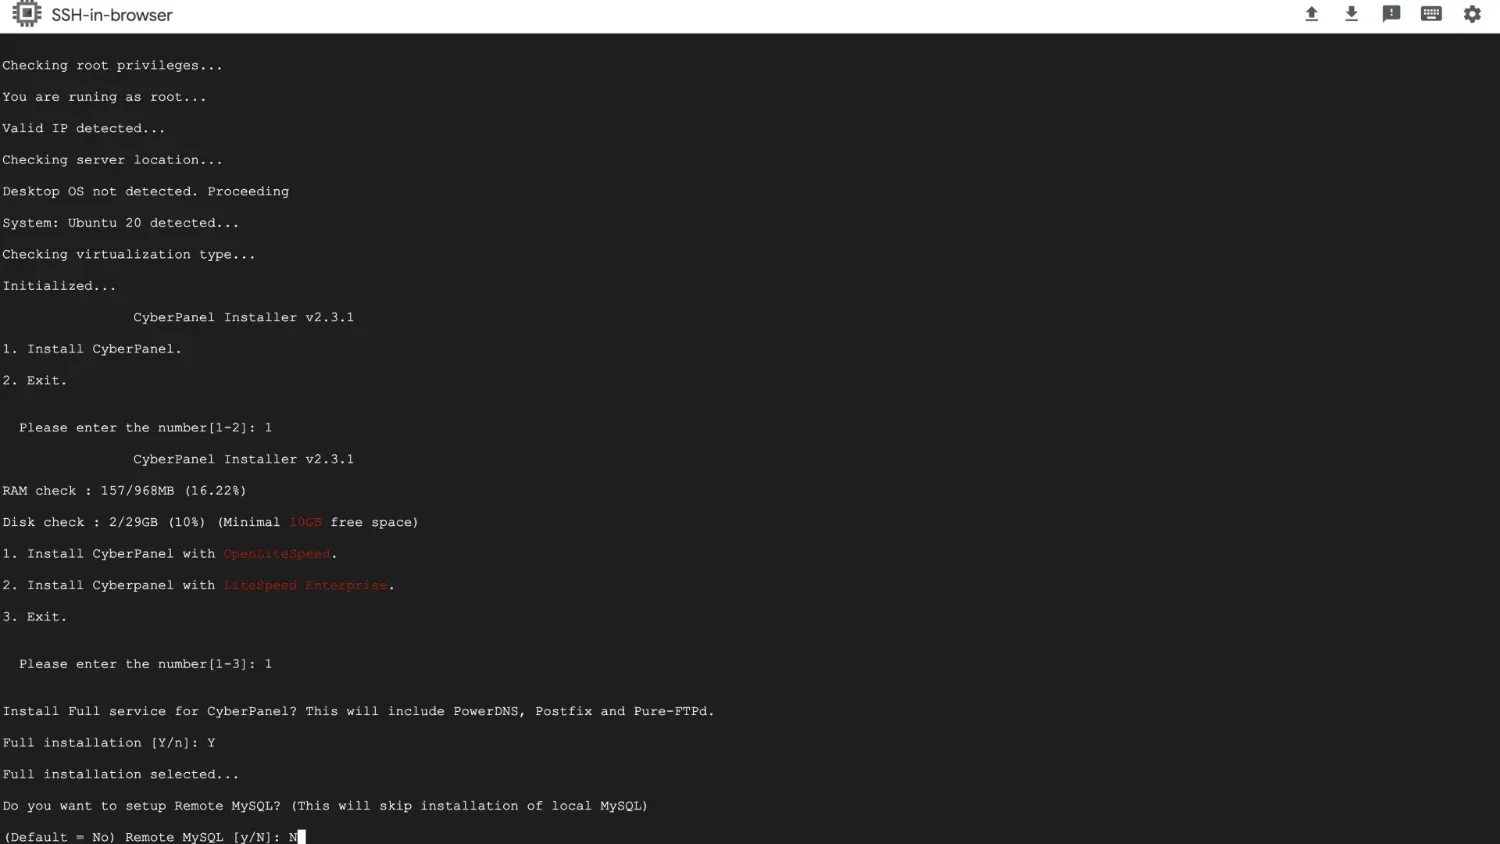
Press Enter to continue with latest version.
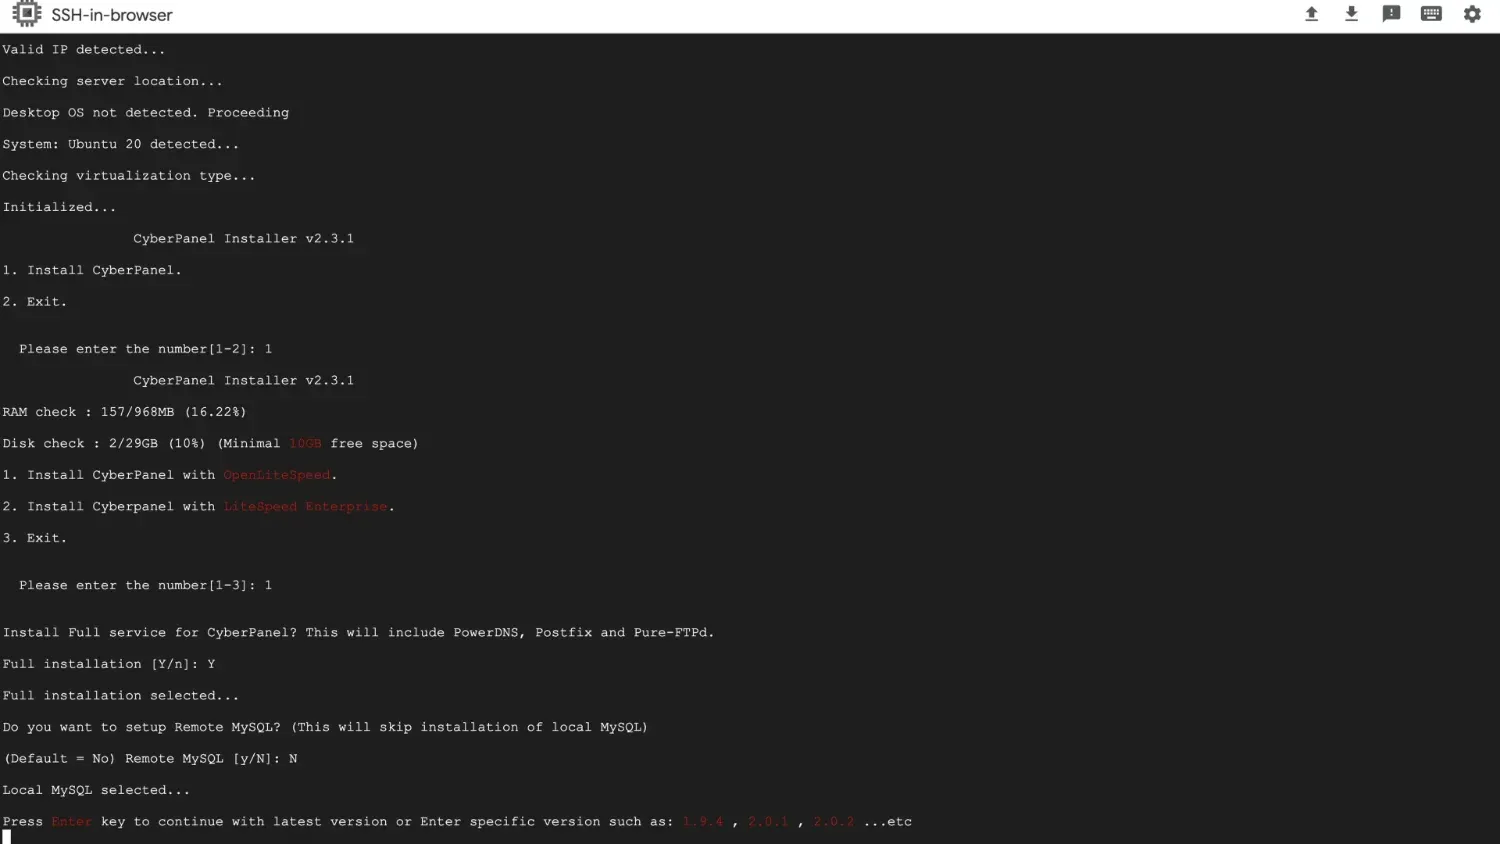
For security reasons, I would recommend either generating random or specifying your own password. Here I'll go with random.
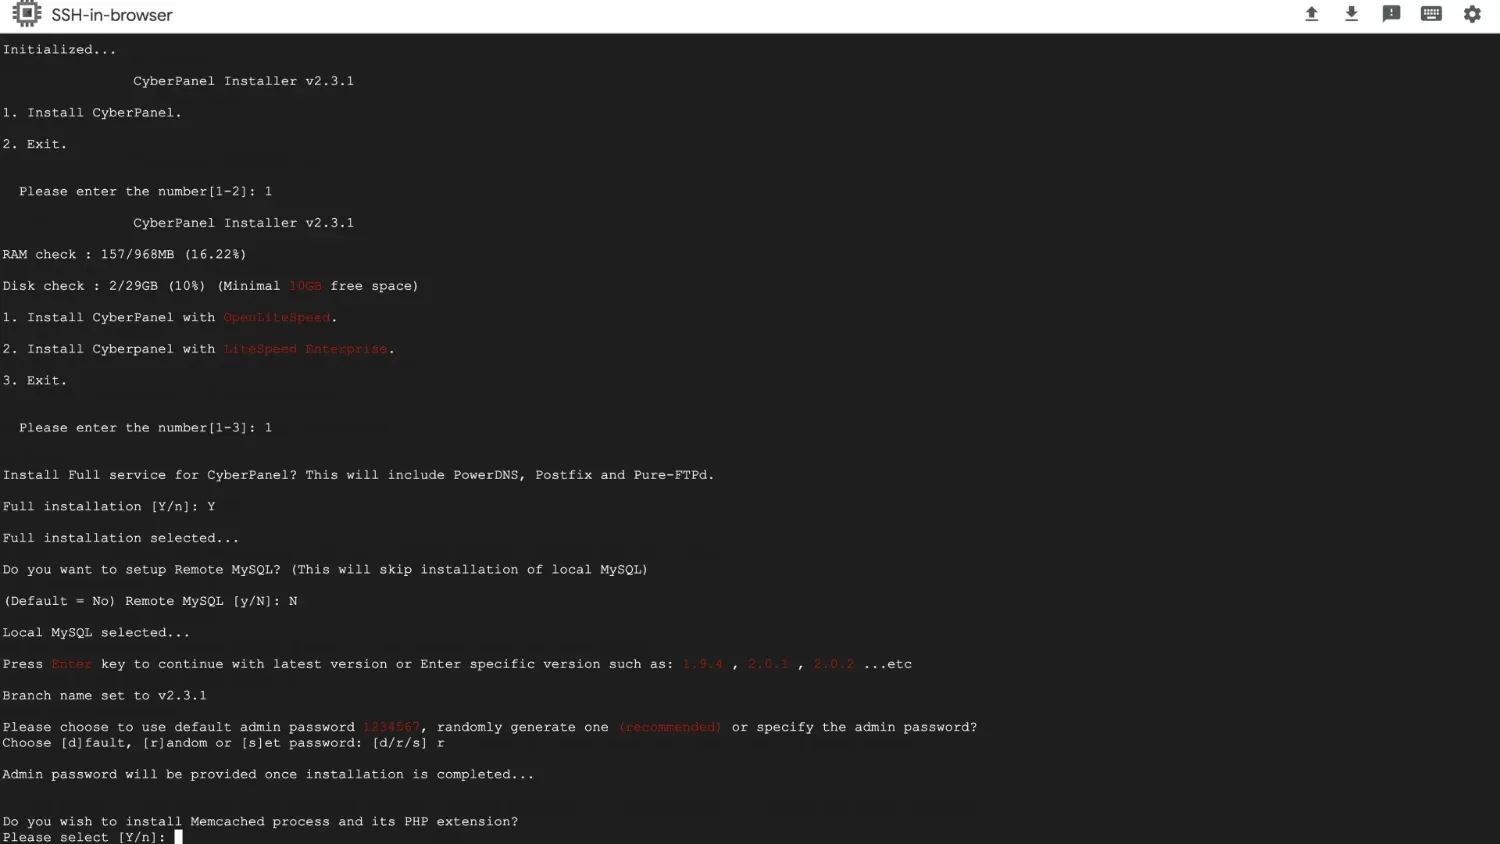
As it's shown here, it will be provided when installation is completed.
For Memcached enter Y, the same for Redis.
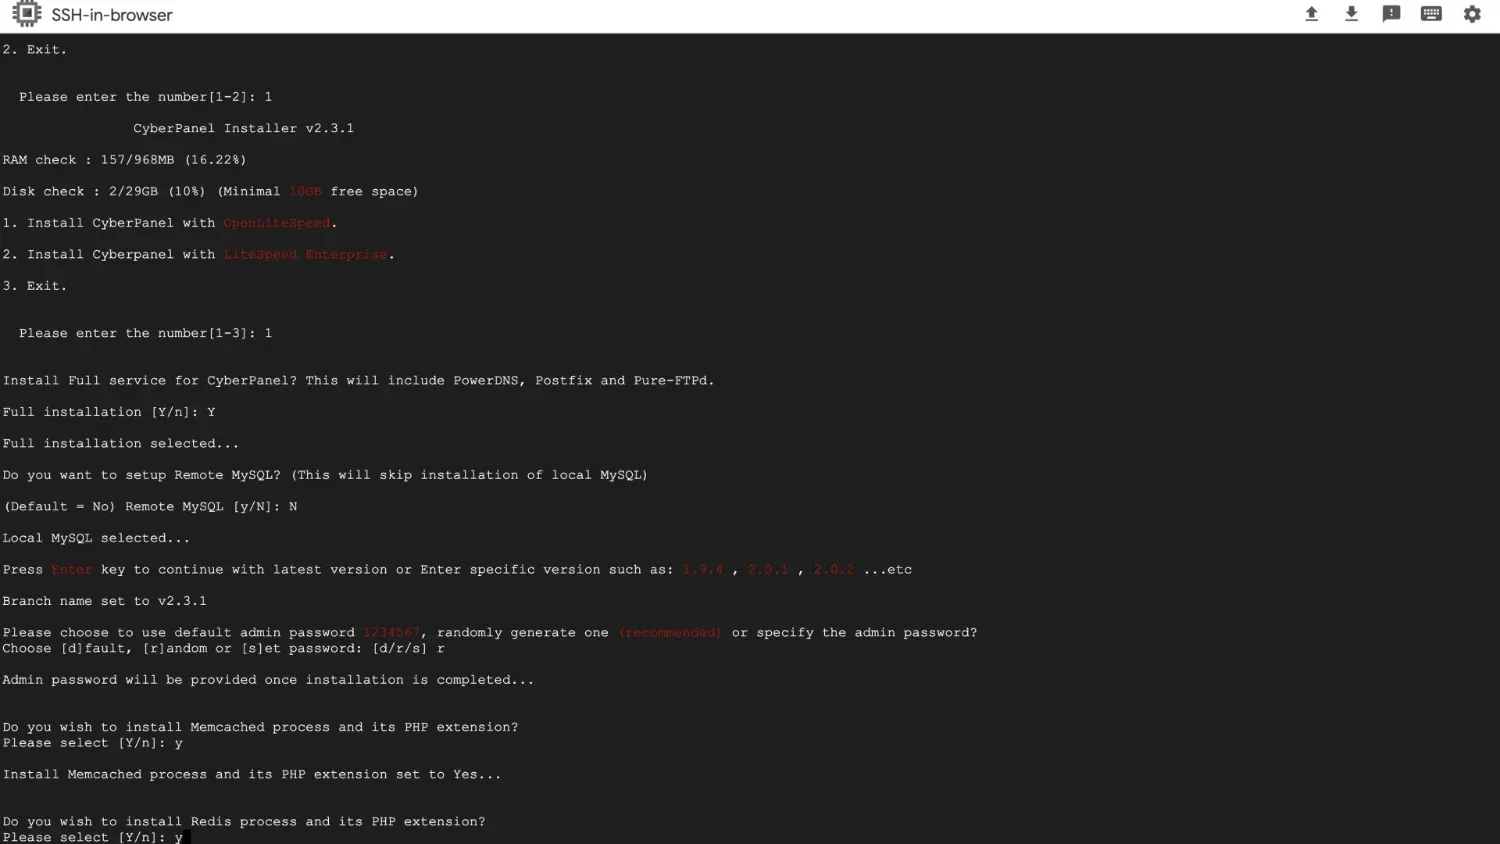
Watchdog will let you know if your server is down. But only after you've set up email, which we'll go through later in this tutorial. And this is a beta feature, so it may be not that reliable. So, it's up to you: either type Yes with capital Y or no and press Enter.
Installation will start and you can take a break, as it will take up to an hour.
When installation is complete, it will show as some stats, our username - which is admin by default - and password.
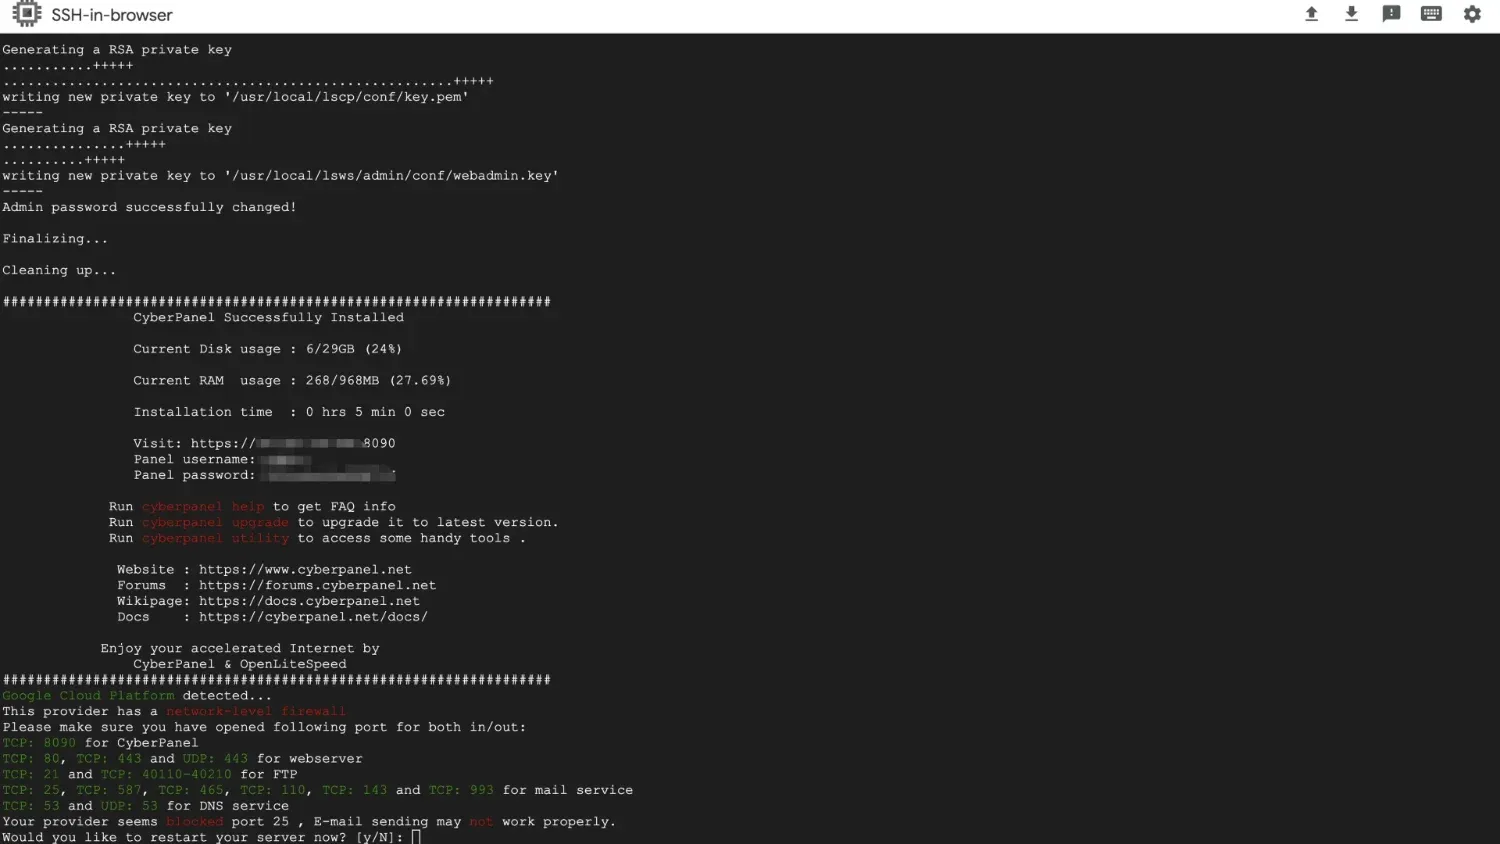
Underneath that it says, that Google Cloud platform detected, that we'll need to configure our firewall for things to work.
And that port 25 is blocked, so we can't send mail using our server.
And these are all the things we'll address.
Fixing cyberpanel not loading (google cloud firewall)
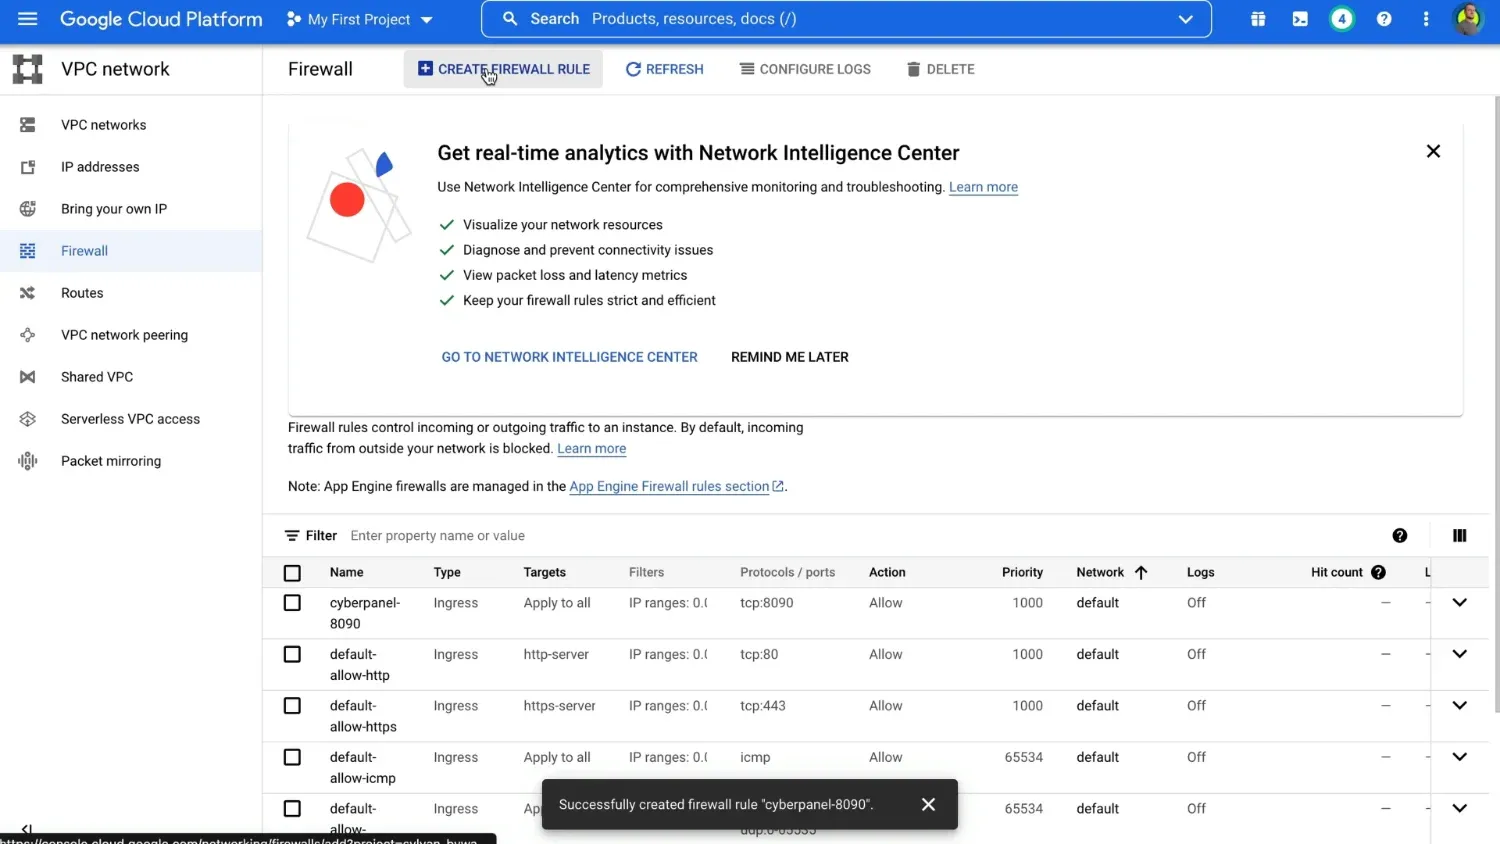
To set up rules for the firewall head to Google Cloud Platform - press Navigation menu icon in the top left corner - Scroll down to networking, here select VPC network - Firewall
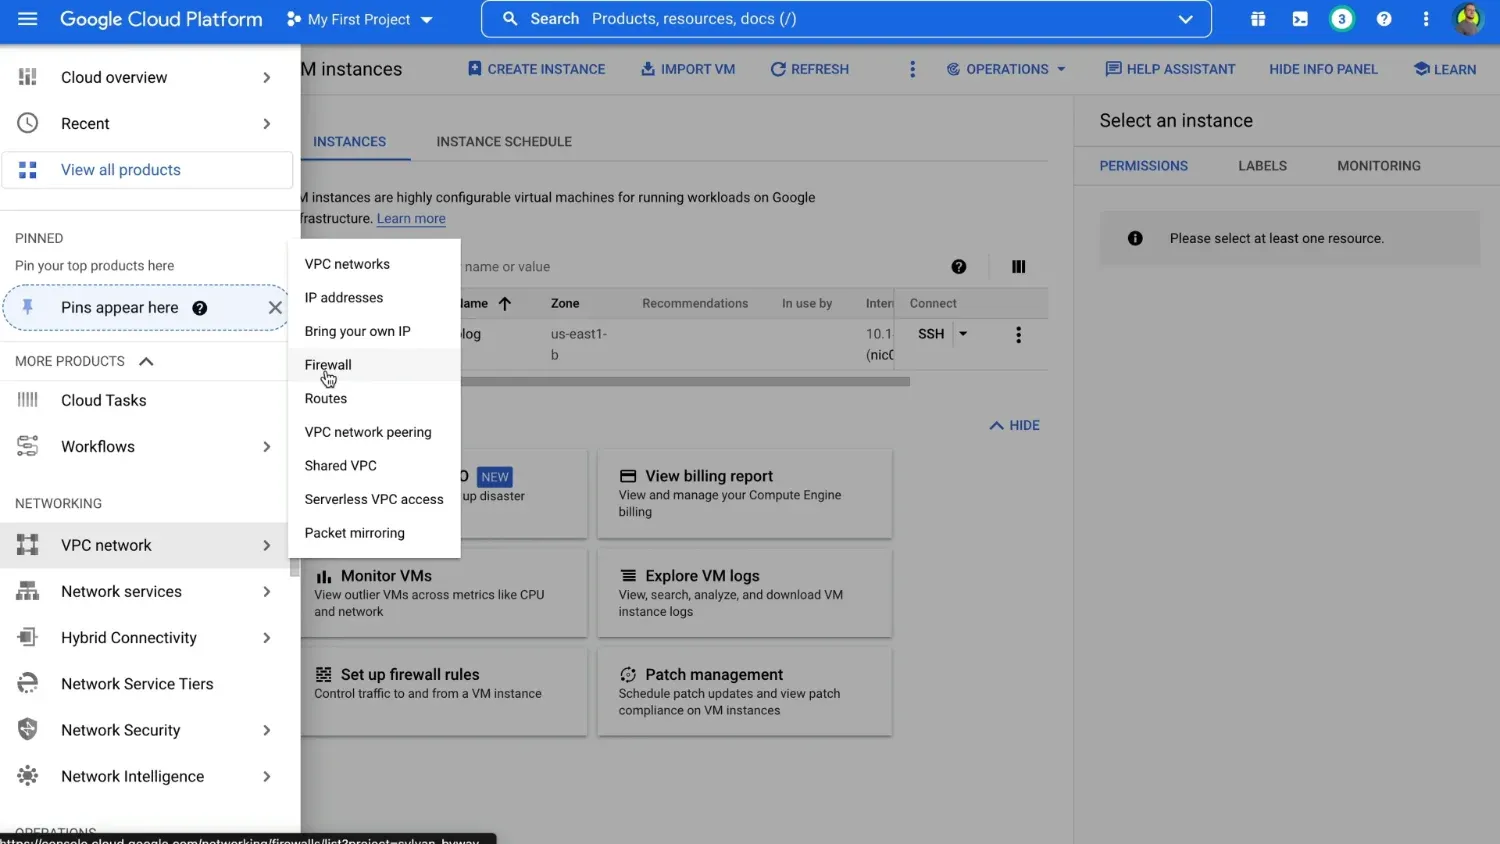
Enter the name you like, at Source IP enter 0.0.0.0/0
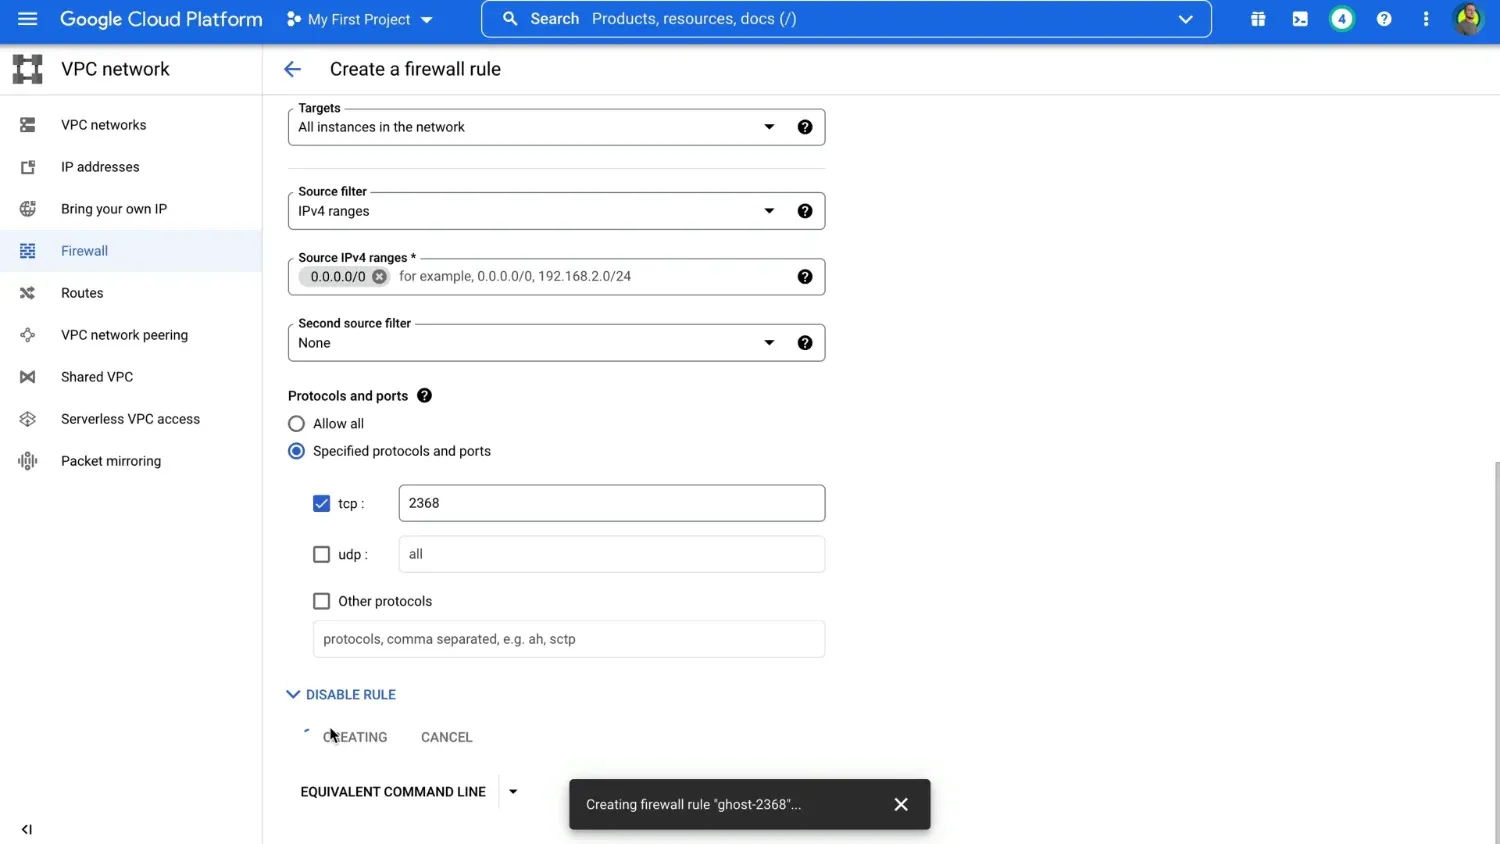
In protocols and ports select tcp and enter 8090 in the field next to it.
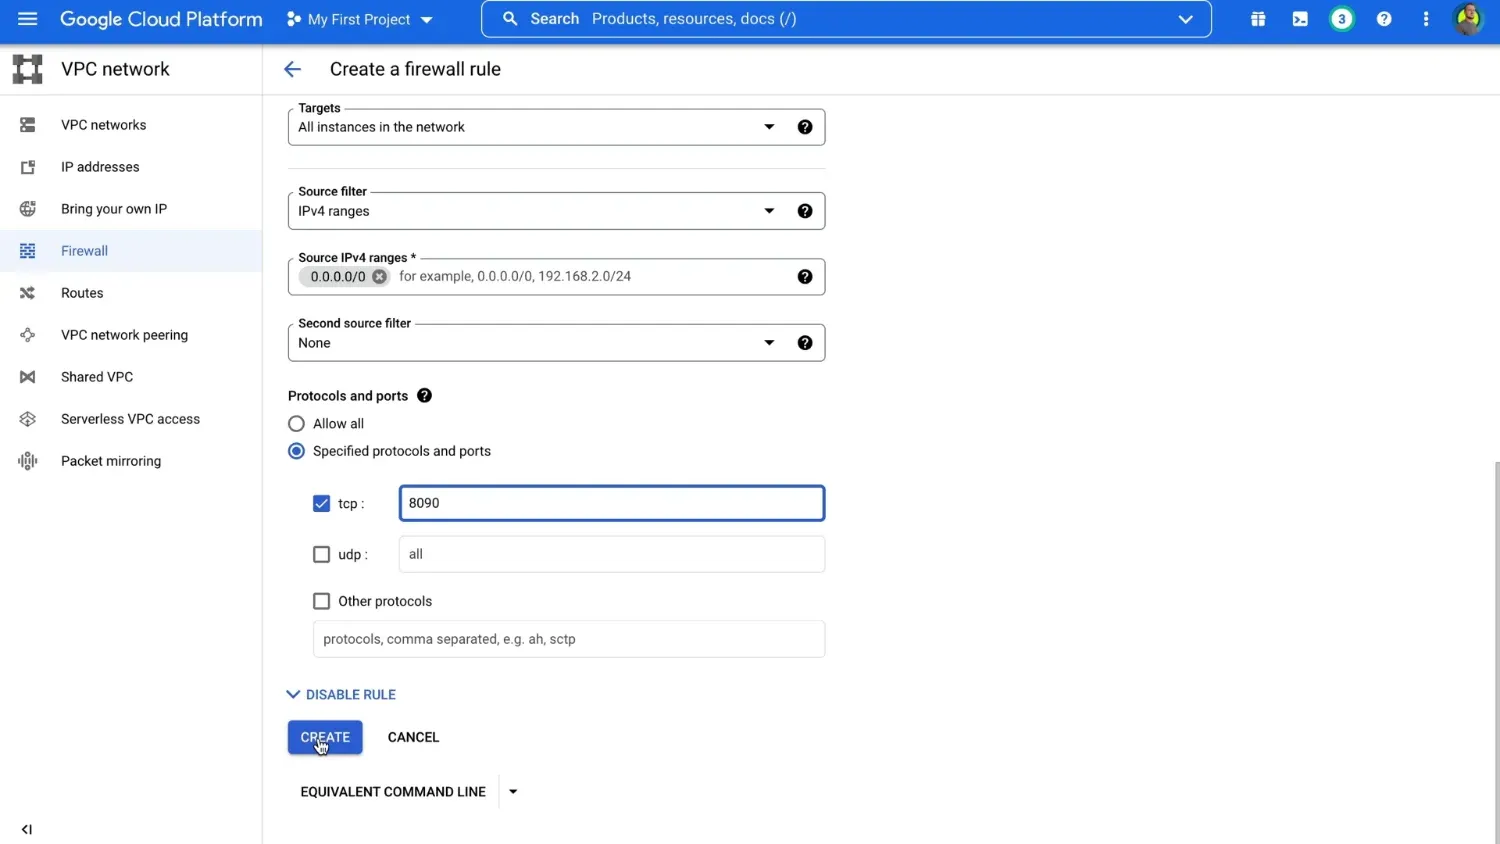
After that press Create.
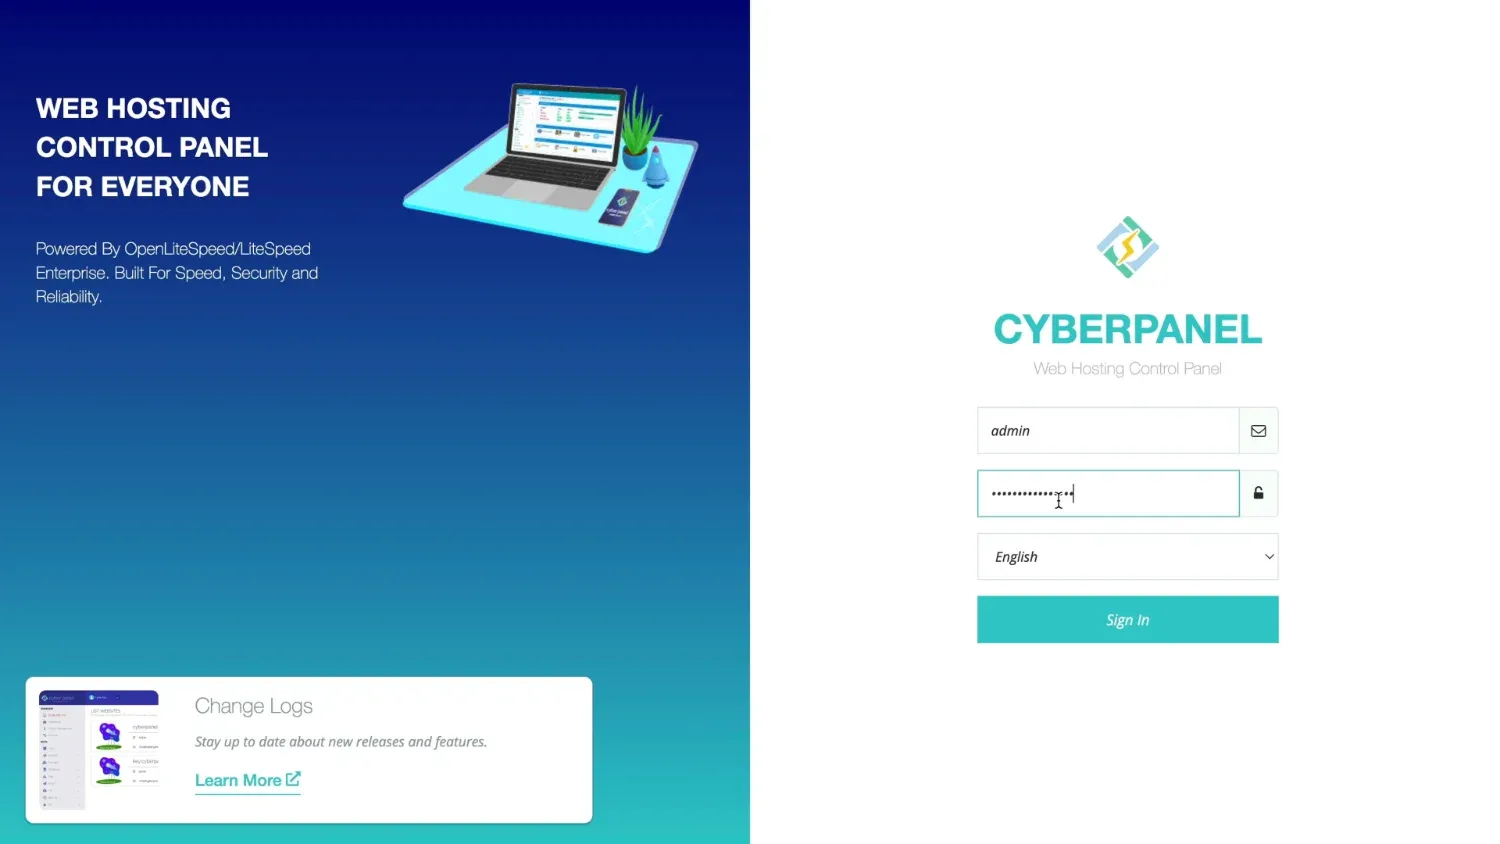
Now when you enter your cloud instance IP followed by :8090 in a browser tab
https://domain.com:8090/you'll see a Cyberpanel login window.
SSL set up
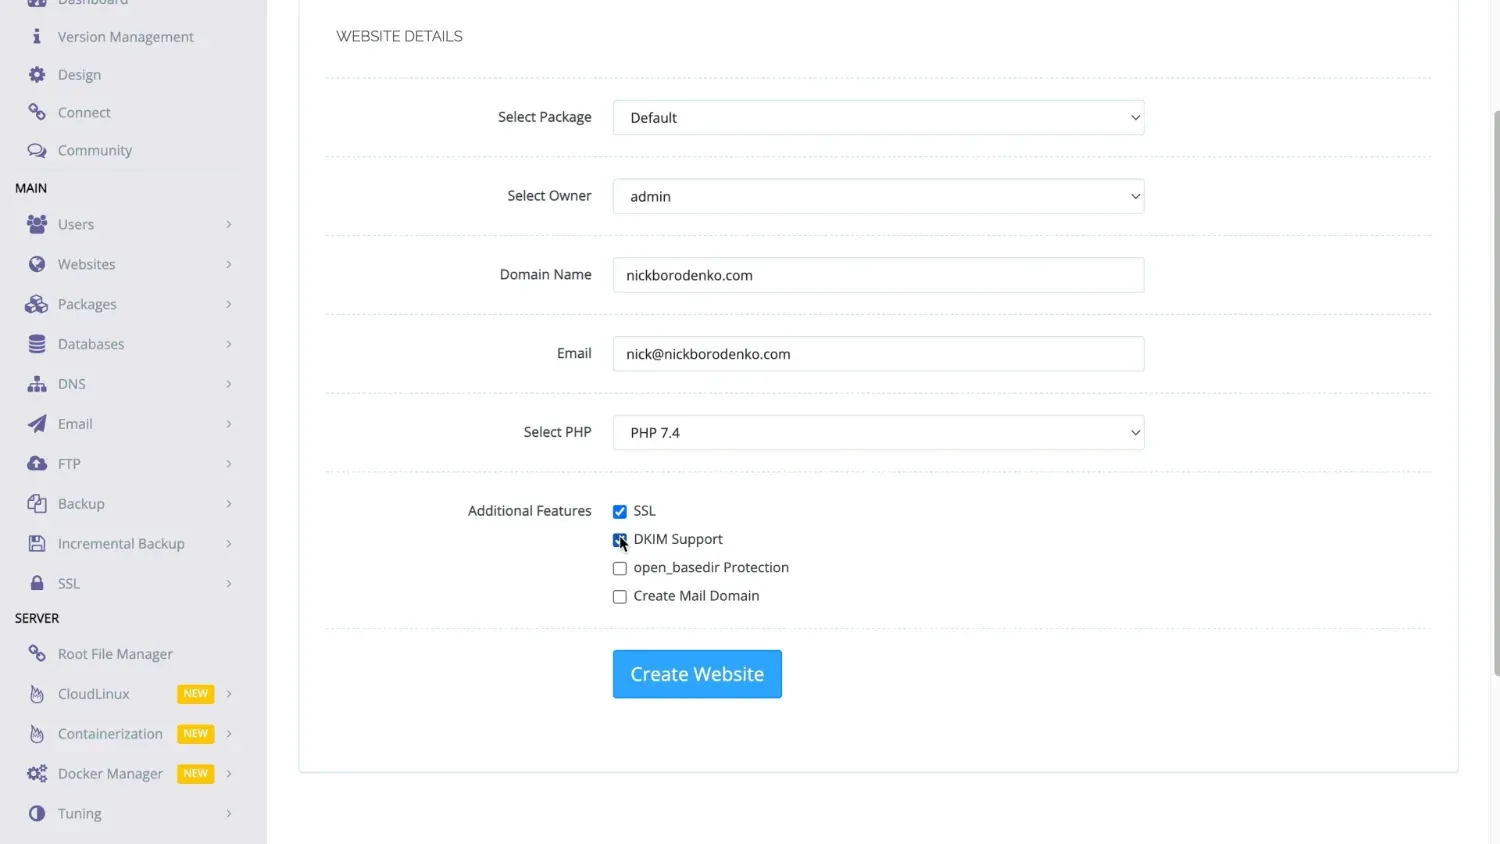
Login to cyberpanel using admin account and your password. Navigate to Websites - Create website
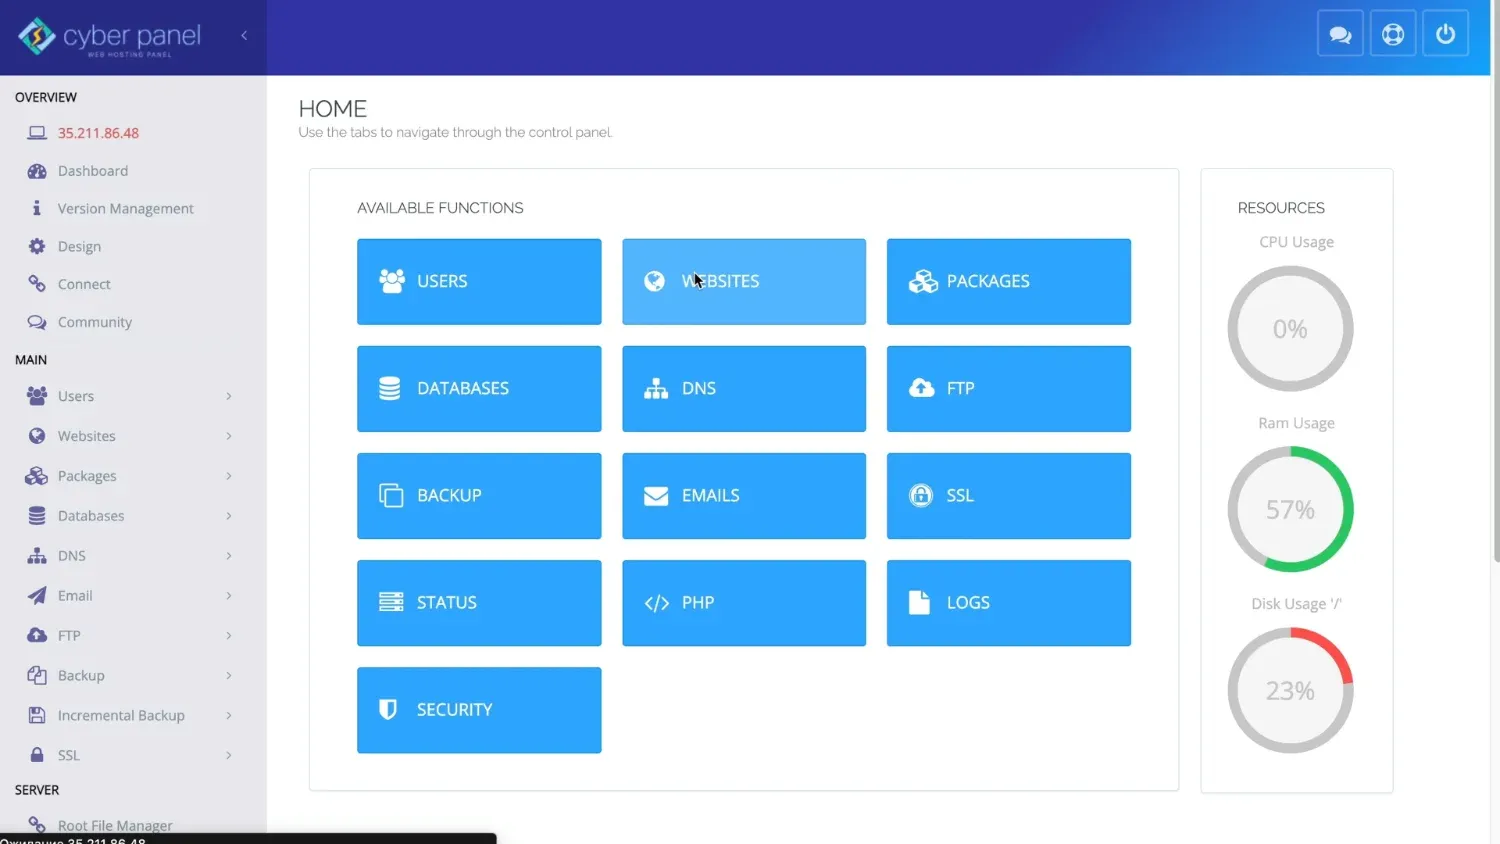
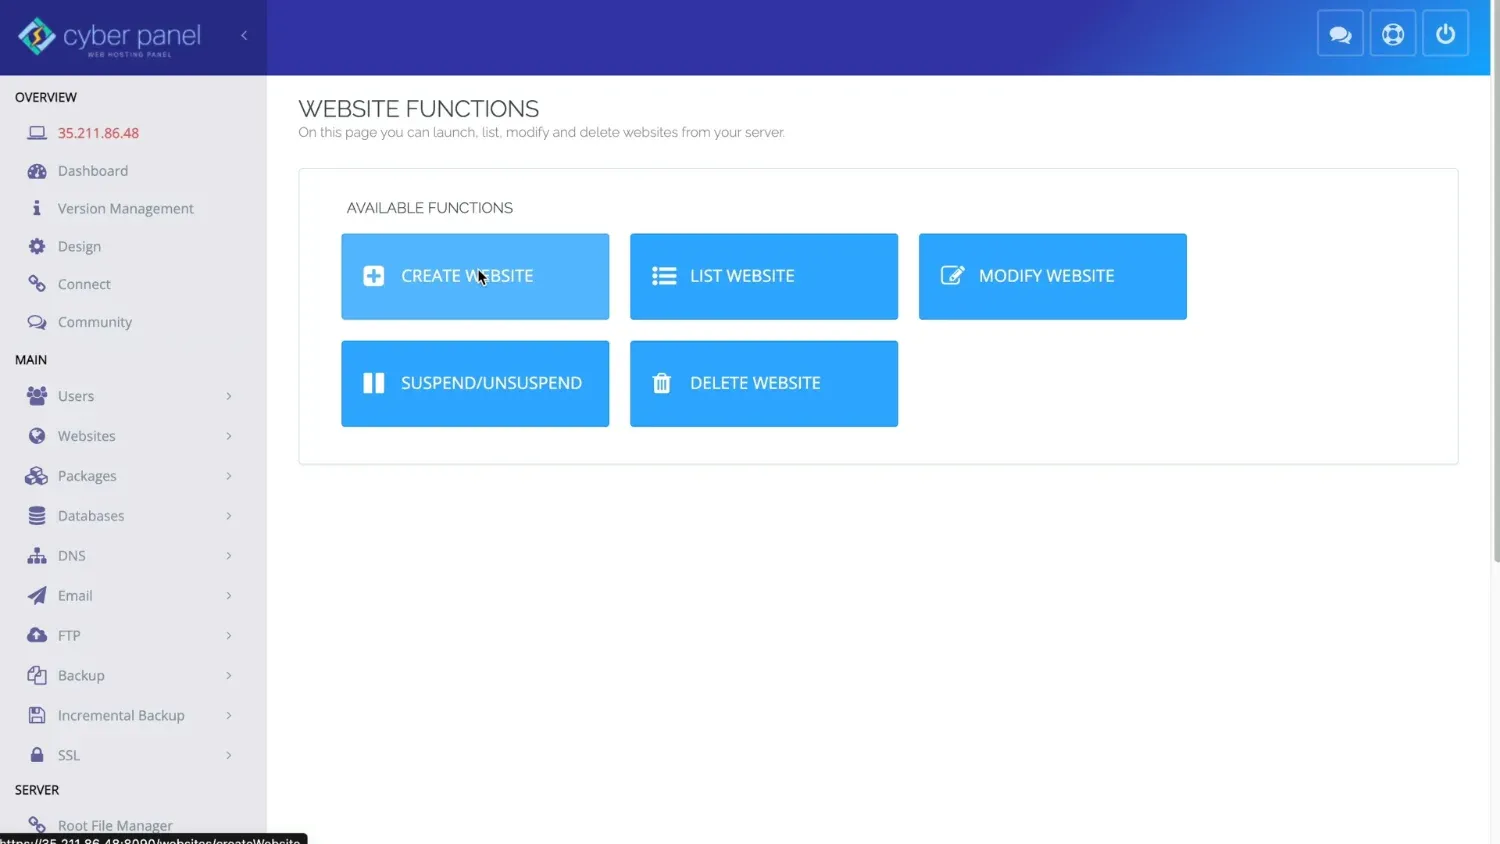
Select default package, choose admin as an owner and enter your domain without www.
Enter your email, select PHP 7.4. Check SSL and DKIM support. Click Create Website
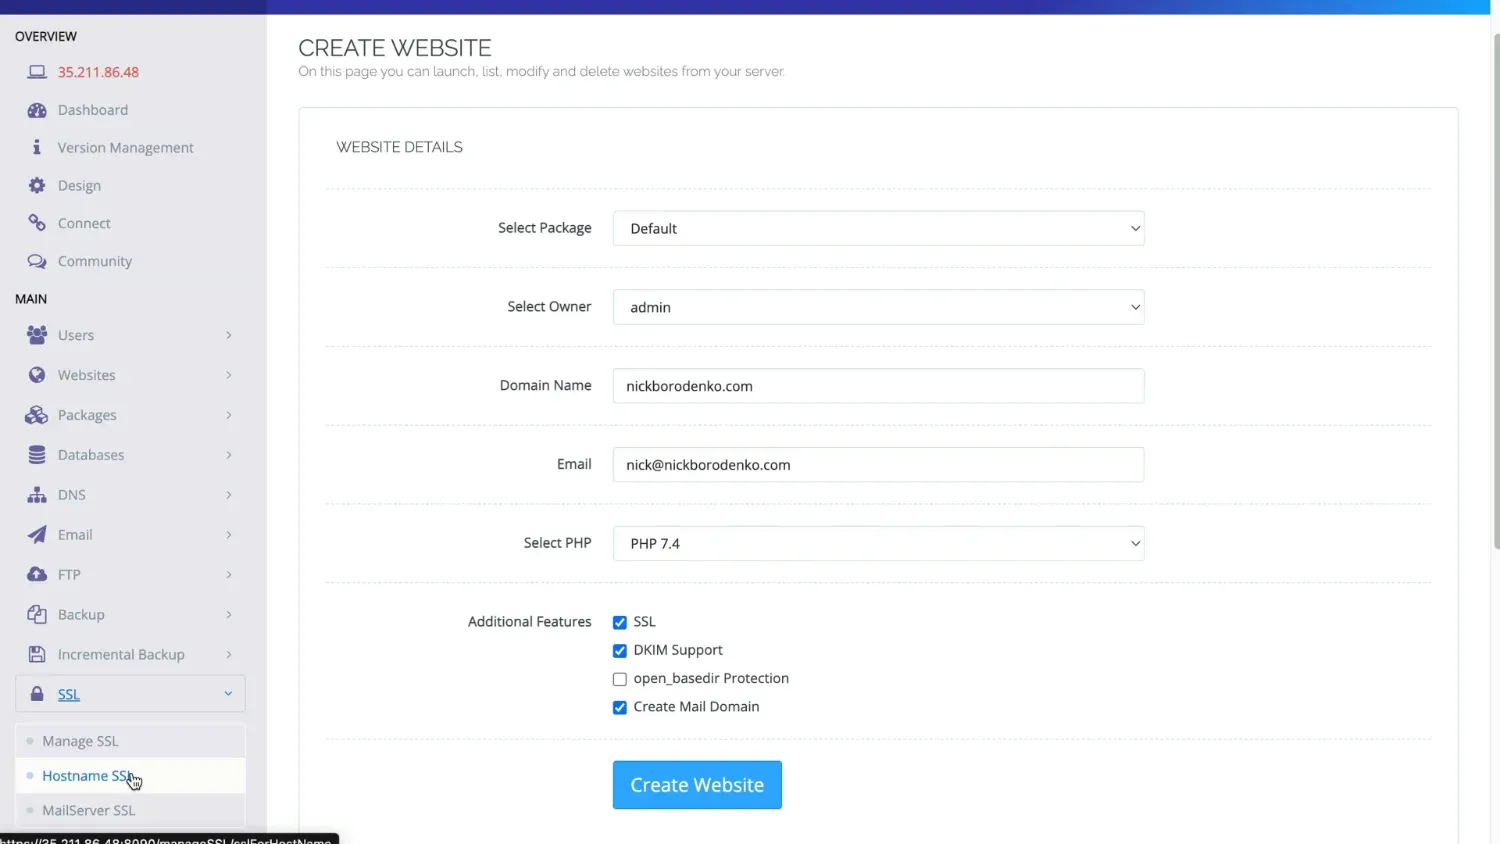
Next in the main menu on the left head to SSL - Hostname SSL. Choose your site here and press issue SSL.
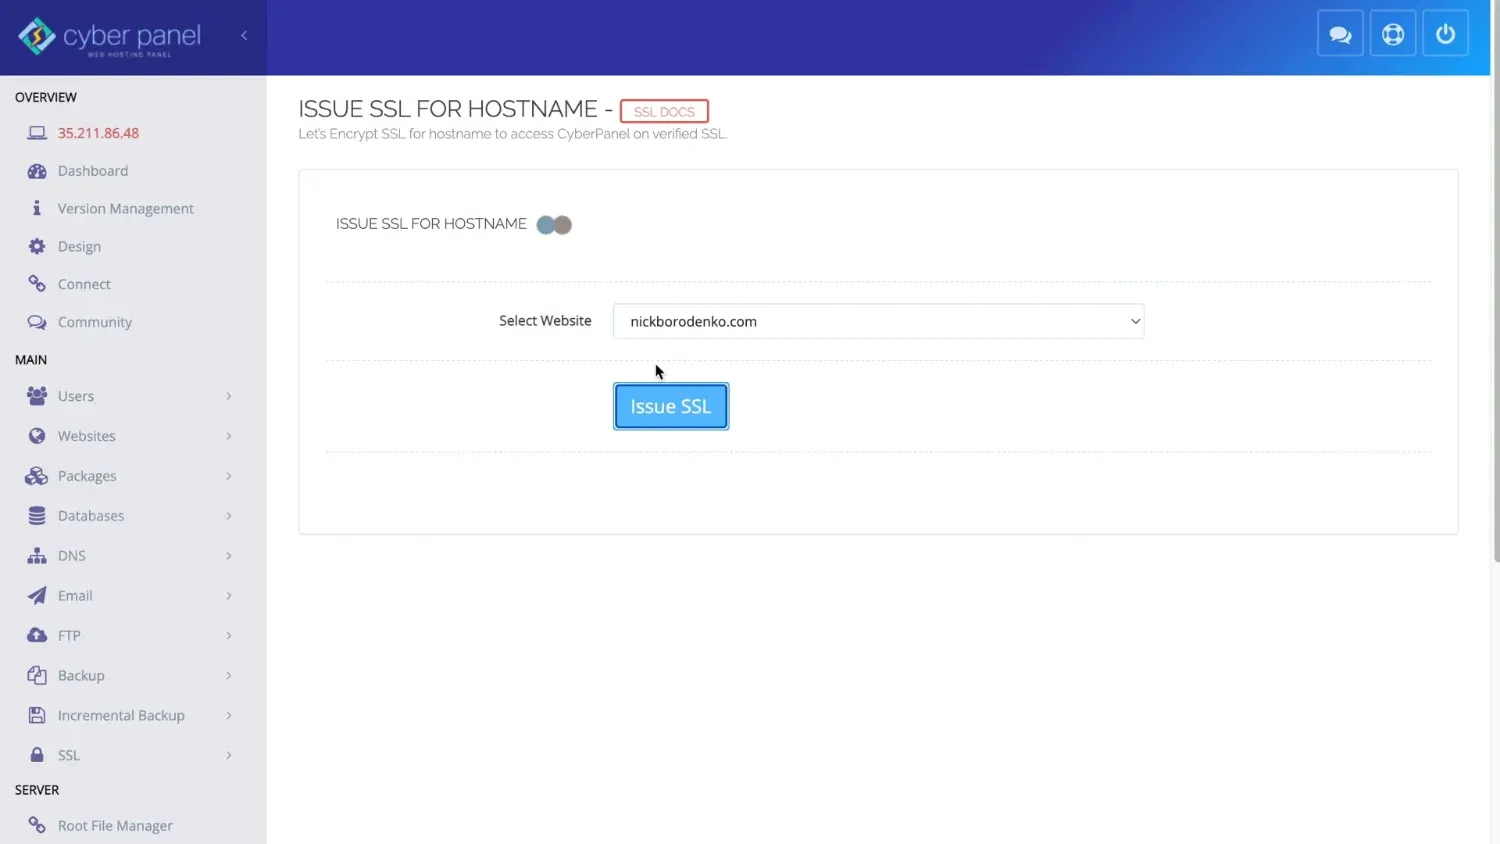
Now you can enter to Cyperpanel via https, so no more warnings from your browser.
Finally, we're ready to install Ghost.
Installing Ghost
In Cyberpanel navigate to Docker Manager - Manage Images using menu on the left.
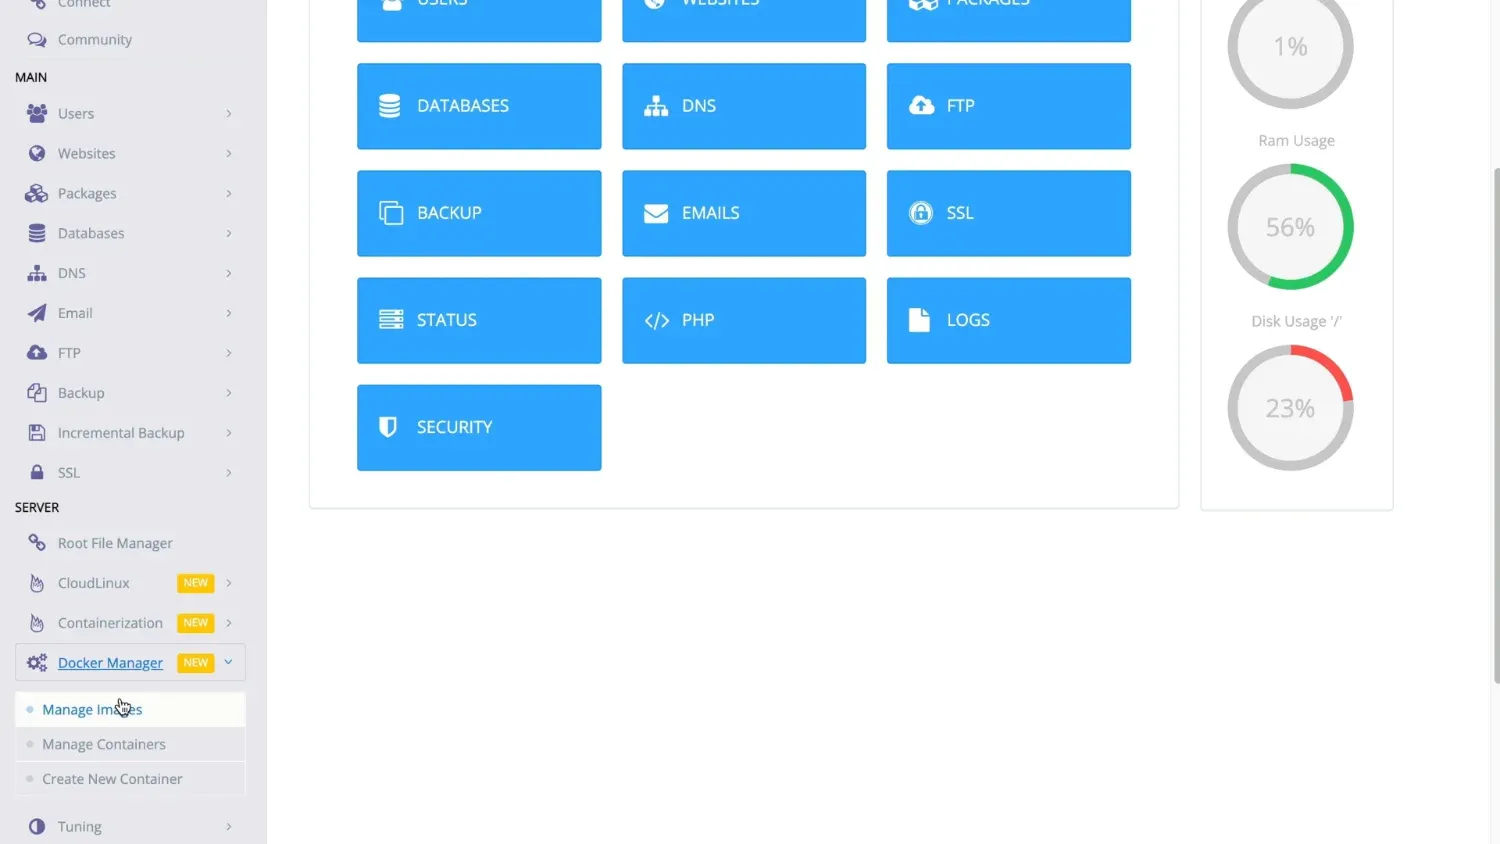
Press Install Docker.
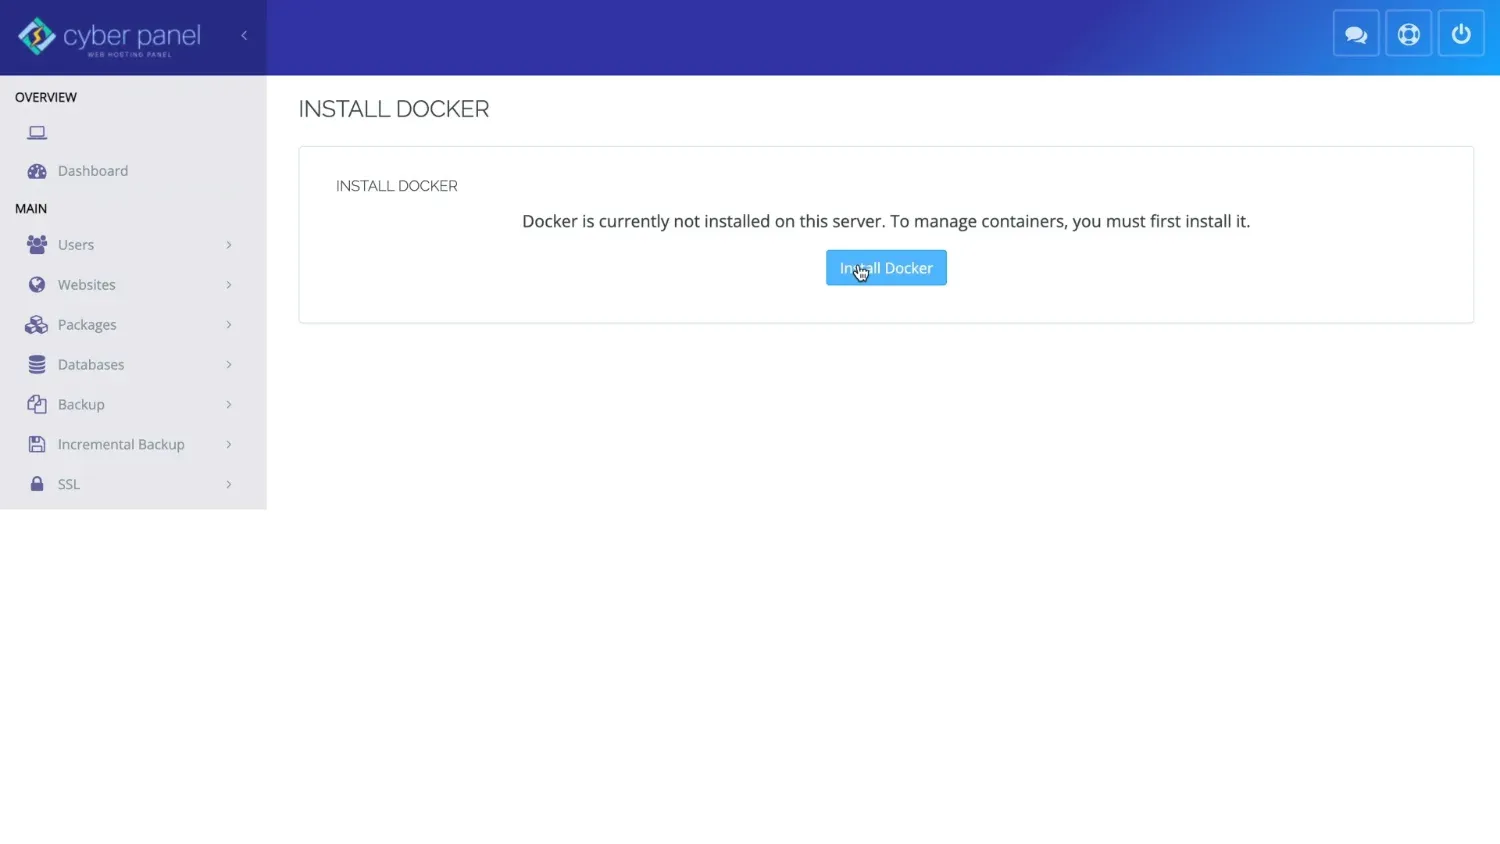
When installation is finished, type ghost in the search bar.
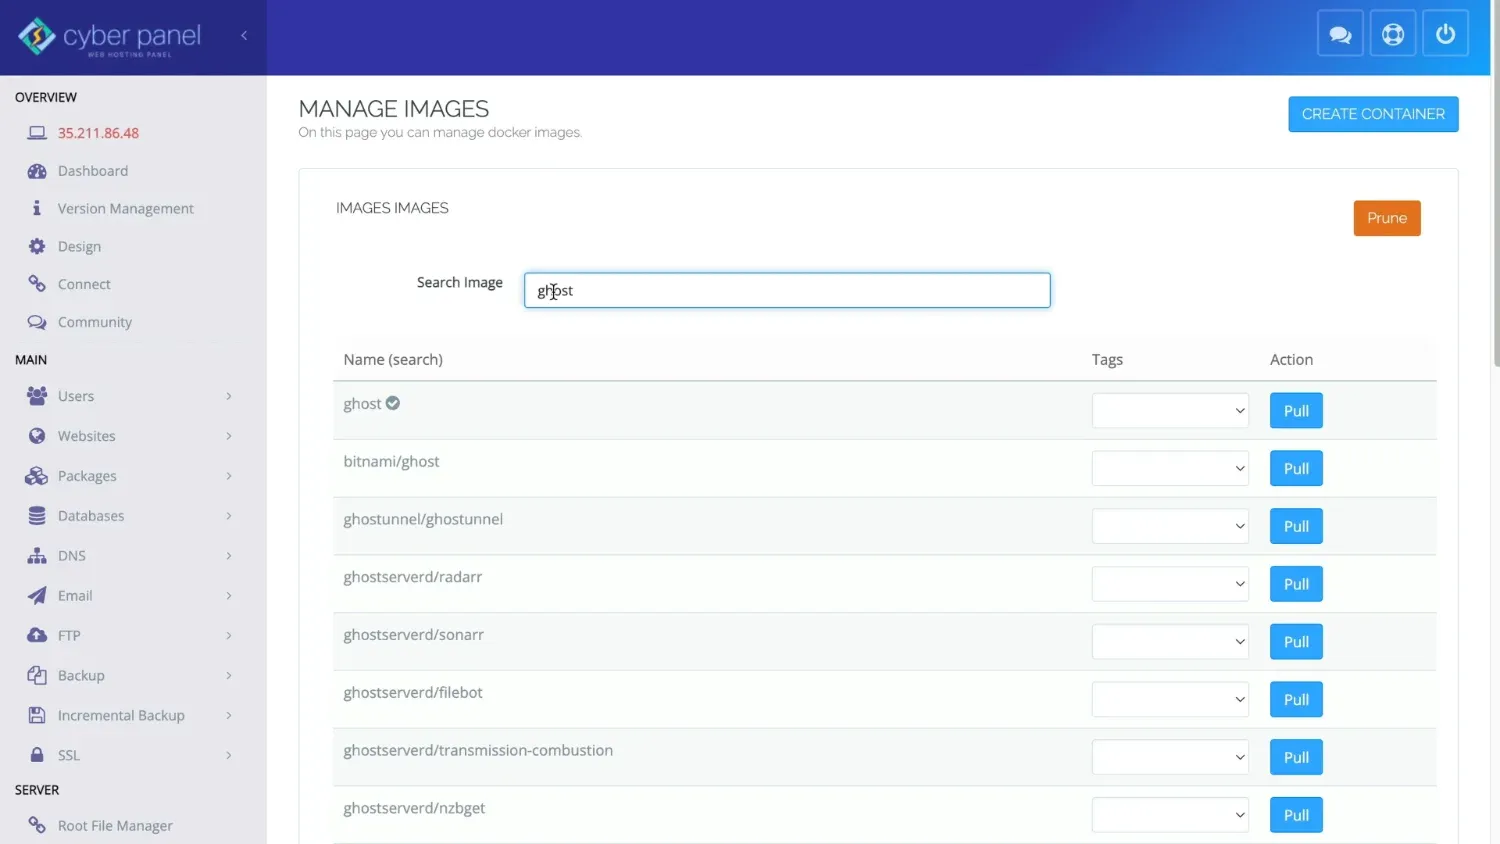
You need the one with checkmark — that is official. In tags select latest or the one with highest number without alpine suffix. And click Pull.
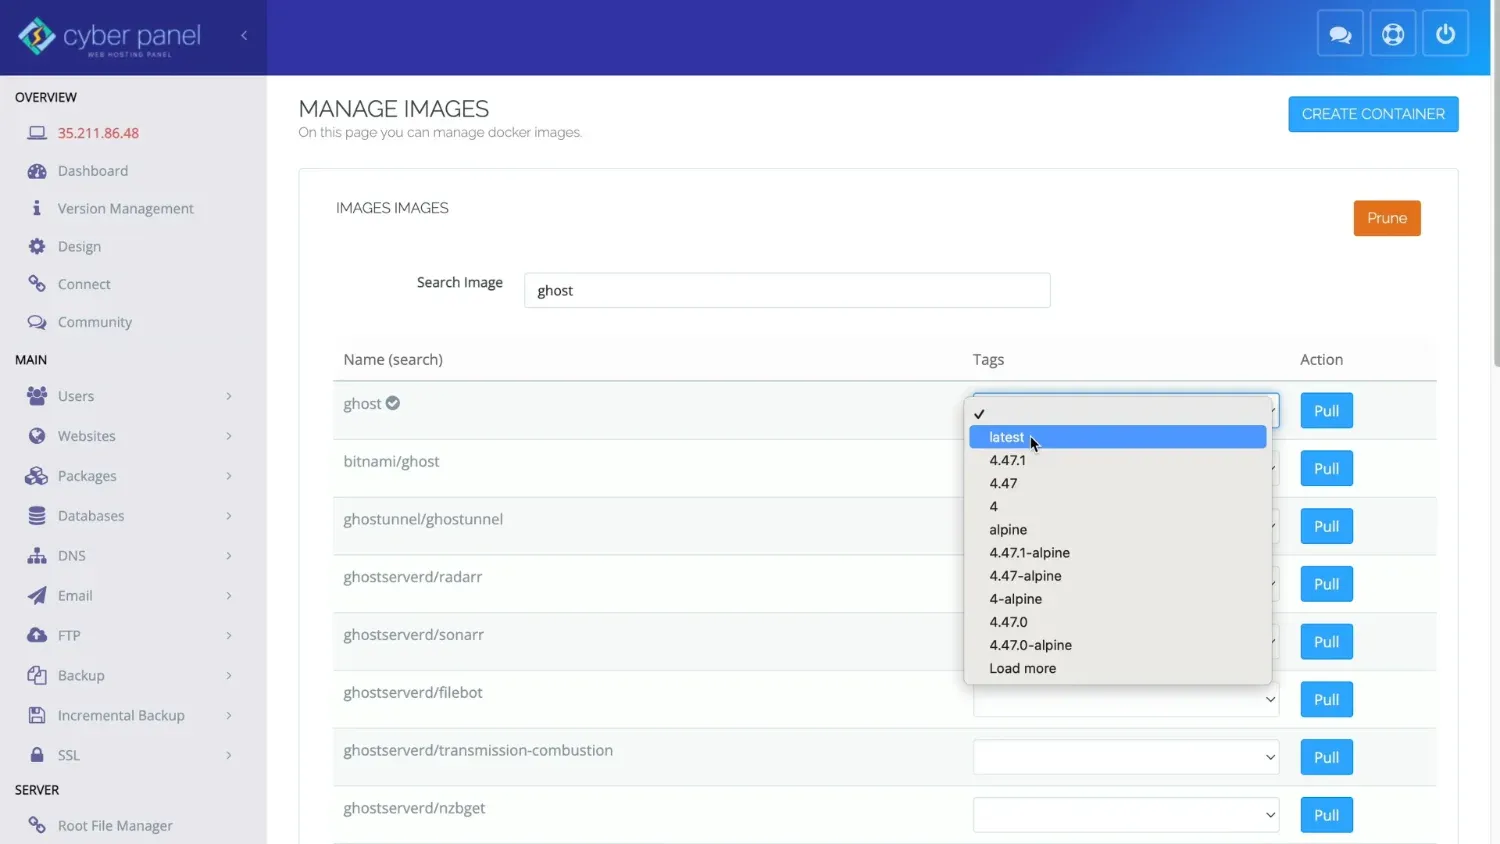
Once that's done click Create container button above on the right.
Select whichever version you've chosen previously and press Create.
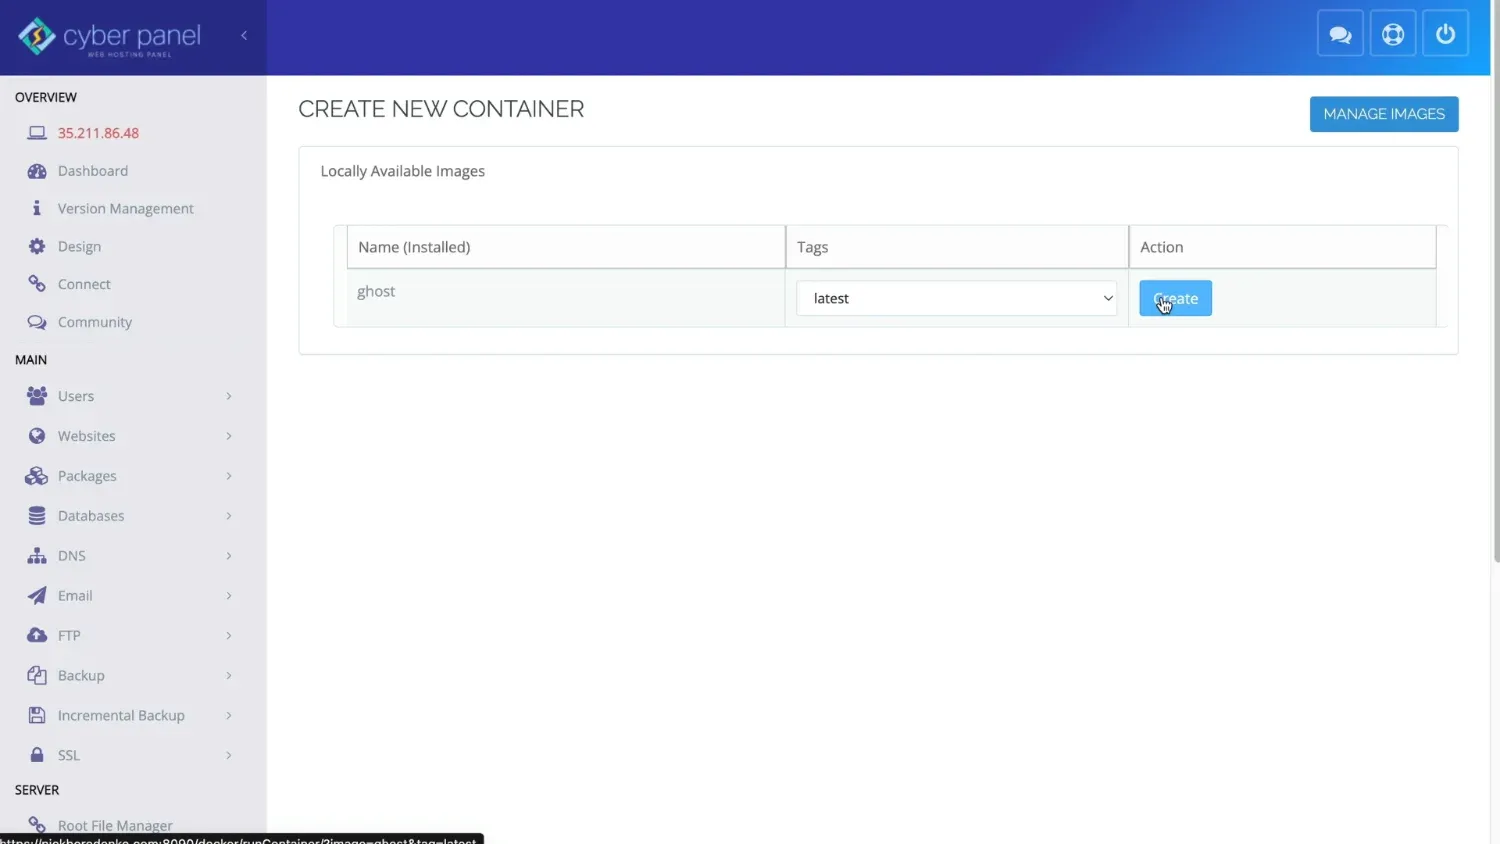
Enter the name, select admin as an owner.
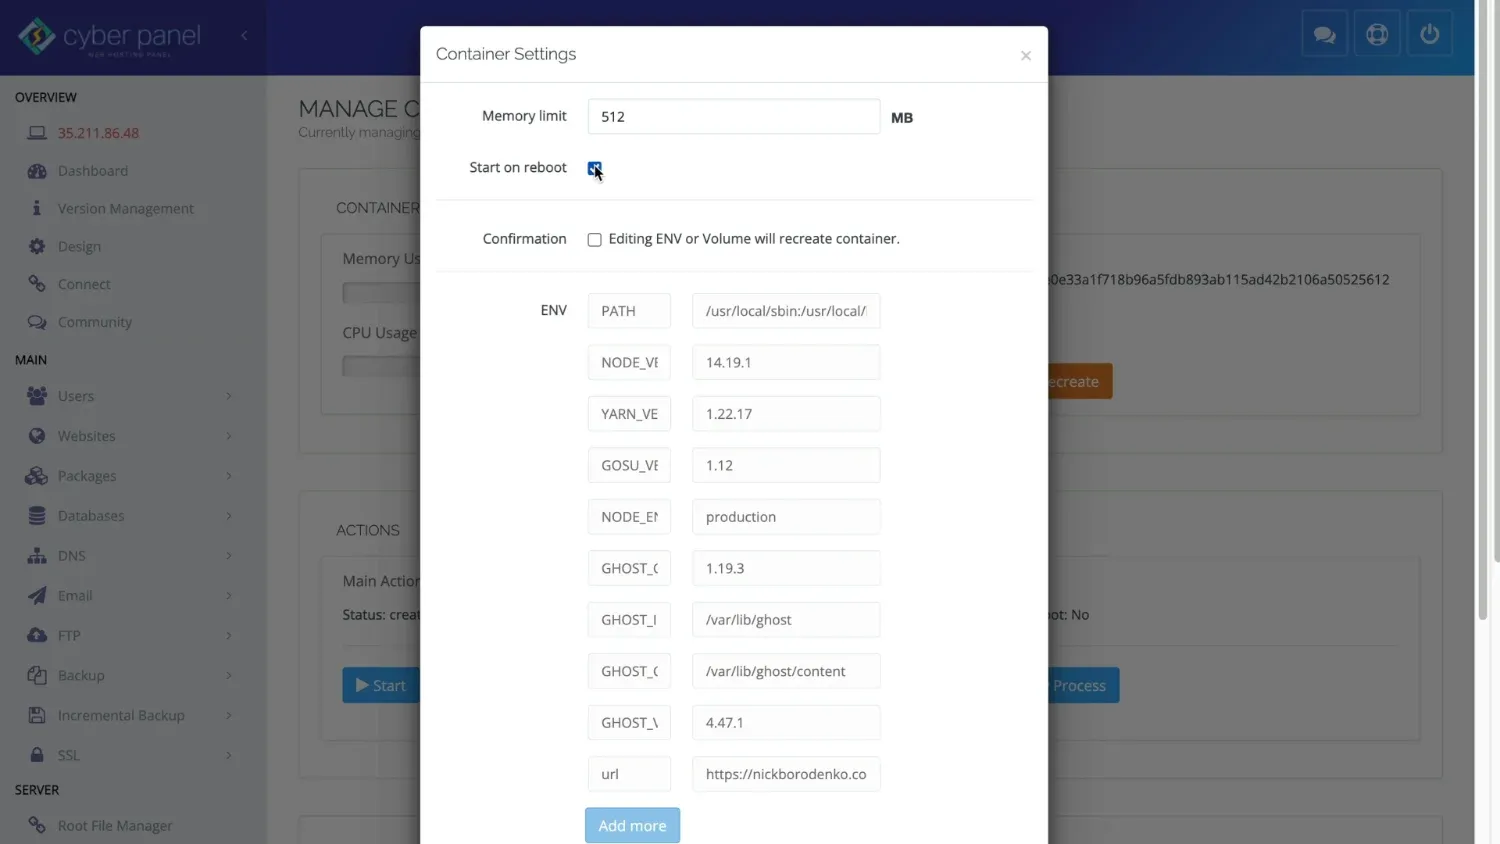
For a memory limit, I've set a value of 512 Mb.
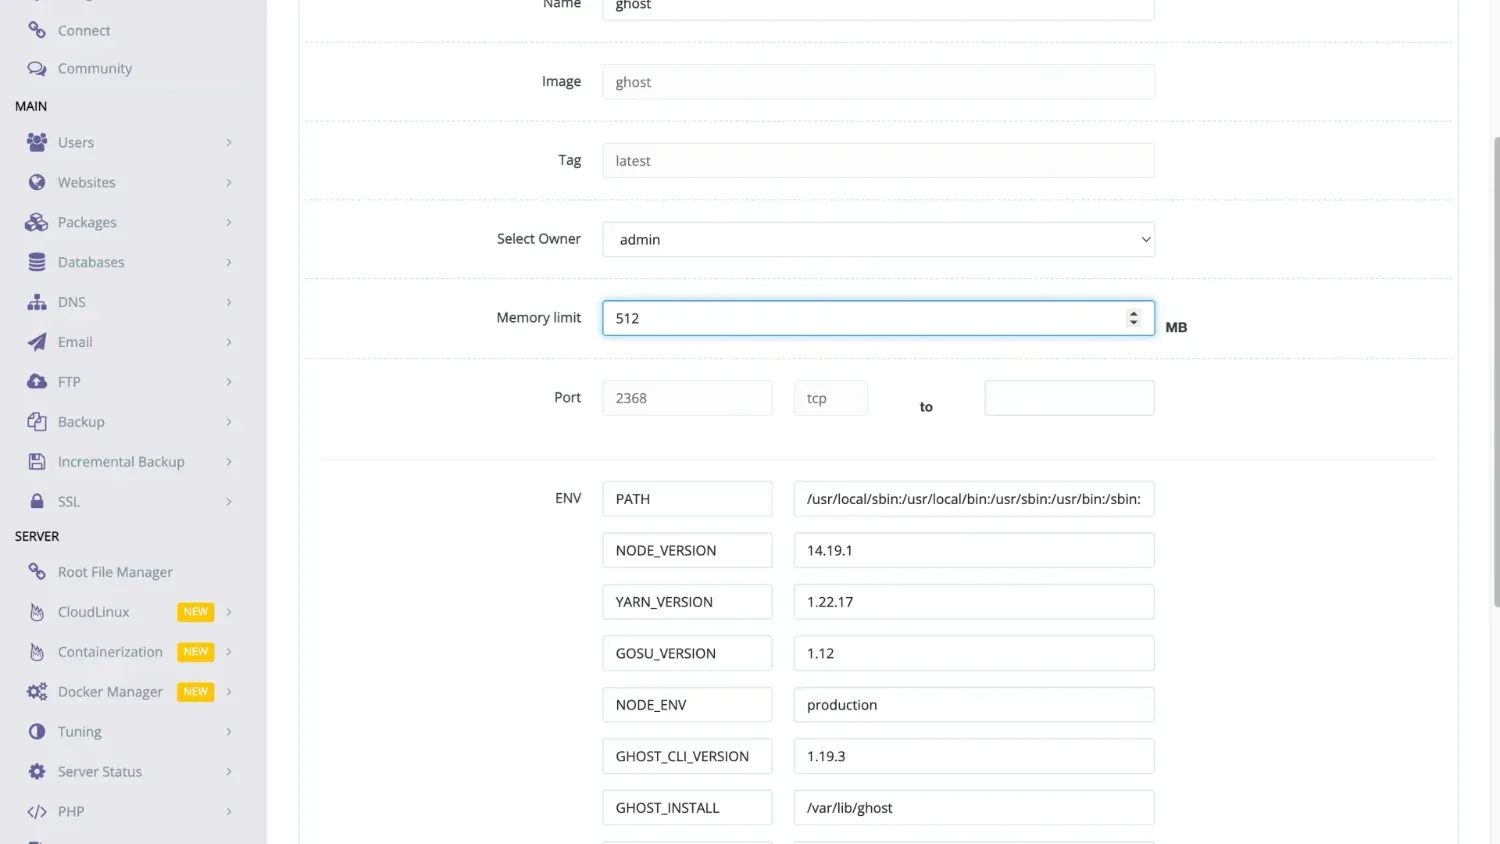
We have 1Gb of RAM available for our entire e2-micro google cloud instance, and we need some RAM for Cyberpanel and ubuntu on top of the RAM for our blog. So, 512 Mb to 768 Mb for Ghost should be that sweet spot.
It's not WordPress, this amount of memory should be more than enough for small and medium-sized blogs.
For port use the same 2368 as you see on the left.
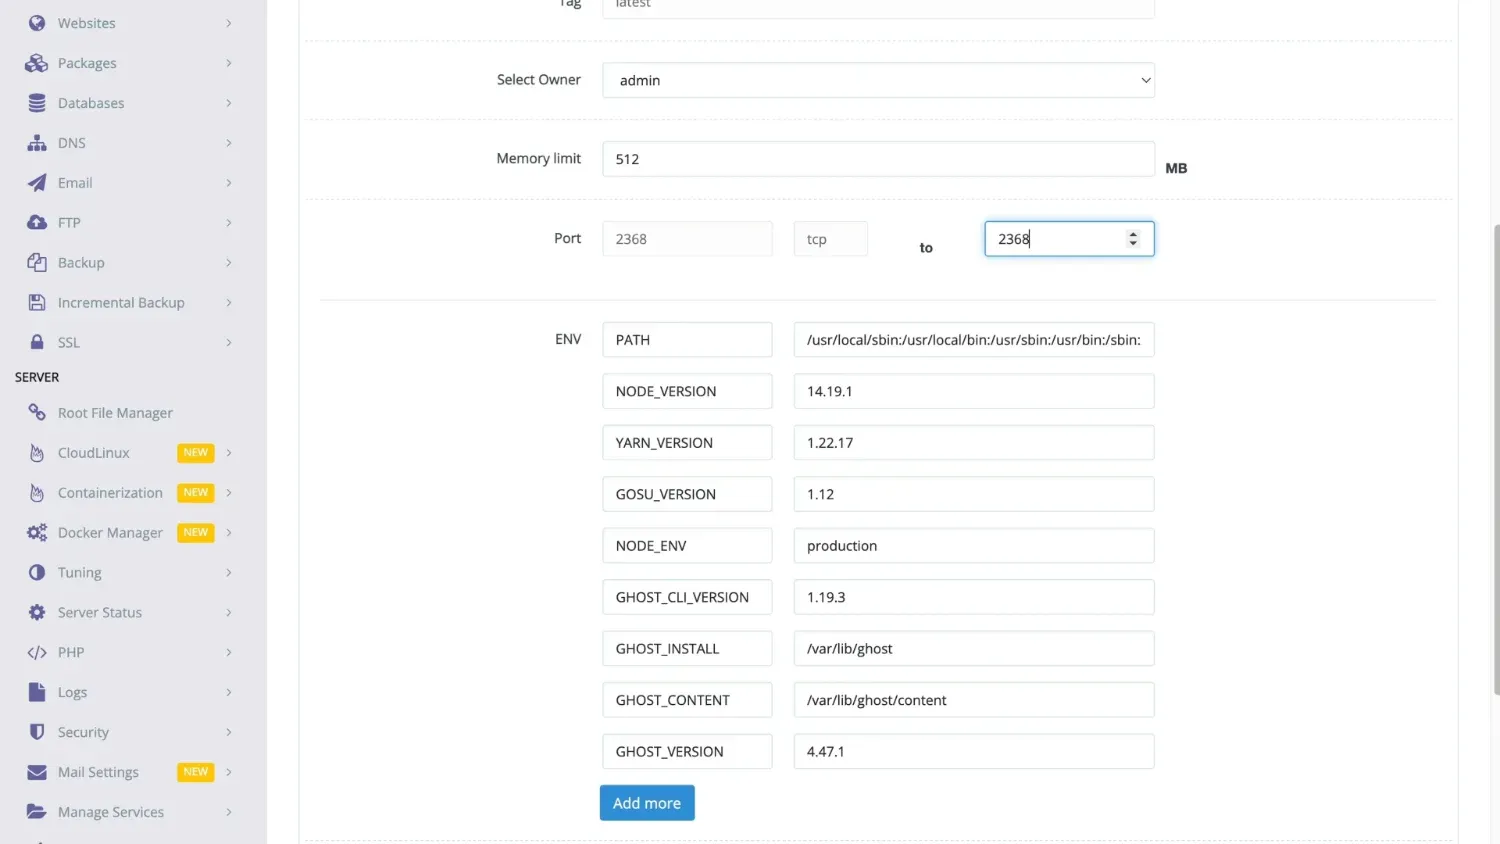
Leave values below as they are. Scroll down and press Add more.
The following environment variables should be added to the Ghost container (for Ghost versions 4.9+):
-e database__client=sqlite3
-e database__connection__filename="content/data/ghost.db"
-e database__useNullAsDefault=true
-e database__debug=false
The above parameters may be entered in the Docker parameter screen (see in the image below).

For providing this fix I would like to give thanks to Christos Koziaris
Type URL in the left box and your blog address starting with https:// in the right.
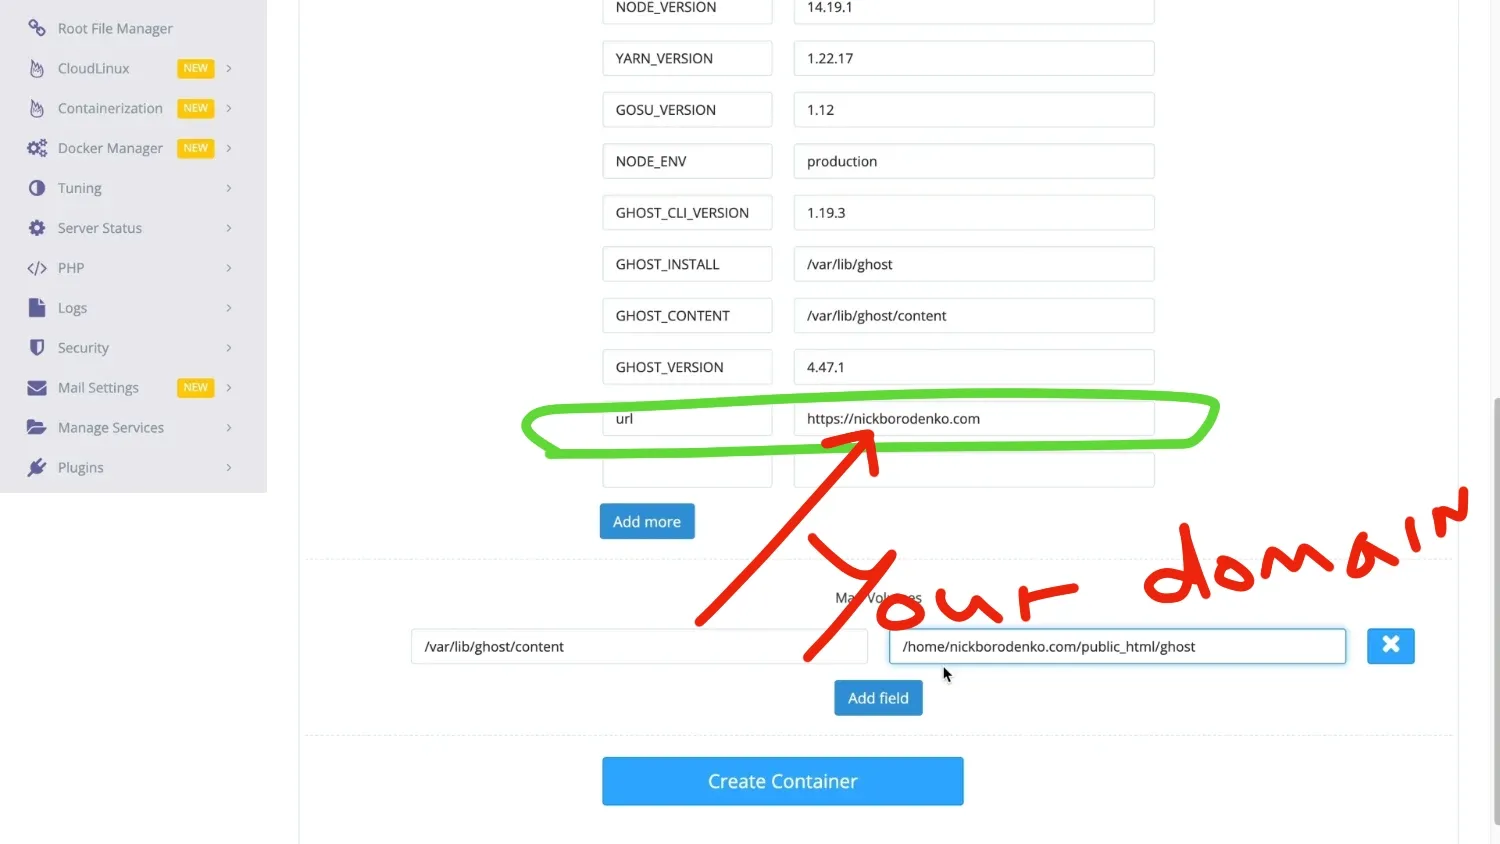
Scroll down again. At map volumes enter these values:
Left (Destination):
/var/lib/ghost/content
Right (Source):
/home/domain.com/public_html/ghost
Make sure you enter your domain instead of domain.com.
And press Create Container. You will be redirected on success.
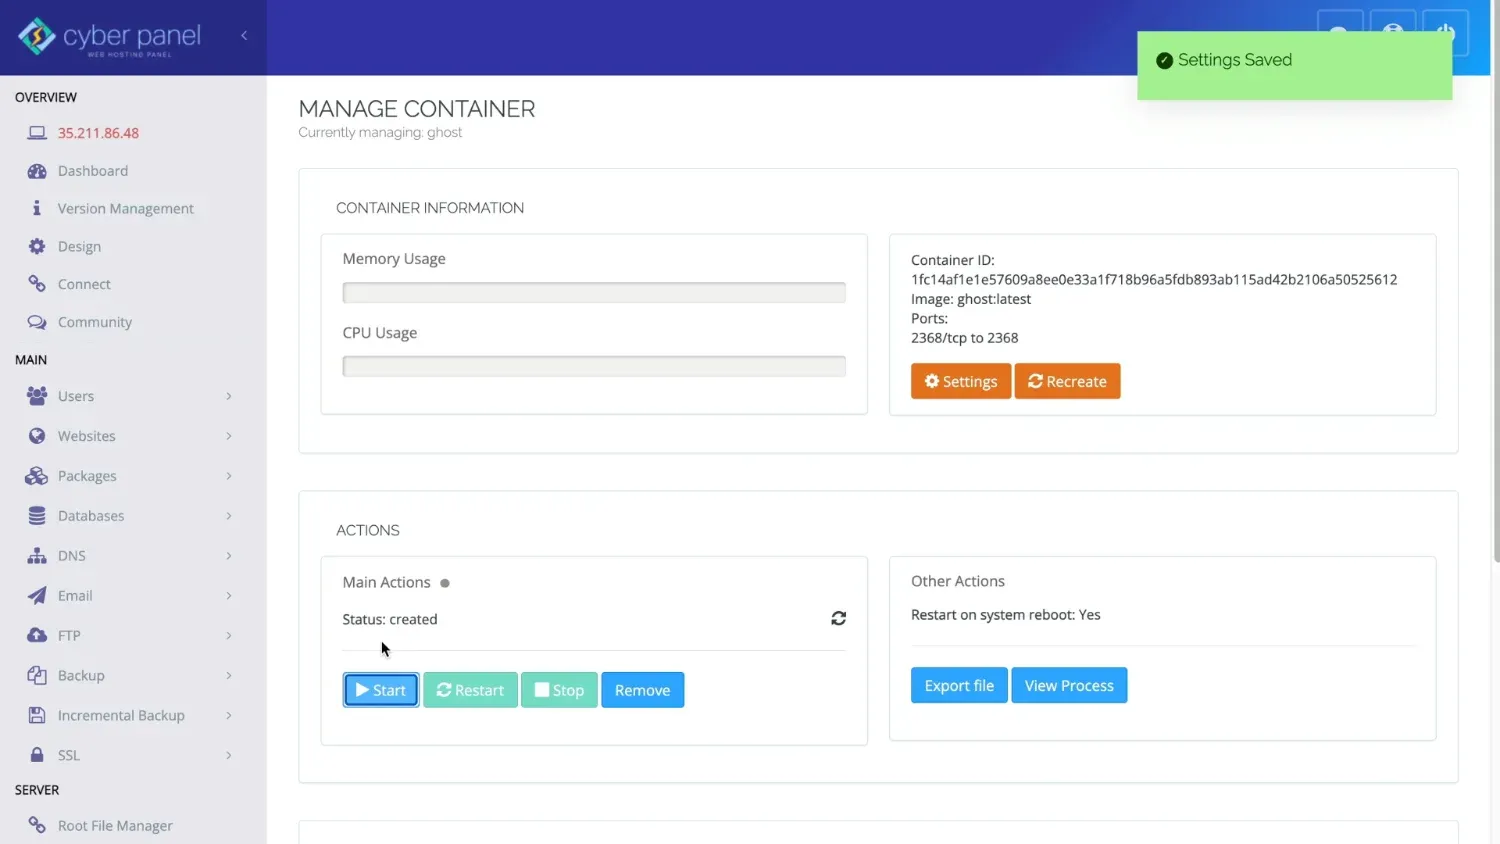
Here press Settings, and check Start on reboot. Scroll down and press Save.
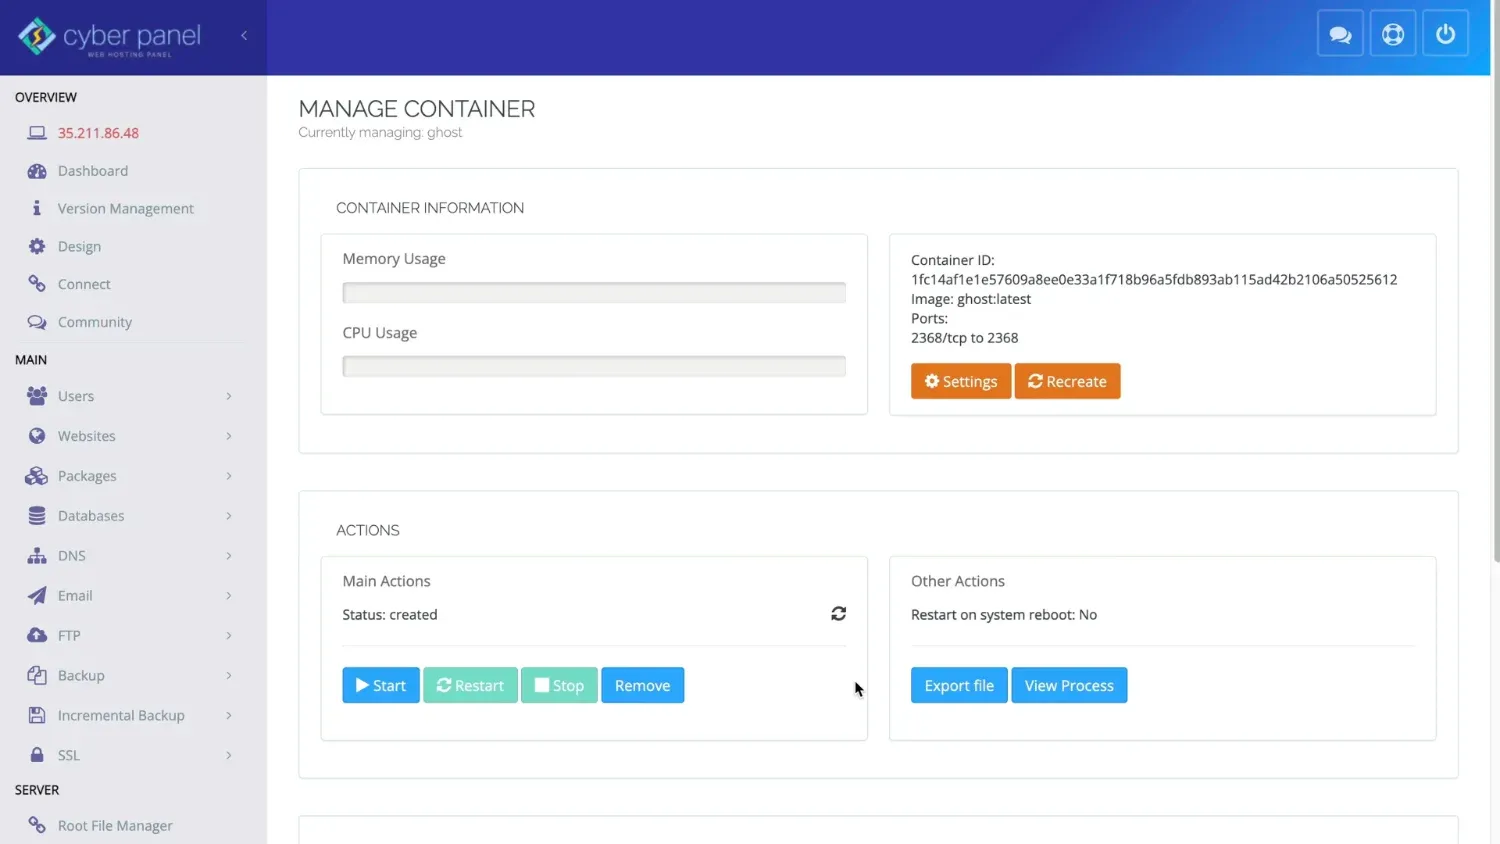
Now press start using the button on the left.
There's one more step you'll need to do.
Reverse proxy (so your blog opens without entering port number)
Return to Google Cloud - VPC network - Firewall. Create one more rule similar to the one you've made before.
This time enter TCP port 2368.
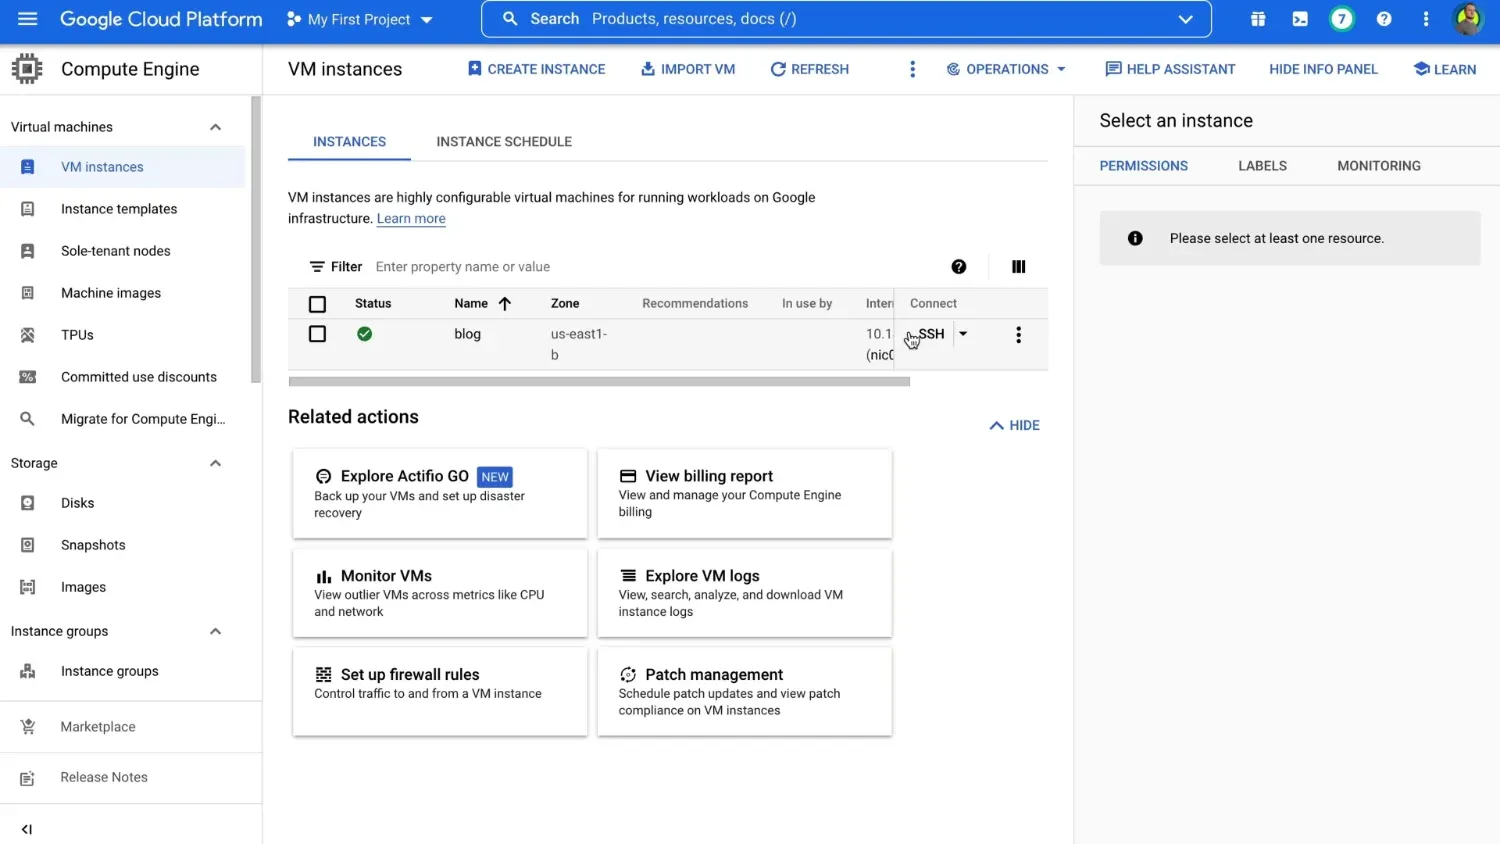
Navigate to Compute Engine section - VM instances and press SSH.
Copy-paste the following command.
sudo vim /usr/local/lsws/conf/httpd_config.conf
Enter the password and press i to start editing the file. Scroll down and paste the following at the very bottom of the file.
extprocessor dockerbackend {
type proxy
address 127.0.0.1:2368
maxConns 100
pcKeepAliveTimeout 60
initTimeout 60
retryTimeout 0
respBuffer 0
}
Press Esc button, type :wq, and press enter to save changes.
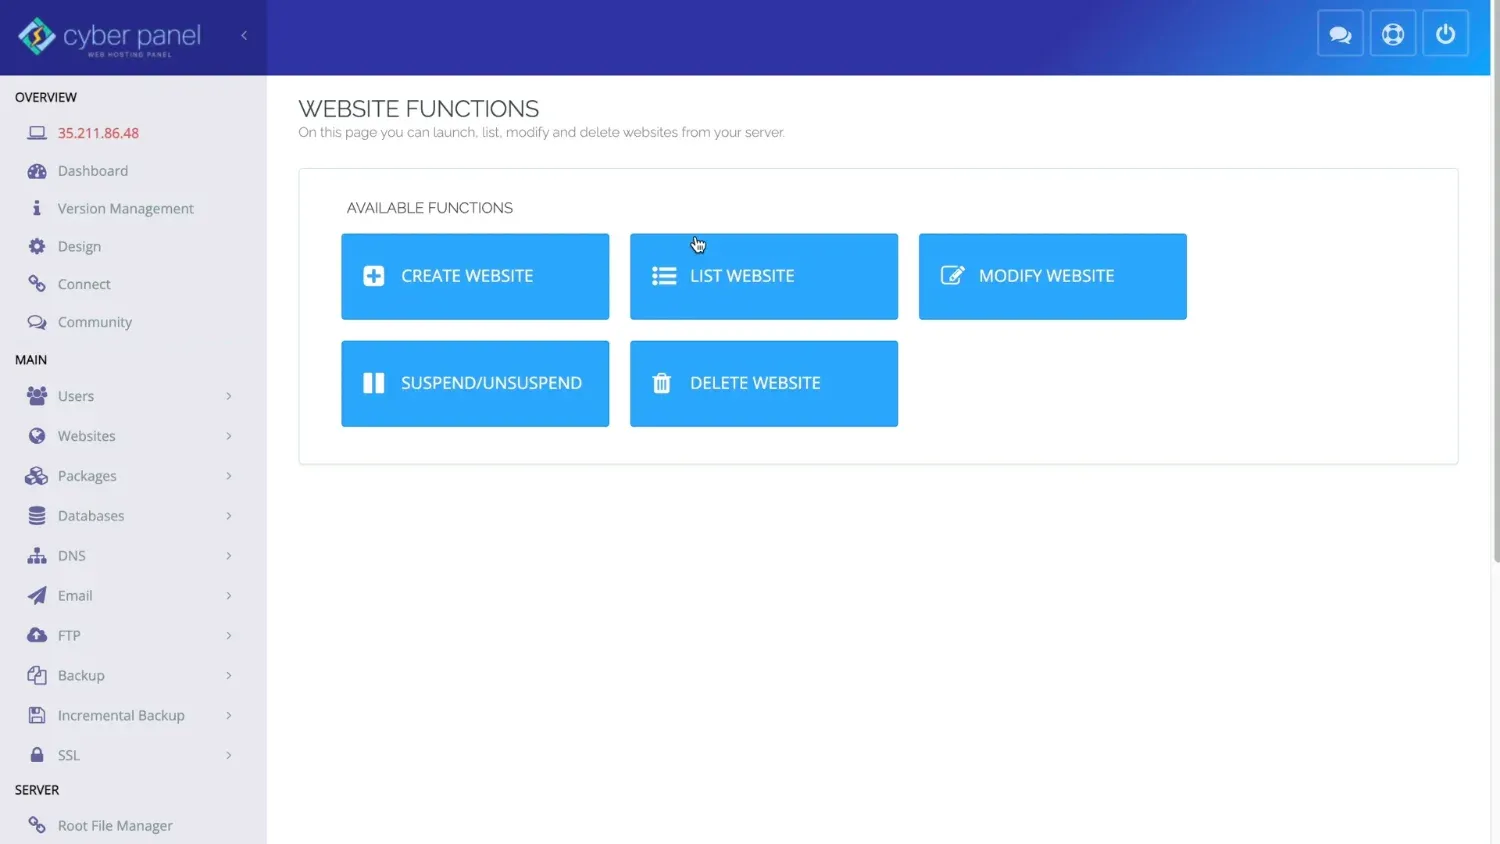
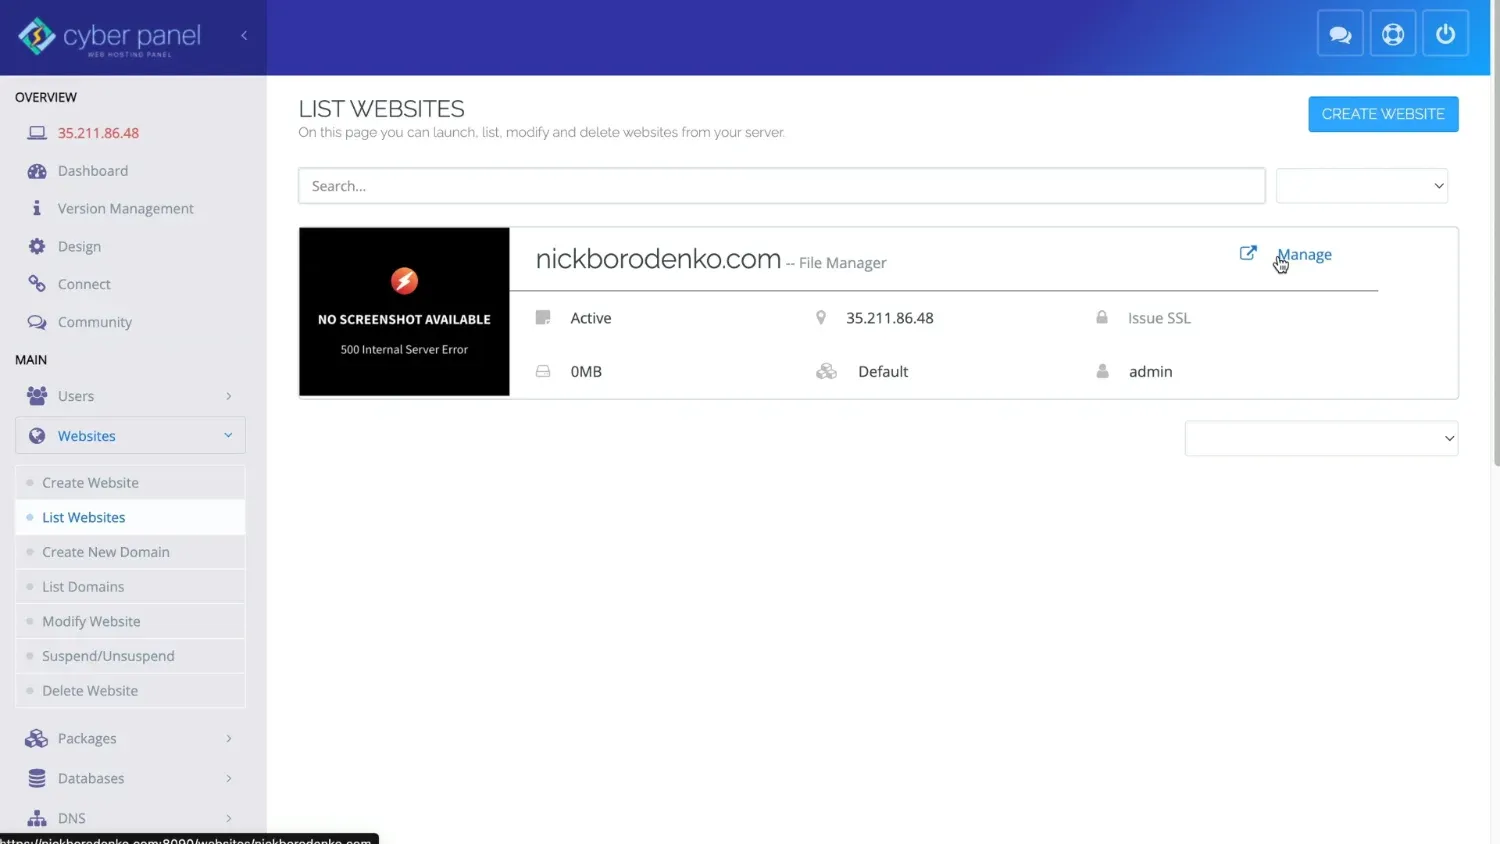
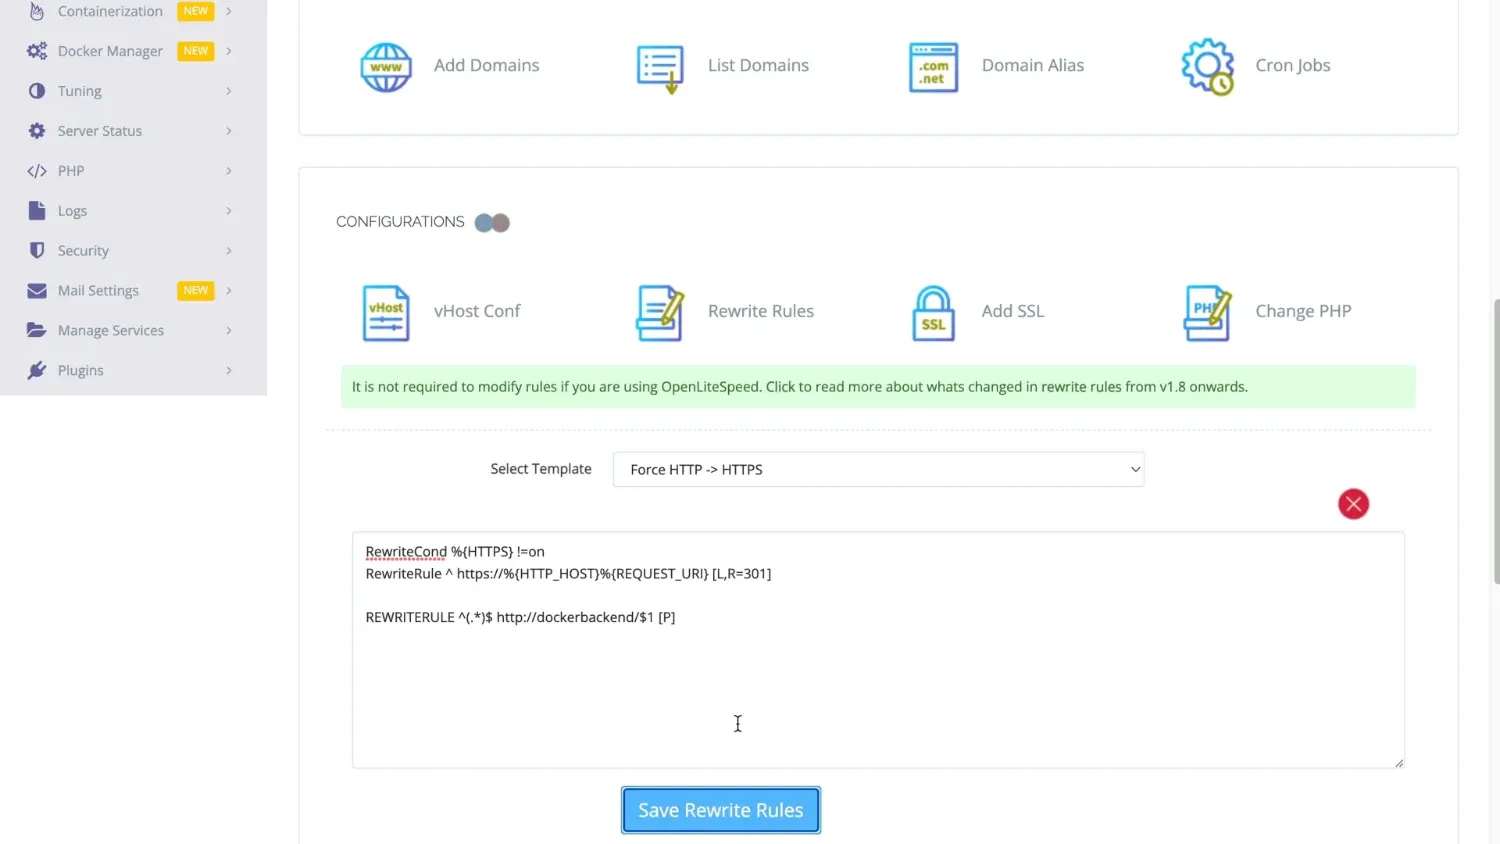
Now go to CyberPanel - Websites - List Websites.
Click Manage,
scroll down, click Rewrite Rules
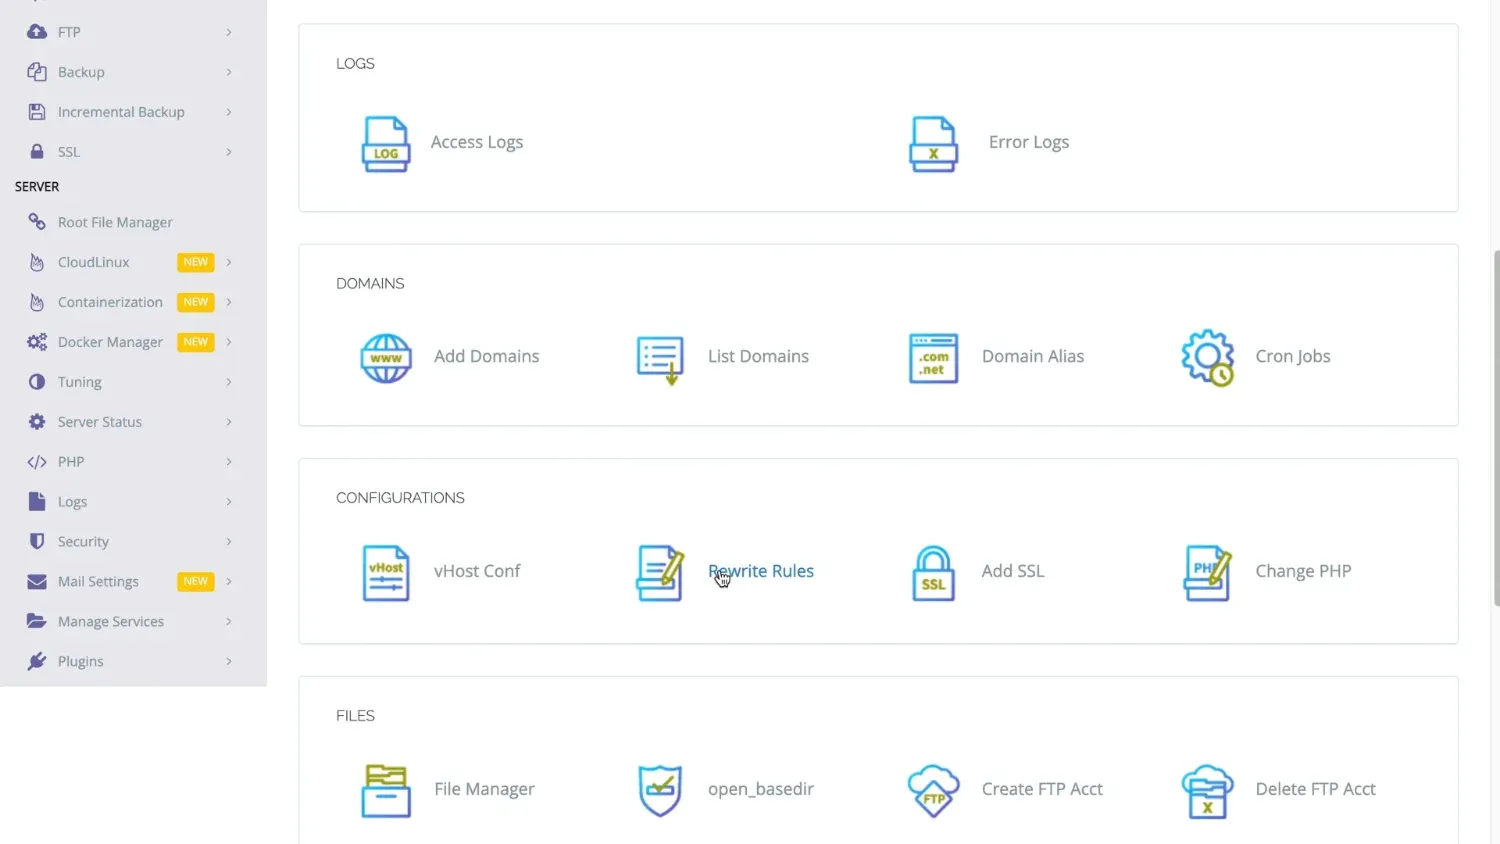
and paste the following code.
RewriteCond %{HTTPS} !=on
RewriteRule ^ https://%{HTTP_HOST}%{REQUEST_URI} [L,R=301]

REWRITERULE ^(.*)$ http://dockerbackend/$1 [P]
Press Save rewrite rules.
Now you can finally open your blog in a browser using your domain name.

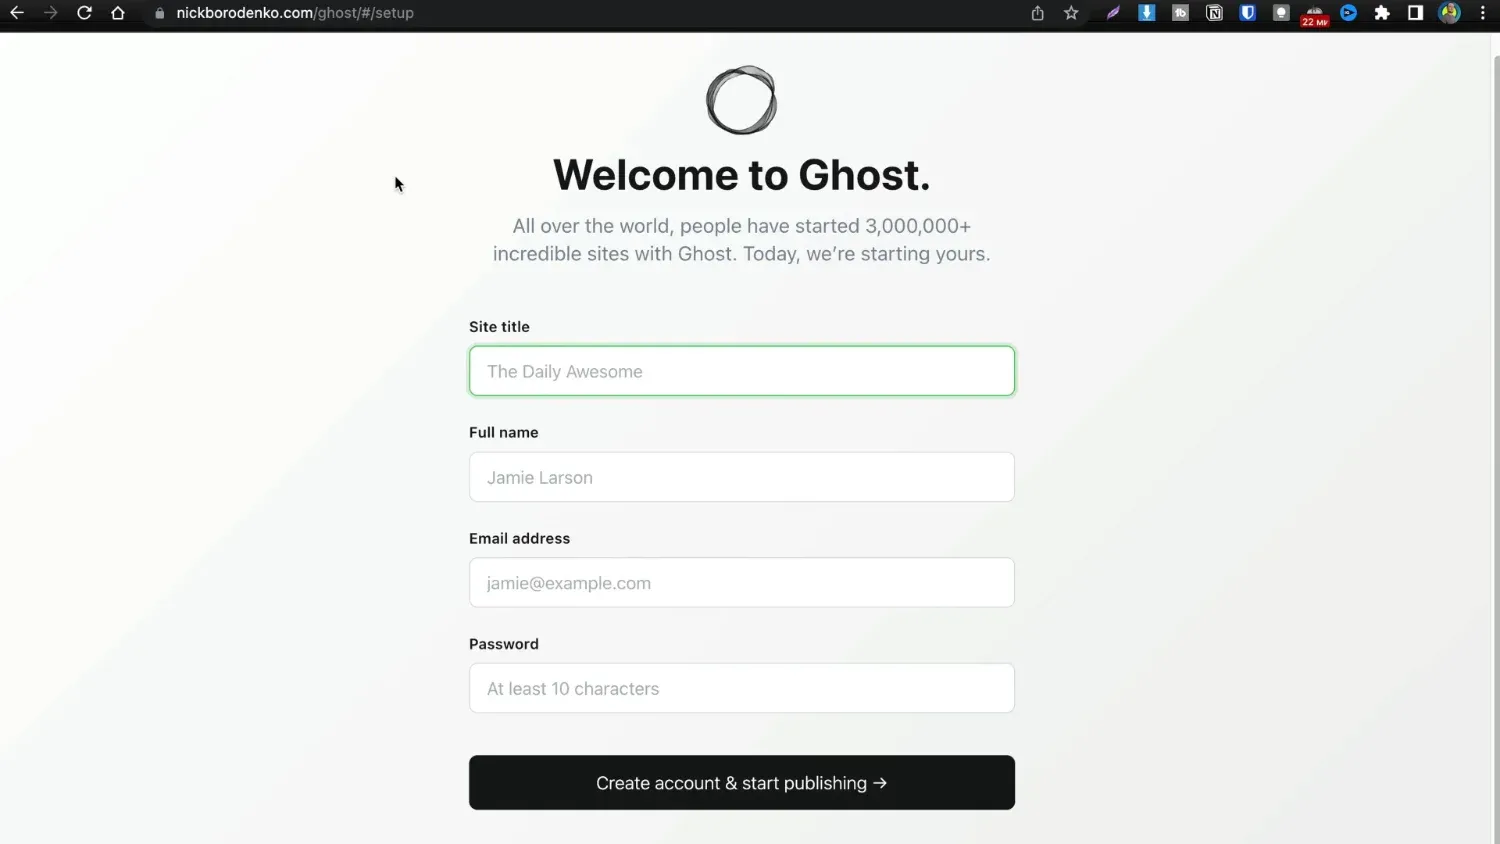
To finish the setup open yourdomain.com/ghost
Enter blog title, author's name, email, and password. That's it.
You can start posting blog posts right away.
As for the mail and newsletter configuration — that will be covered in the second part of this tutorial. It will be published soon :)
If you found this tutorial useful and want more content like this — consider subscribing to my YouTube channel. And thanks for your support!
If you have any questions left — feel free to ask them in the comment section down below (or on YouTube).

